Create Playbooks in Easy Mode
Note
Flows are now called playbooks and nodes are called steps in Easy Mode.
To view or work with playbooks, you must be in a group that has Playbook permission. For more information, see Manage Users.
Easy Mode allows you to create playbooks easily by selecting automation for steps without directly entering LQL code. A wide range of automation is available, and for many customers, it’s possible to create most or all needed playbooks using Easy Mode. When you open a playbook, Easy Mode opens by default.
LogicHub still supports the original LogicHub flow builder, which is now called Advanced Mode and is accessible from the More (...) menu on the Playbooks page. For more information on using Advanced Mode, see Create a Playbook in Advanced Mode.
Create a Playbook in Easy Mode
- Click New Playbook from the left navigation or go to My Library and click on Playbooks.
- Clicking on New Playbook gives you a pop-up option
New Blank Playbookor choose from a template. - Clicking on My Library > Playbooks gives you an option to click New on the upper-right corner or open an existing Playbook from the list of Playbooks.

Information
By default, playbooks open in Easy Mode. To change the default mode, see Set Default Playbook Editor.
You can start a new playbook from a blank template or a template with content. The difference is that a blank template doesn’t have any defined steps, whereas a template with content has one or more predefined steps that you can edit and add to.
-
Click New Blank Playbook. The Playbook opens up in Easy Mode and the trigger steps appear with the options to choose from.
-
Use the date/time controls at the top to set a date/time range for the playbook data. If you change the date when viewing data, the data you’re viewing updates automatically. By default, it will be 15 minutes.
-
Hover over the name at the upper left of the screen and click on the untitled playbook, enter the new name and press return or click the checkbox.
You can now create steps for the playbook.
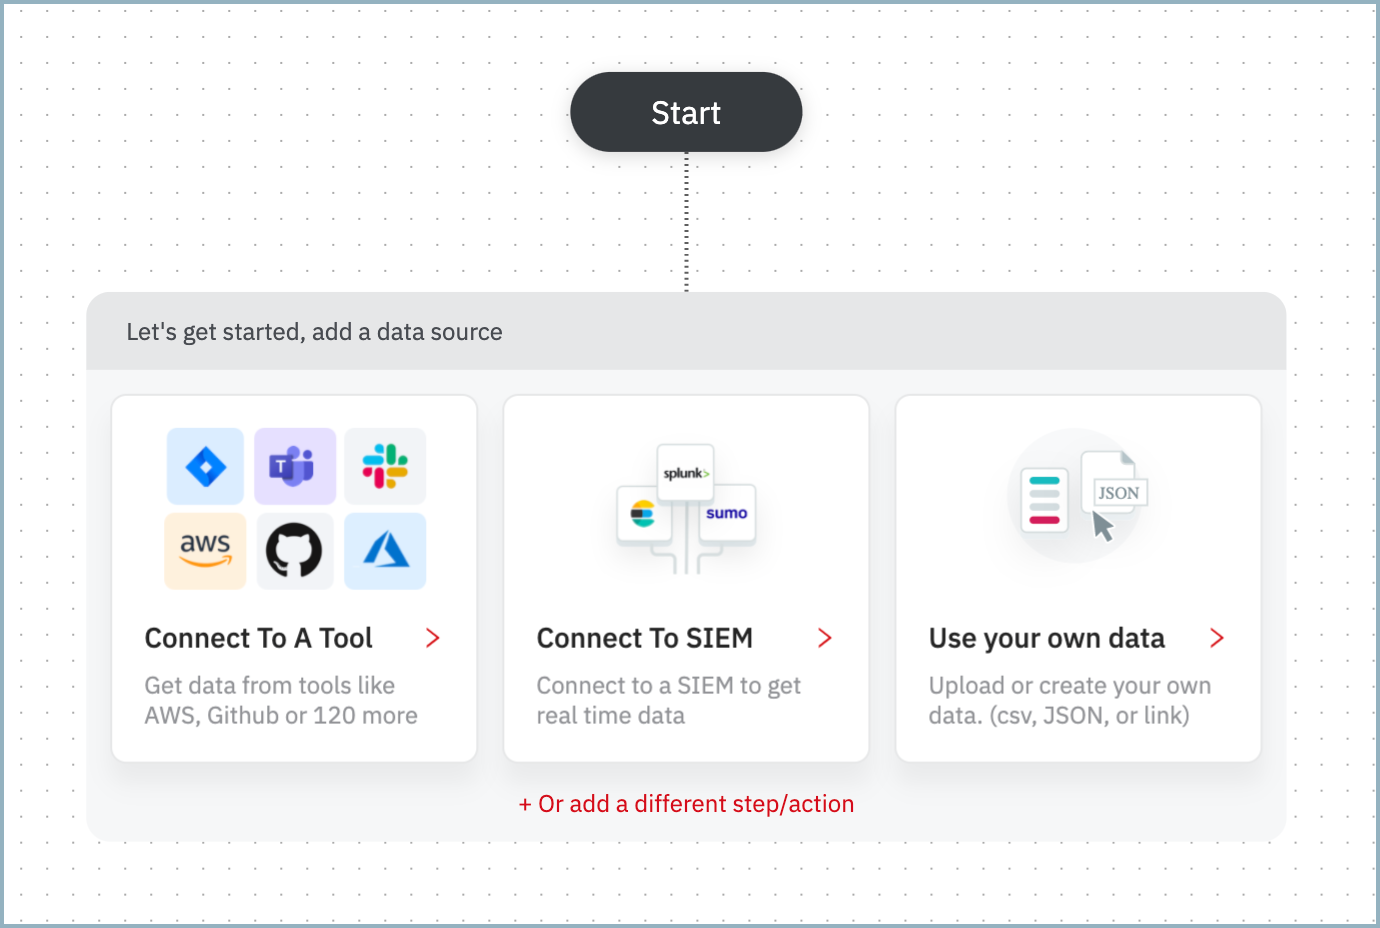
Create a Custom Data Flow
- Click on Use your own data. A custom data form appears on the right pane.
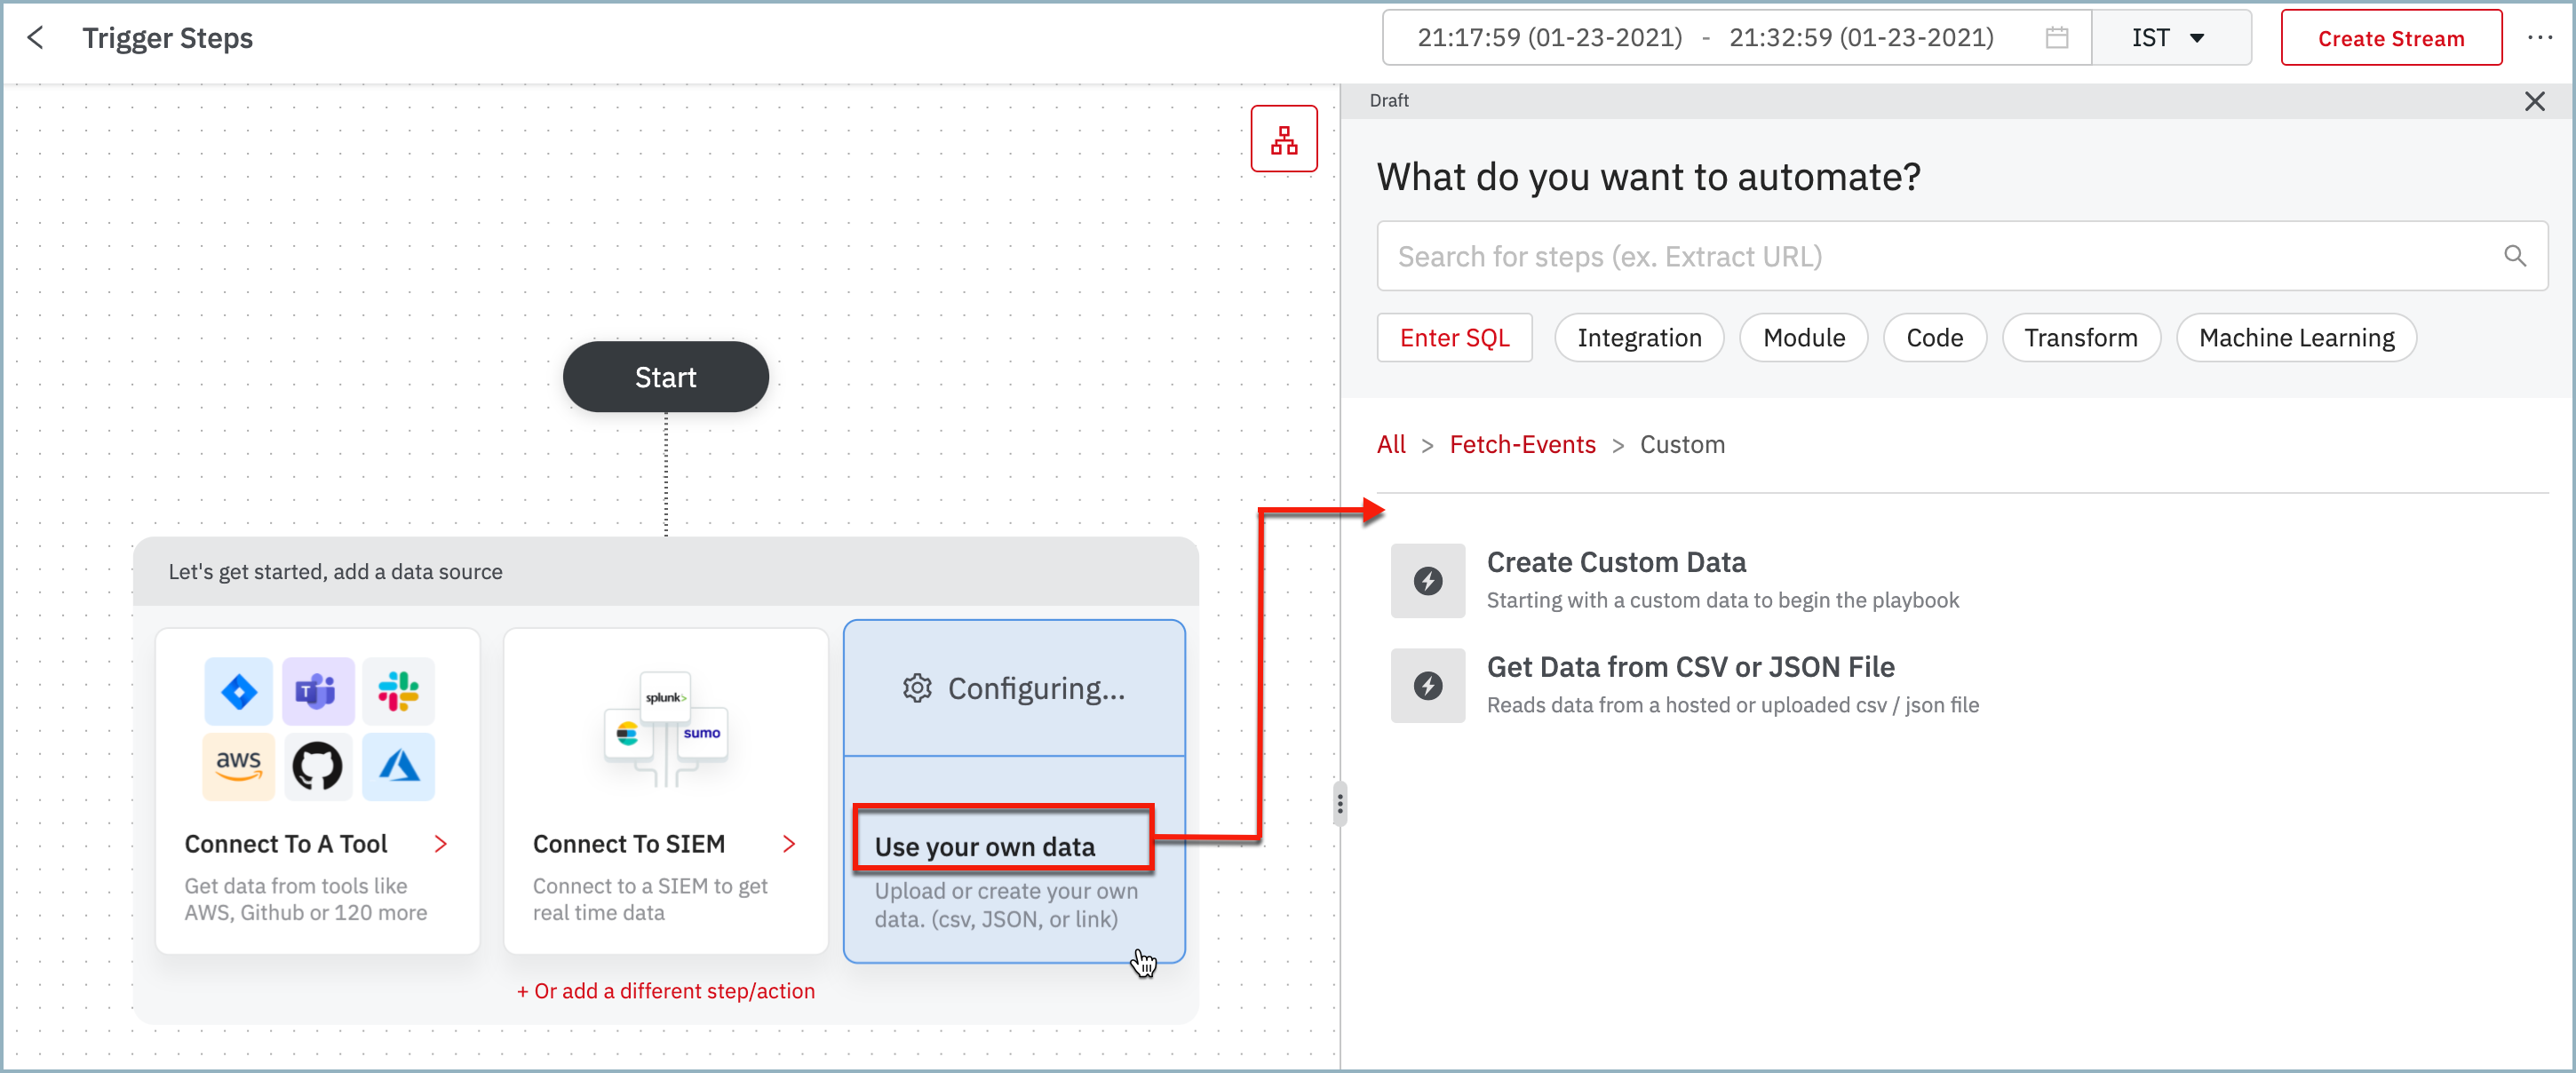
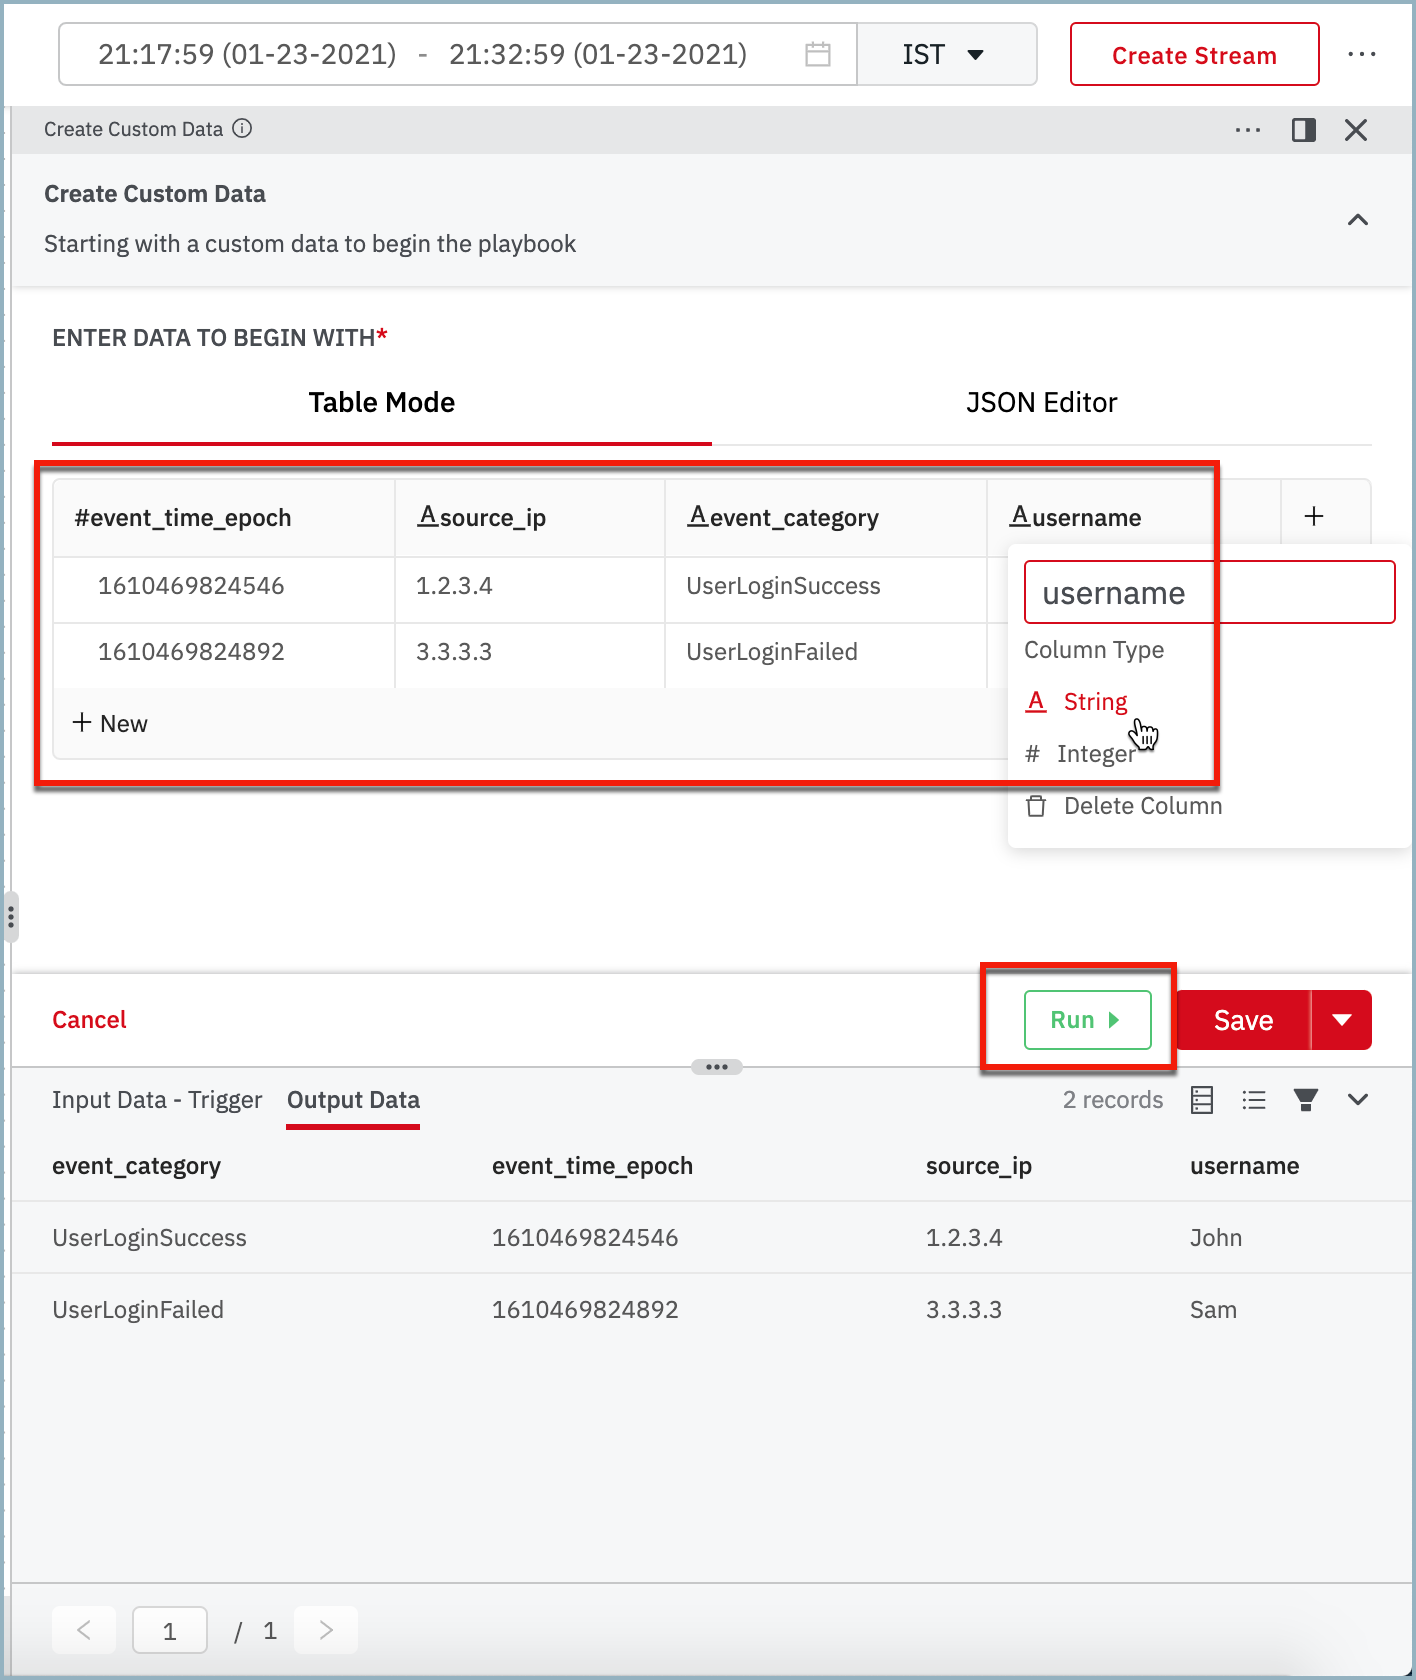
- Enter the data in the Table Mode to begin with by adding new rows and columns.
- Click on the column name to change the data to String or Integer.
You can add new columns and rows by clicking on the + sign.
Once done click Run to view the output data.
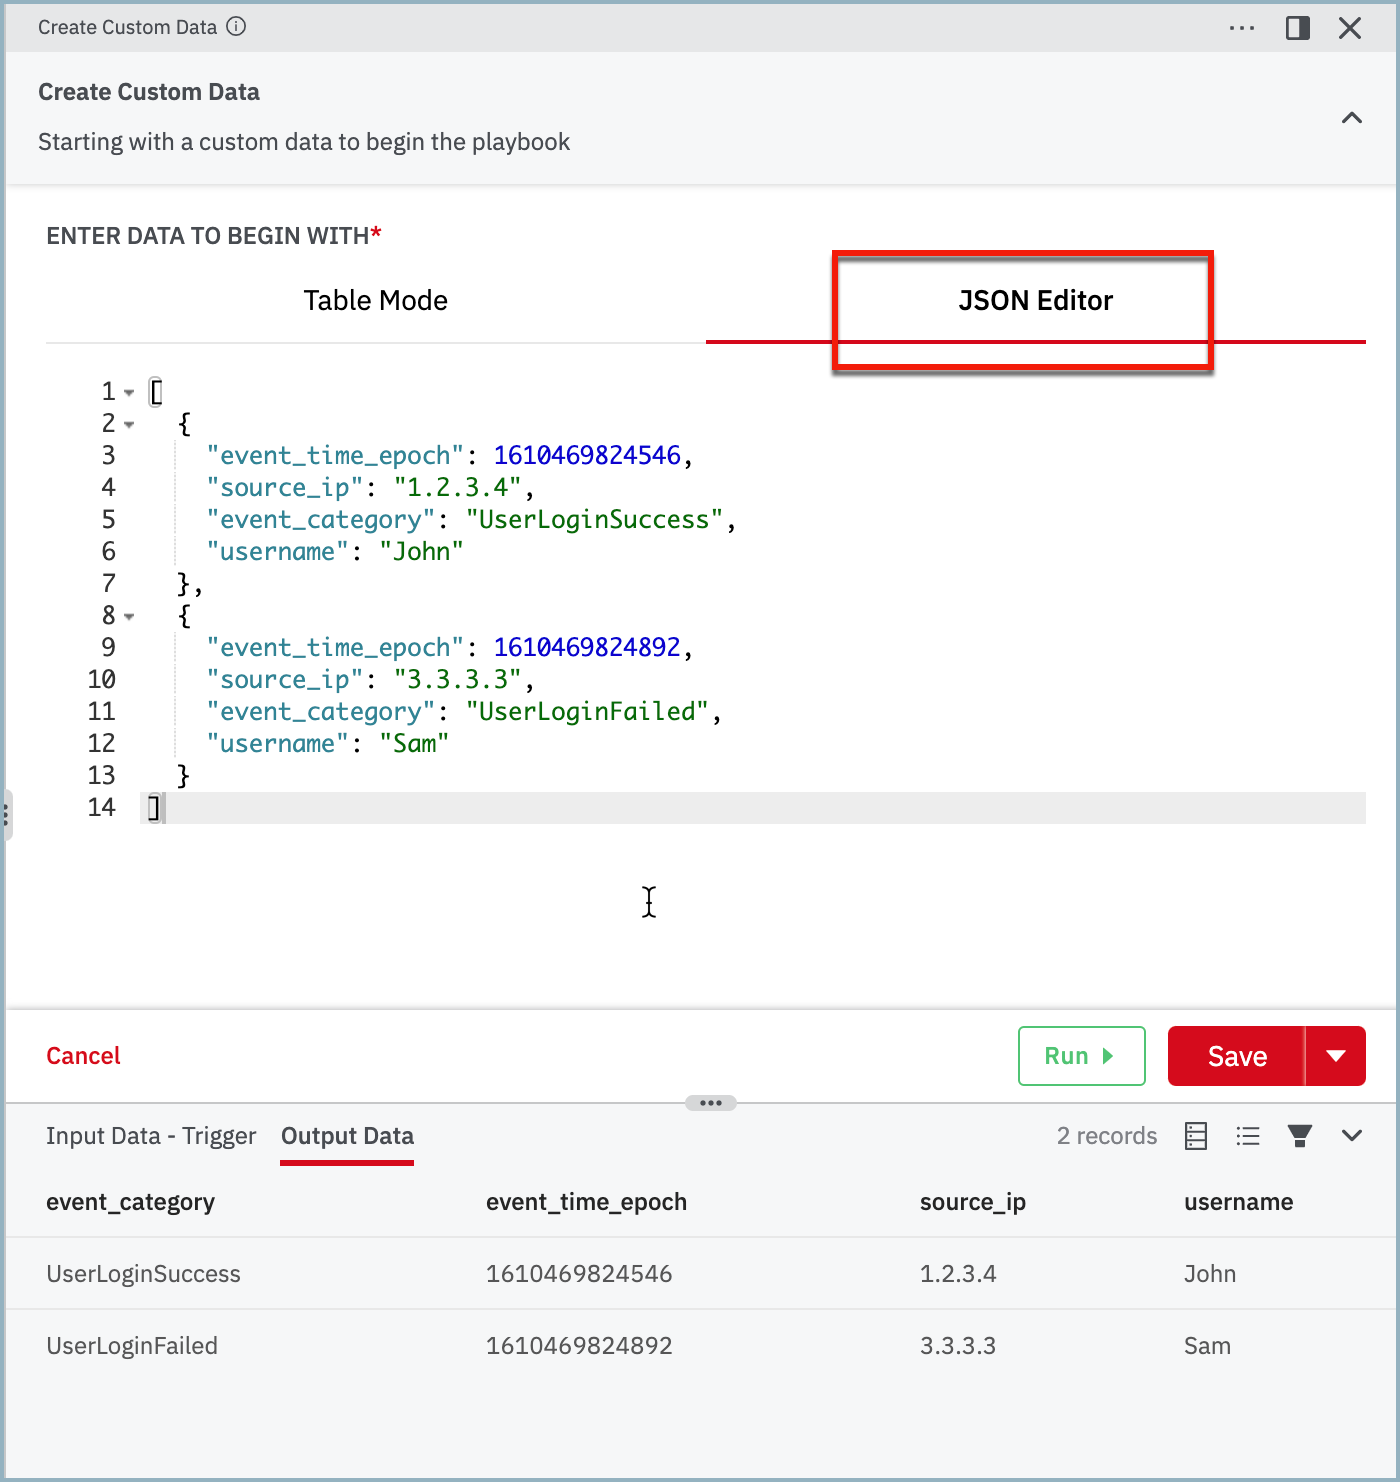
- Click JSON Editor to view or edit the JSON data based on the custom data provided in Table Mode.
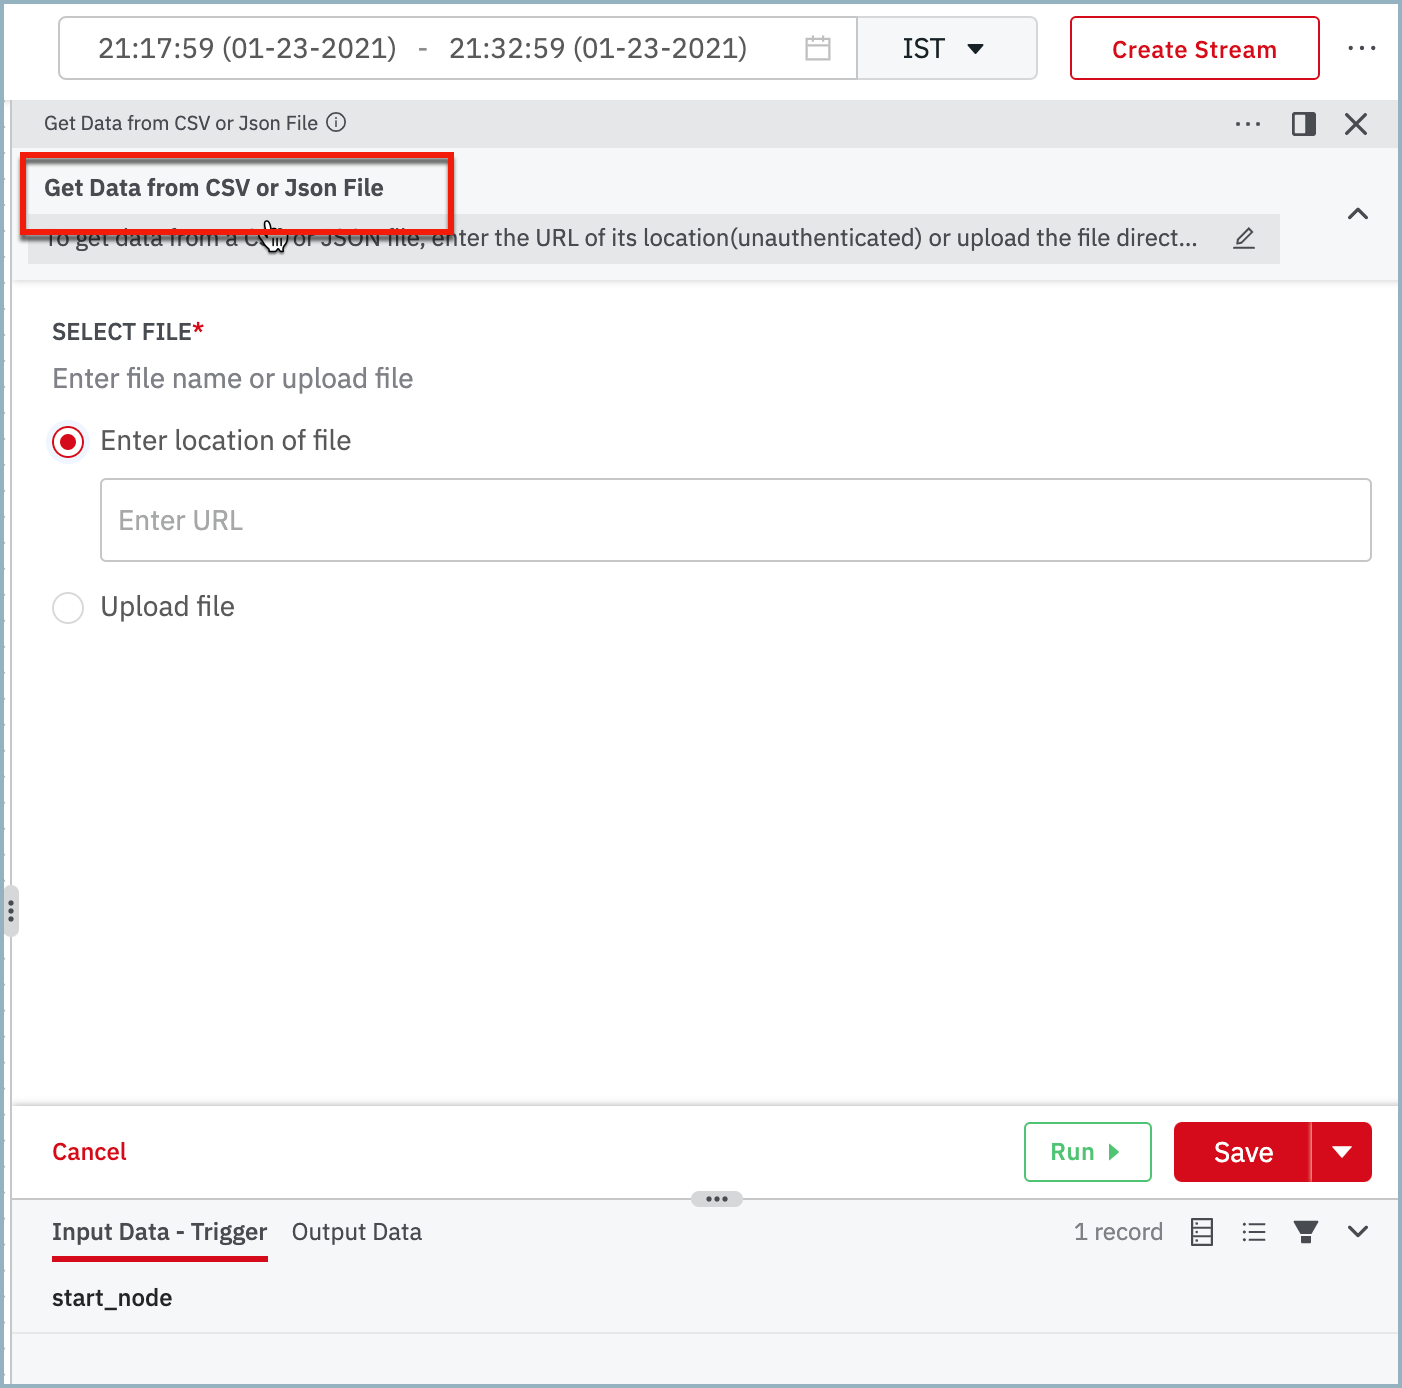
Get Data from CSV or JSON File
- From the Use your own data, select Get Data from CSV or JSON File.
- Choose to Enter location of file or Upload file and click Run.
For more information on getting data from CSV or JSON, see Include Data from a CSV or JSON File.
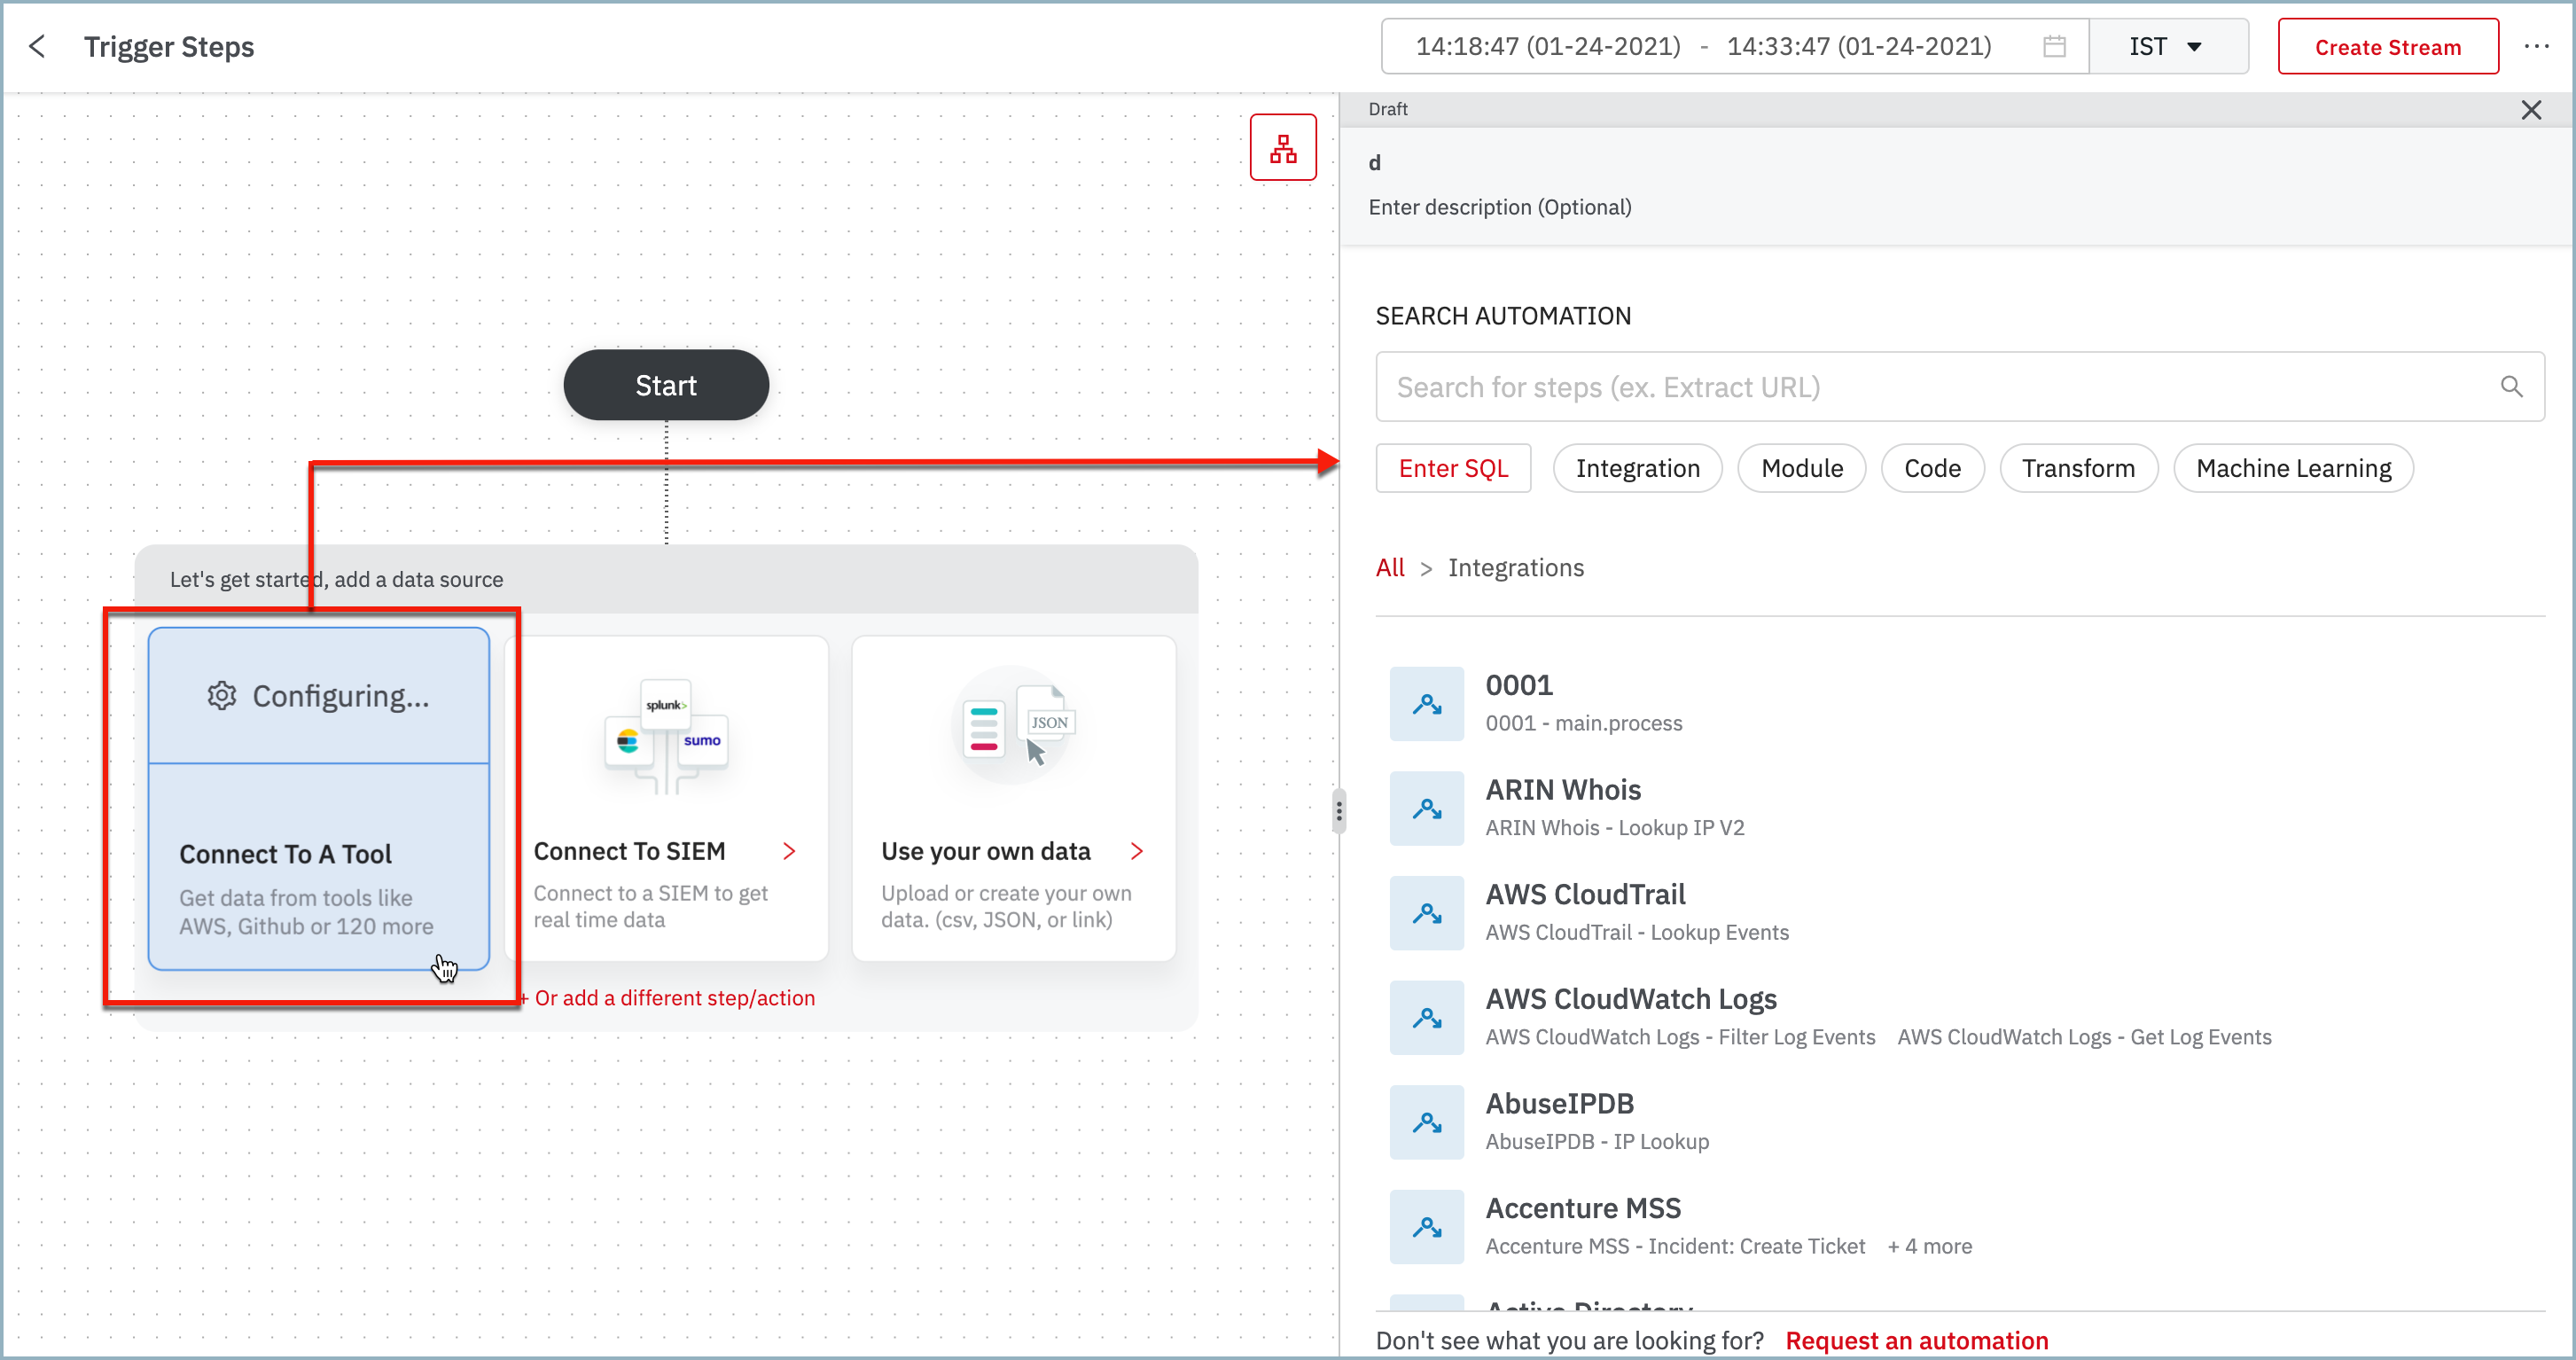
Connect to a Tool
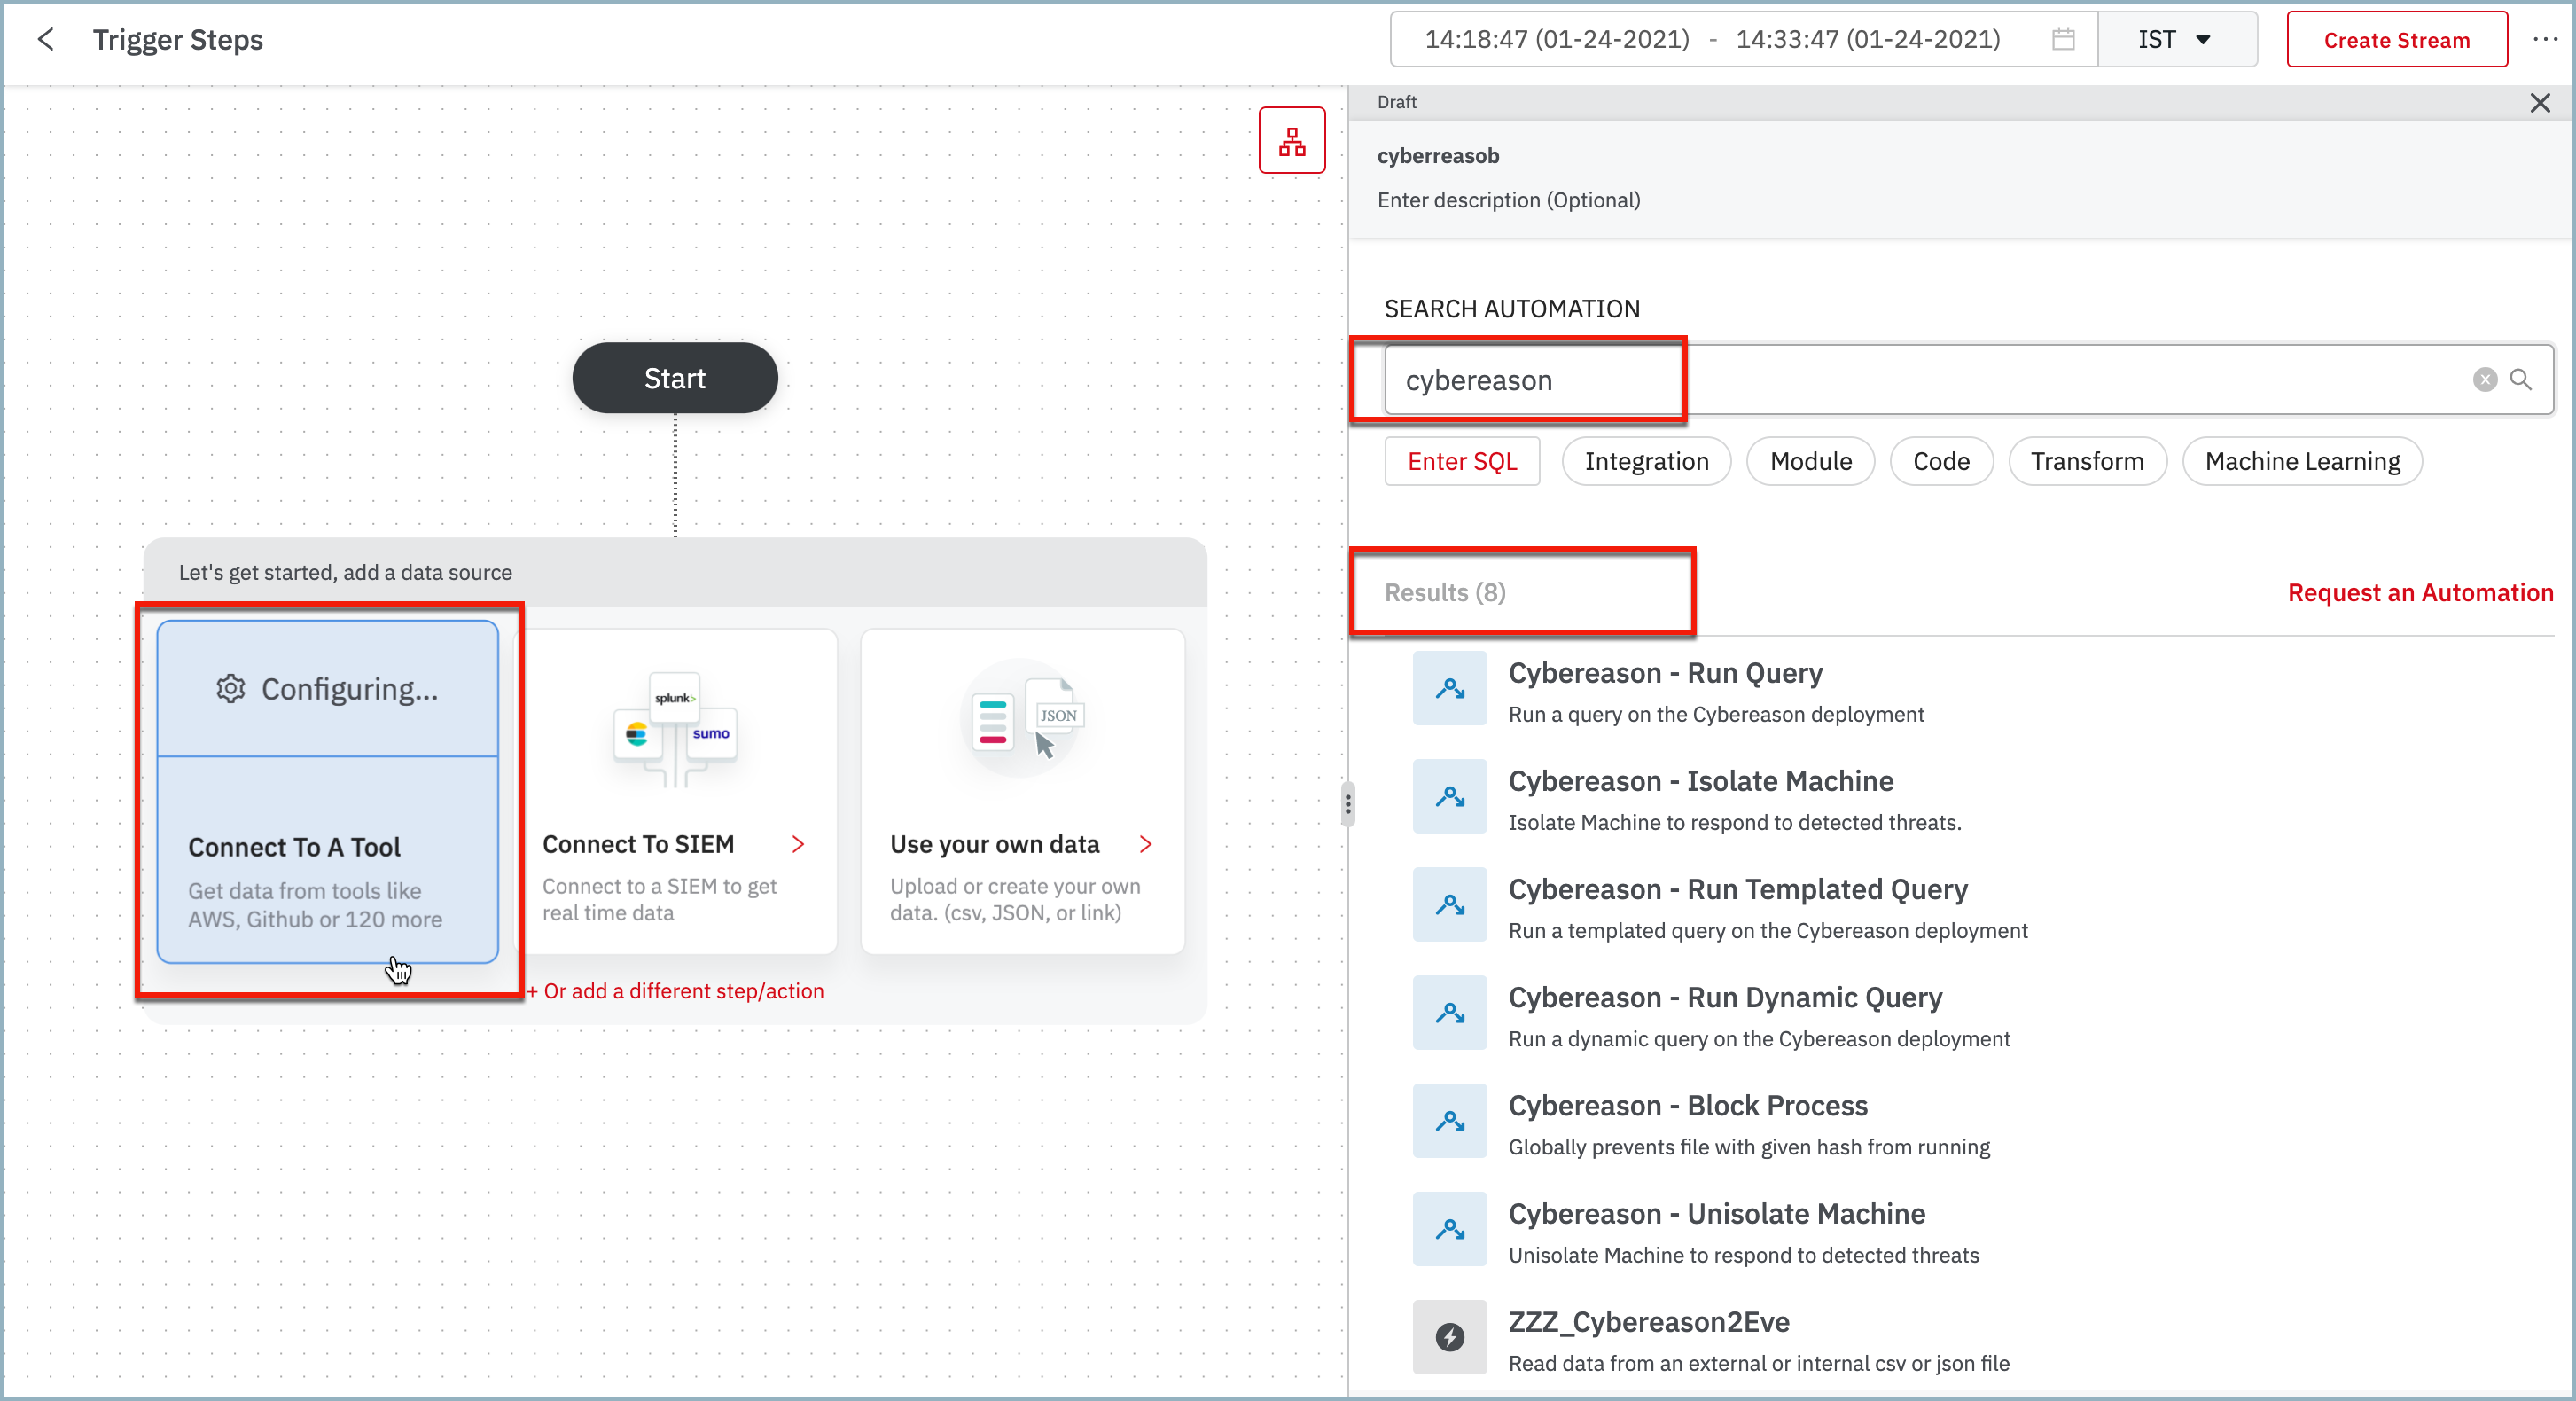
Connect to a Tool allows you to connect to the integration from Easy Mode. You can search for the required integration and establish a connection.
Searching provides a list of related search results to select.
Connect to SIEM
Connect to SIEM allows you to connect to the SIEM environments from the Easy Mode.
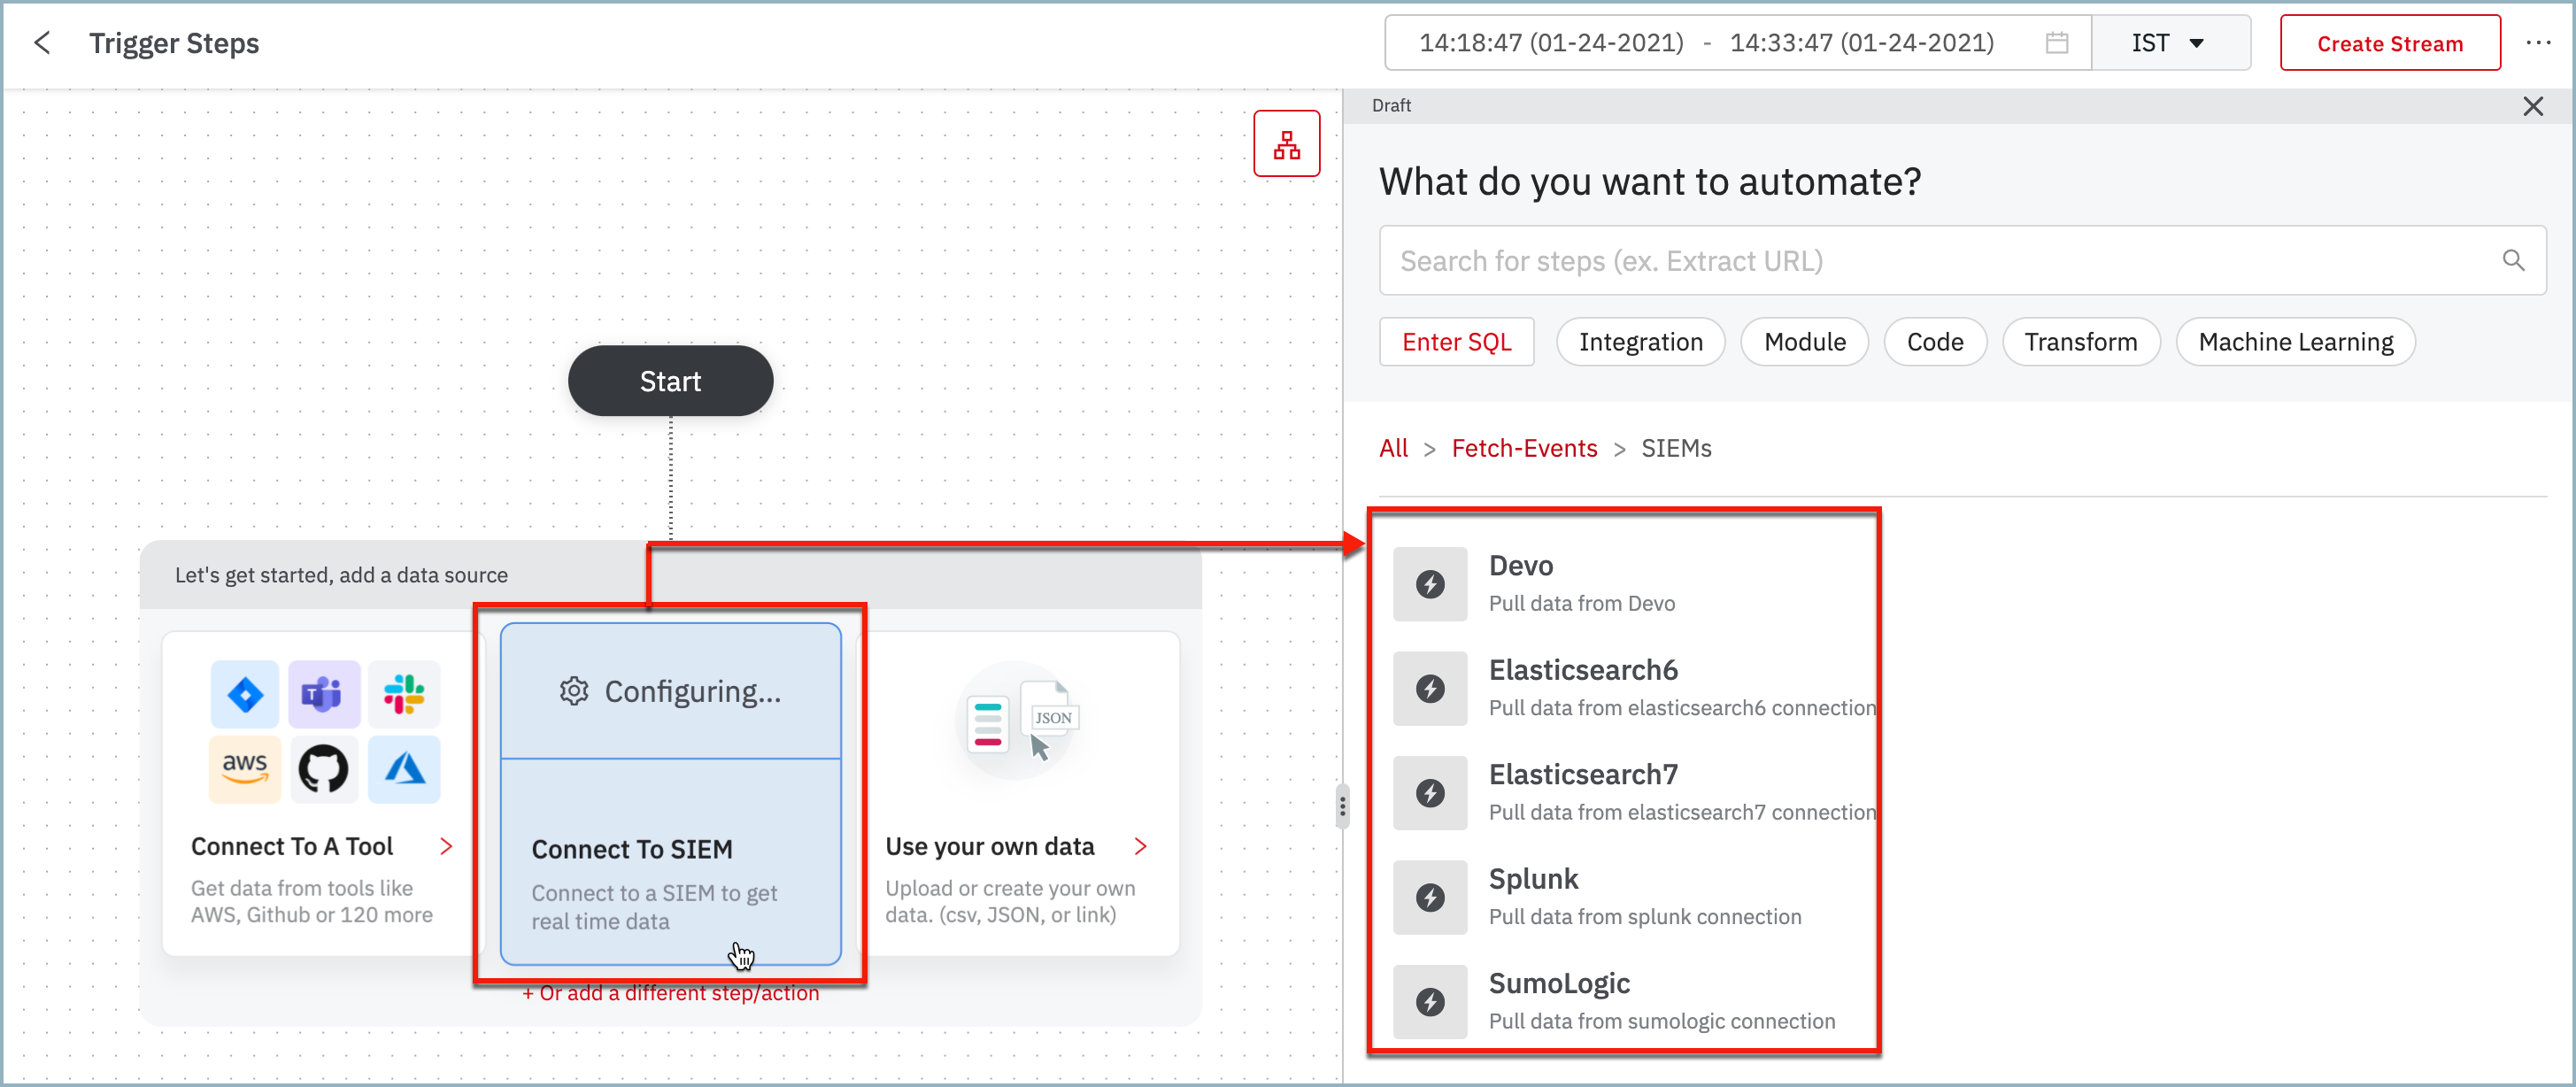
- Click on any environment to create a connection. For more information, see Create Connections.
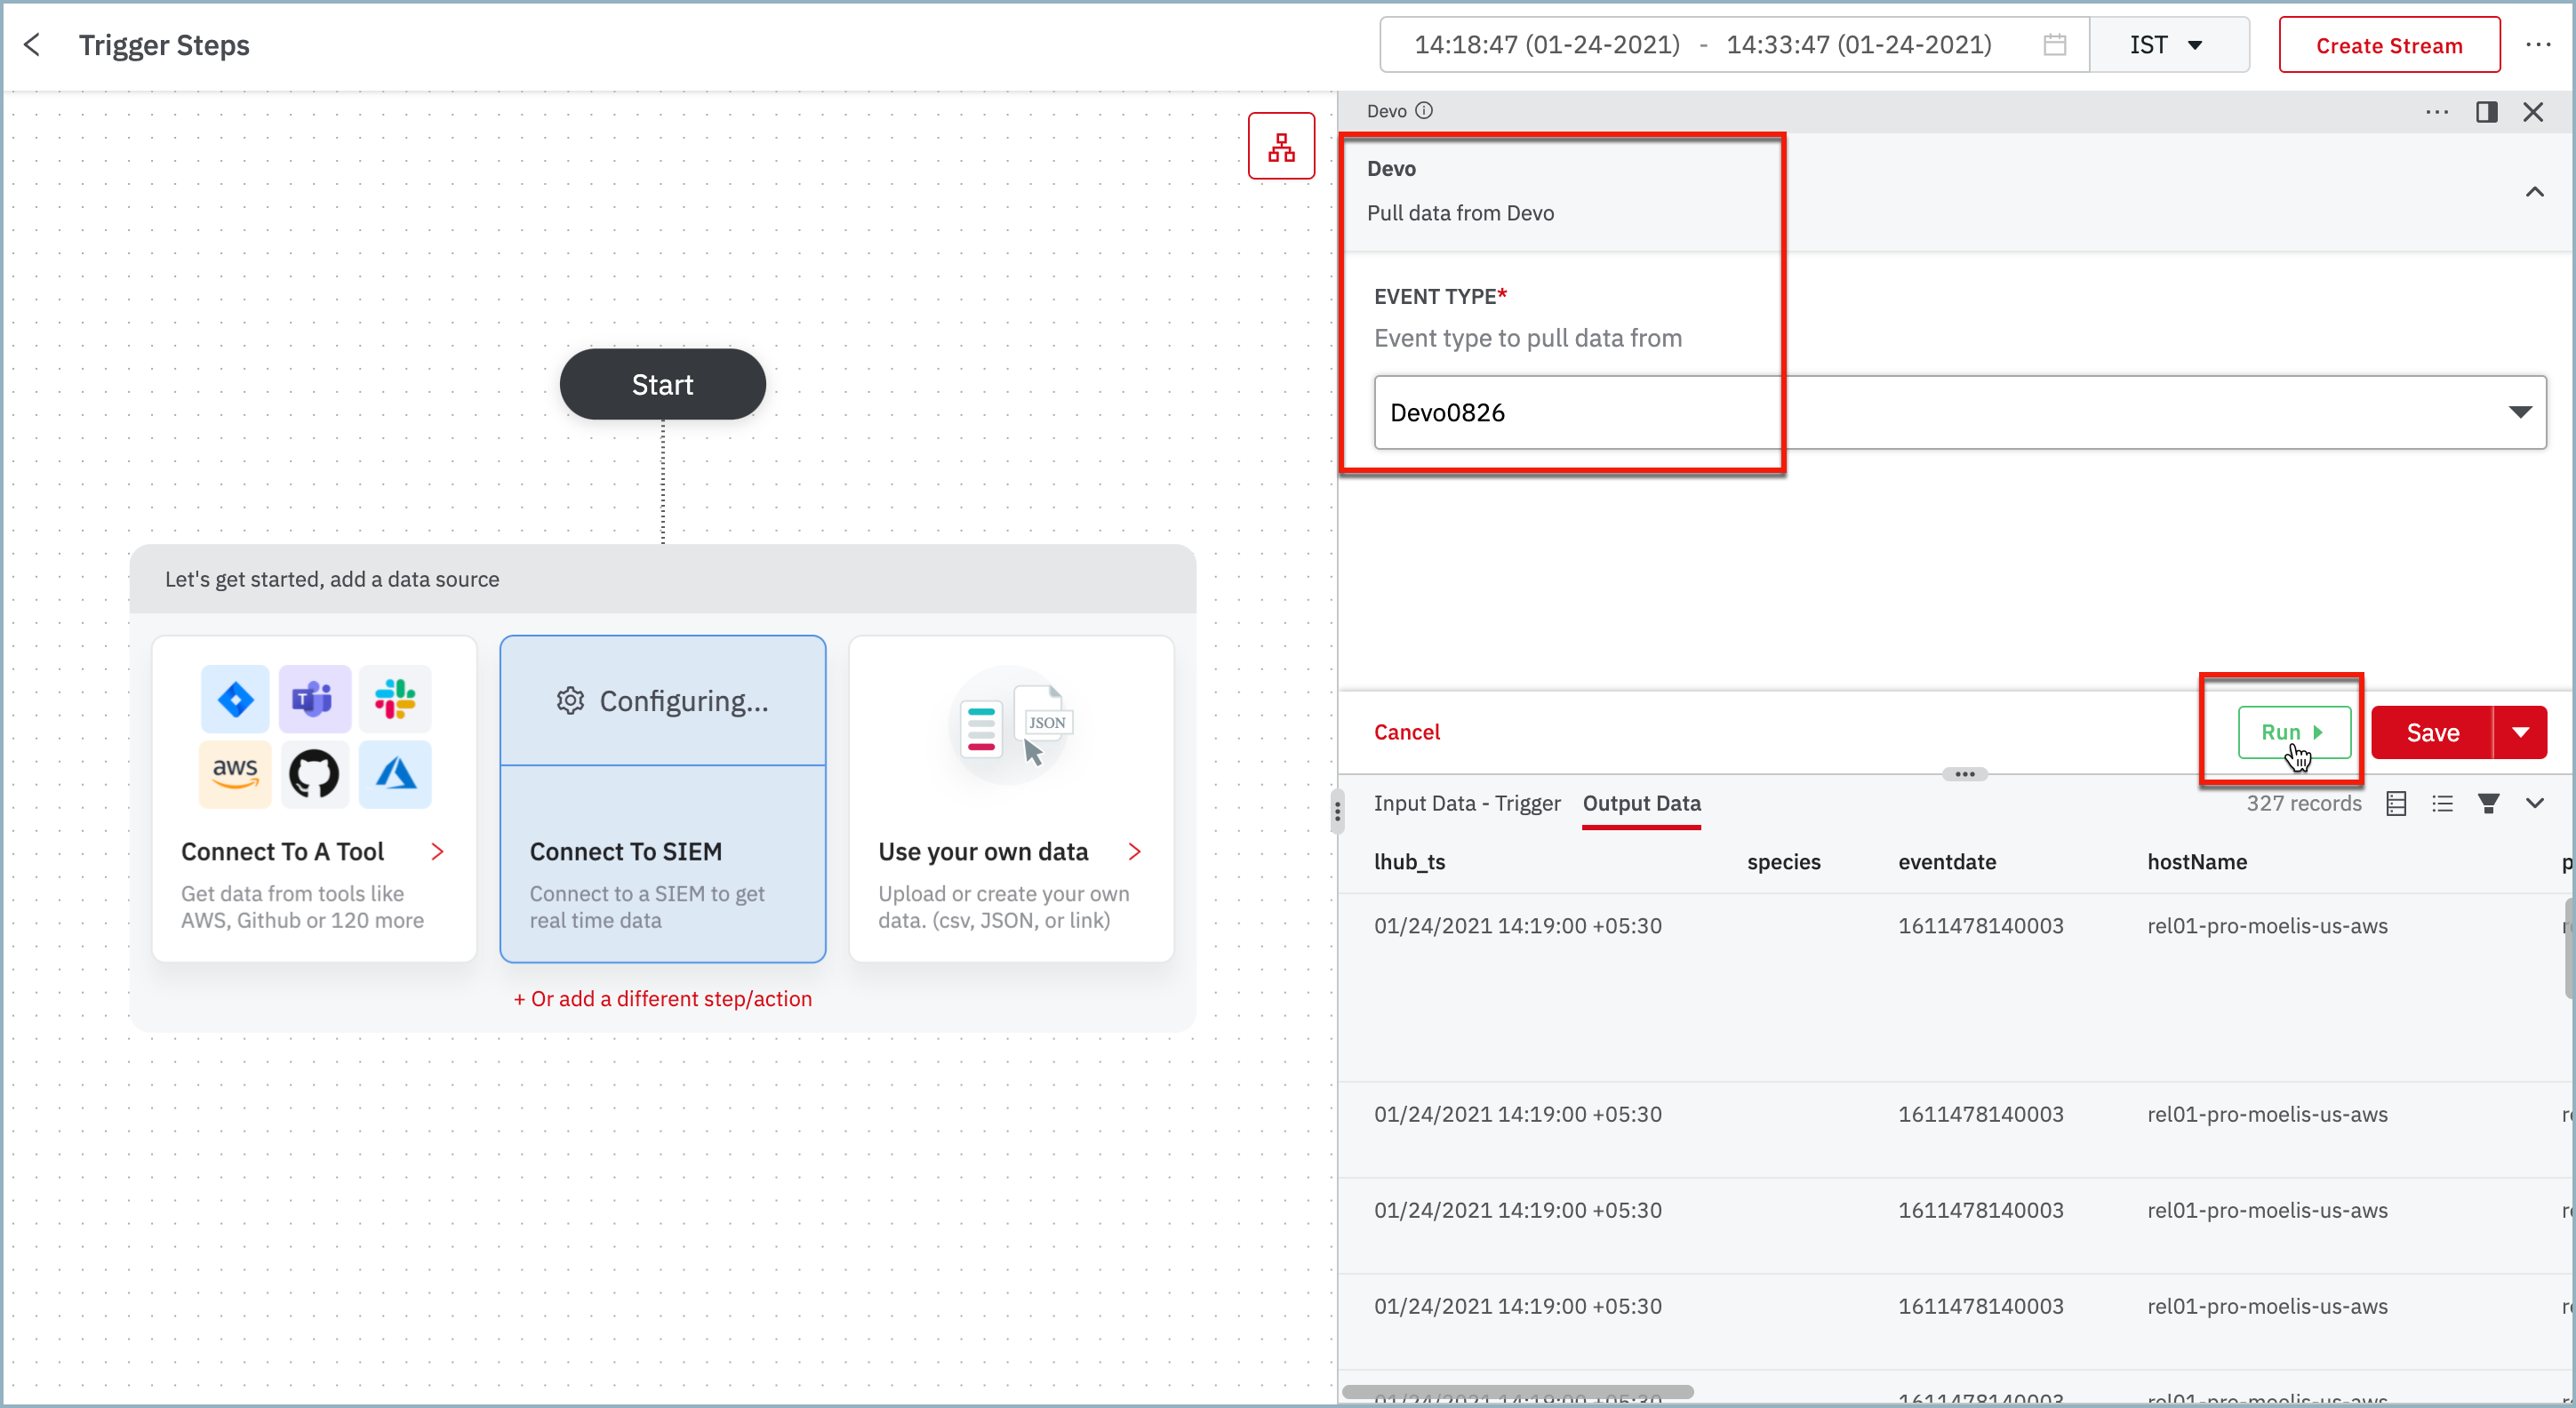
- Additionally, click on + Or add a different step/action to add the step or action.
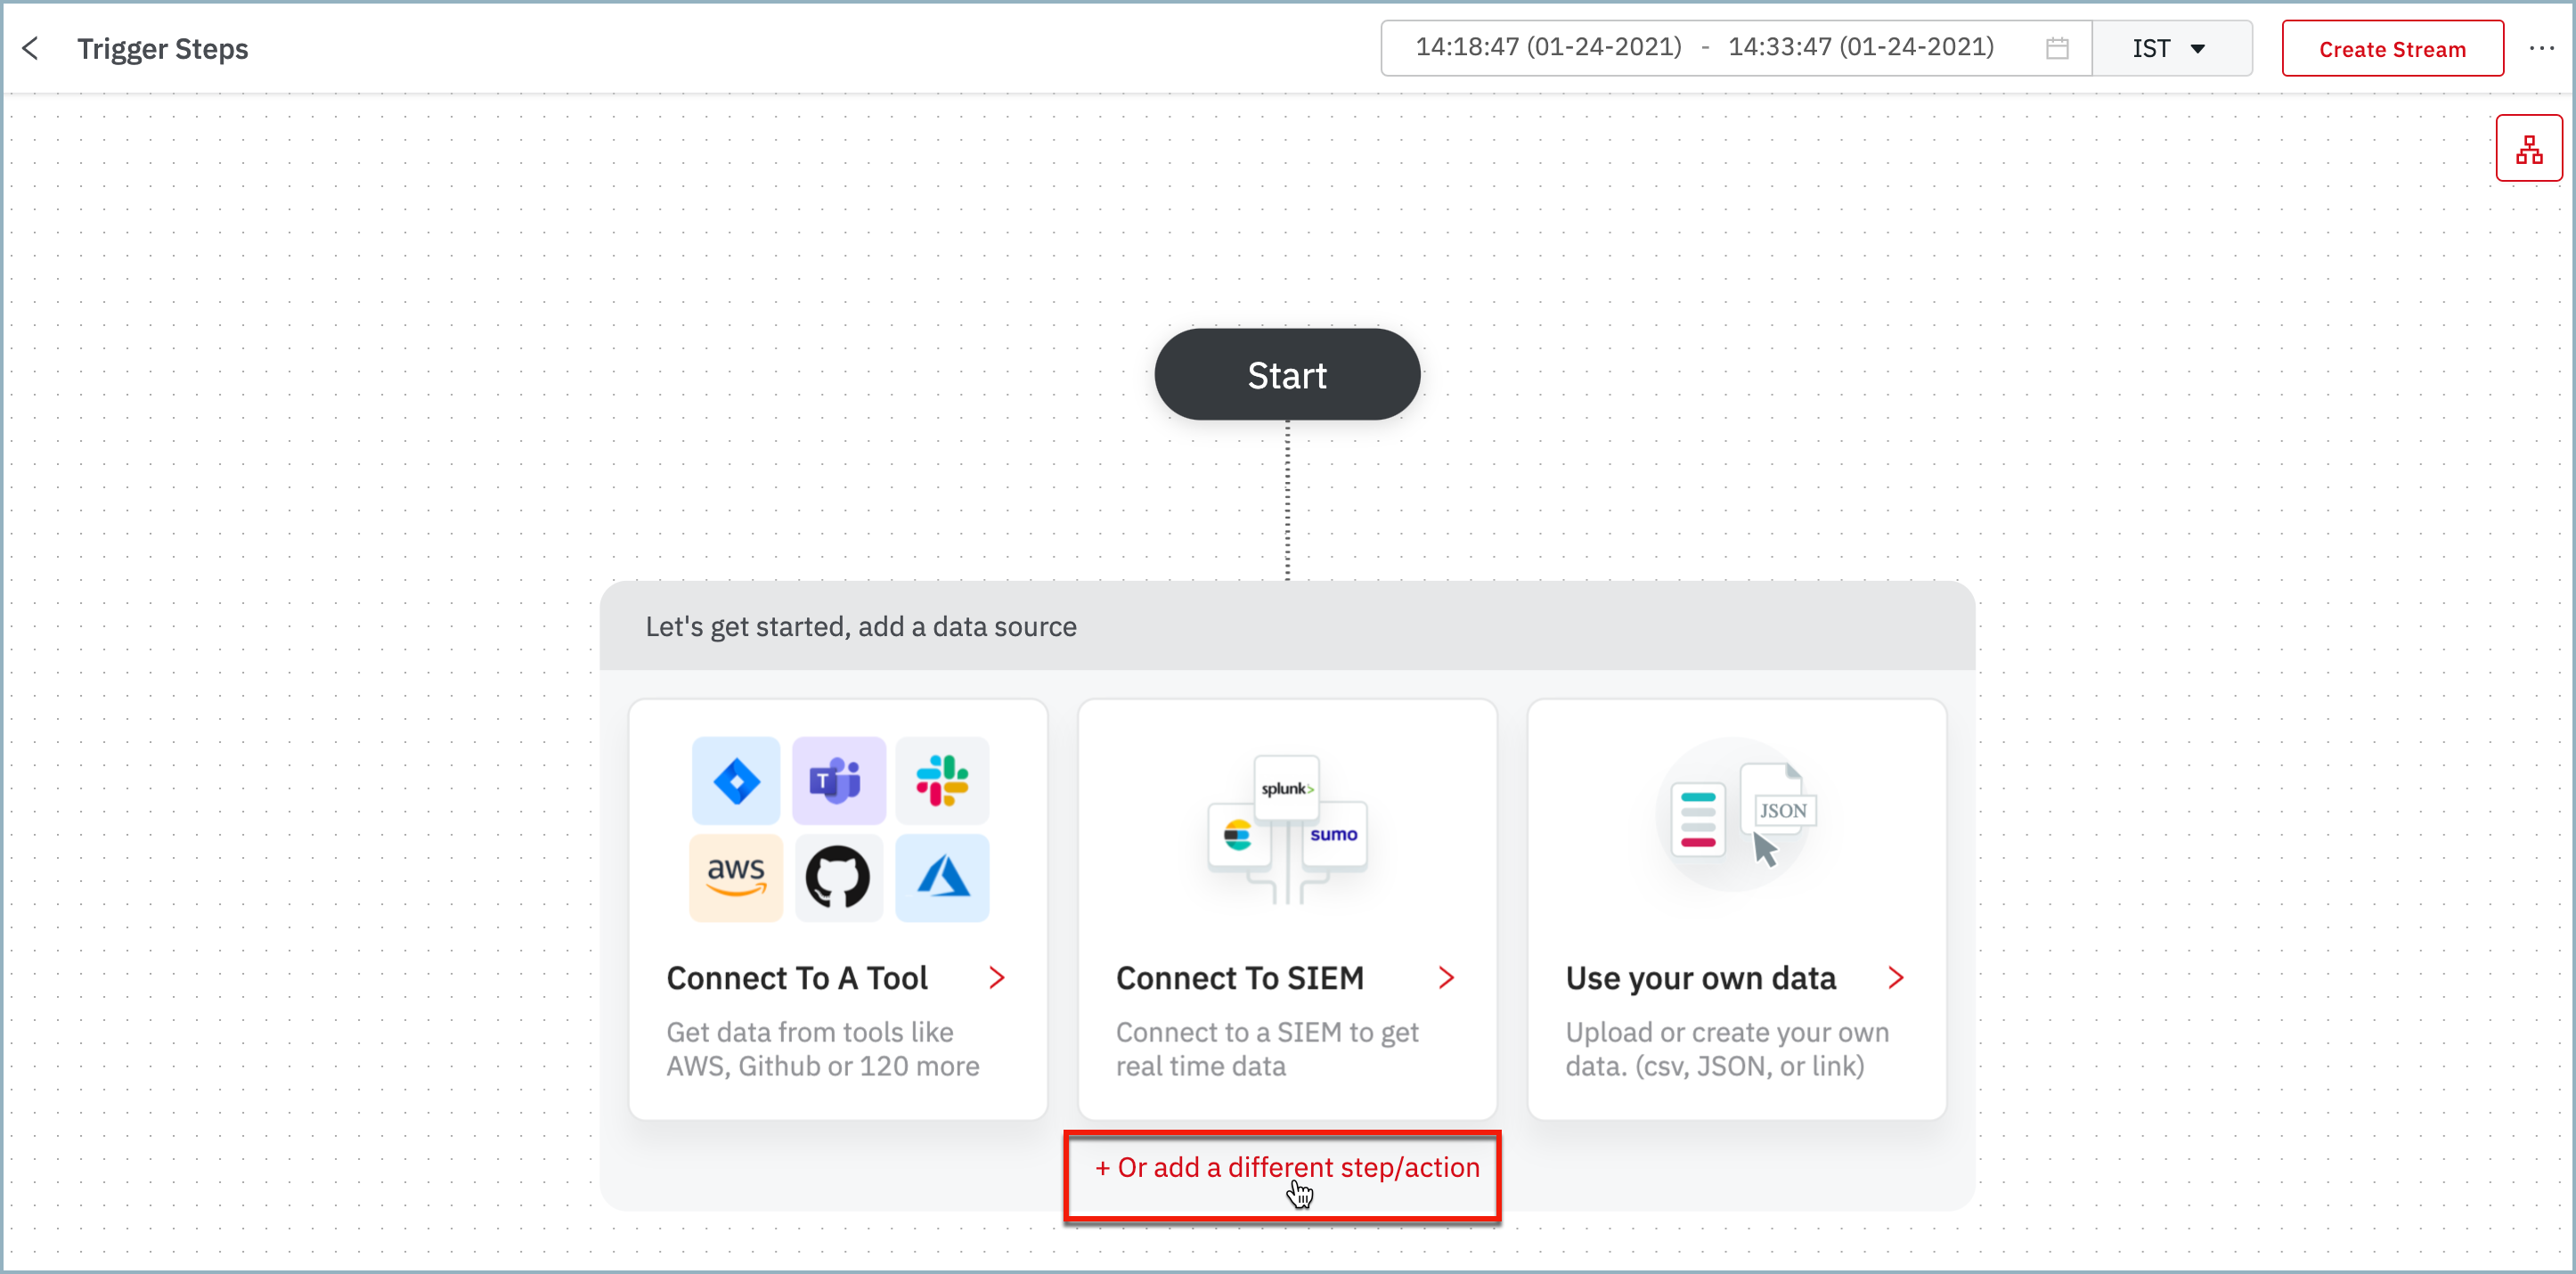
The following form opens up.
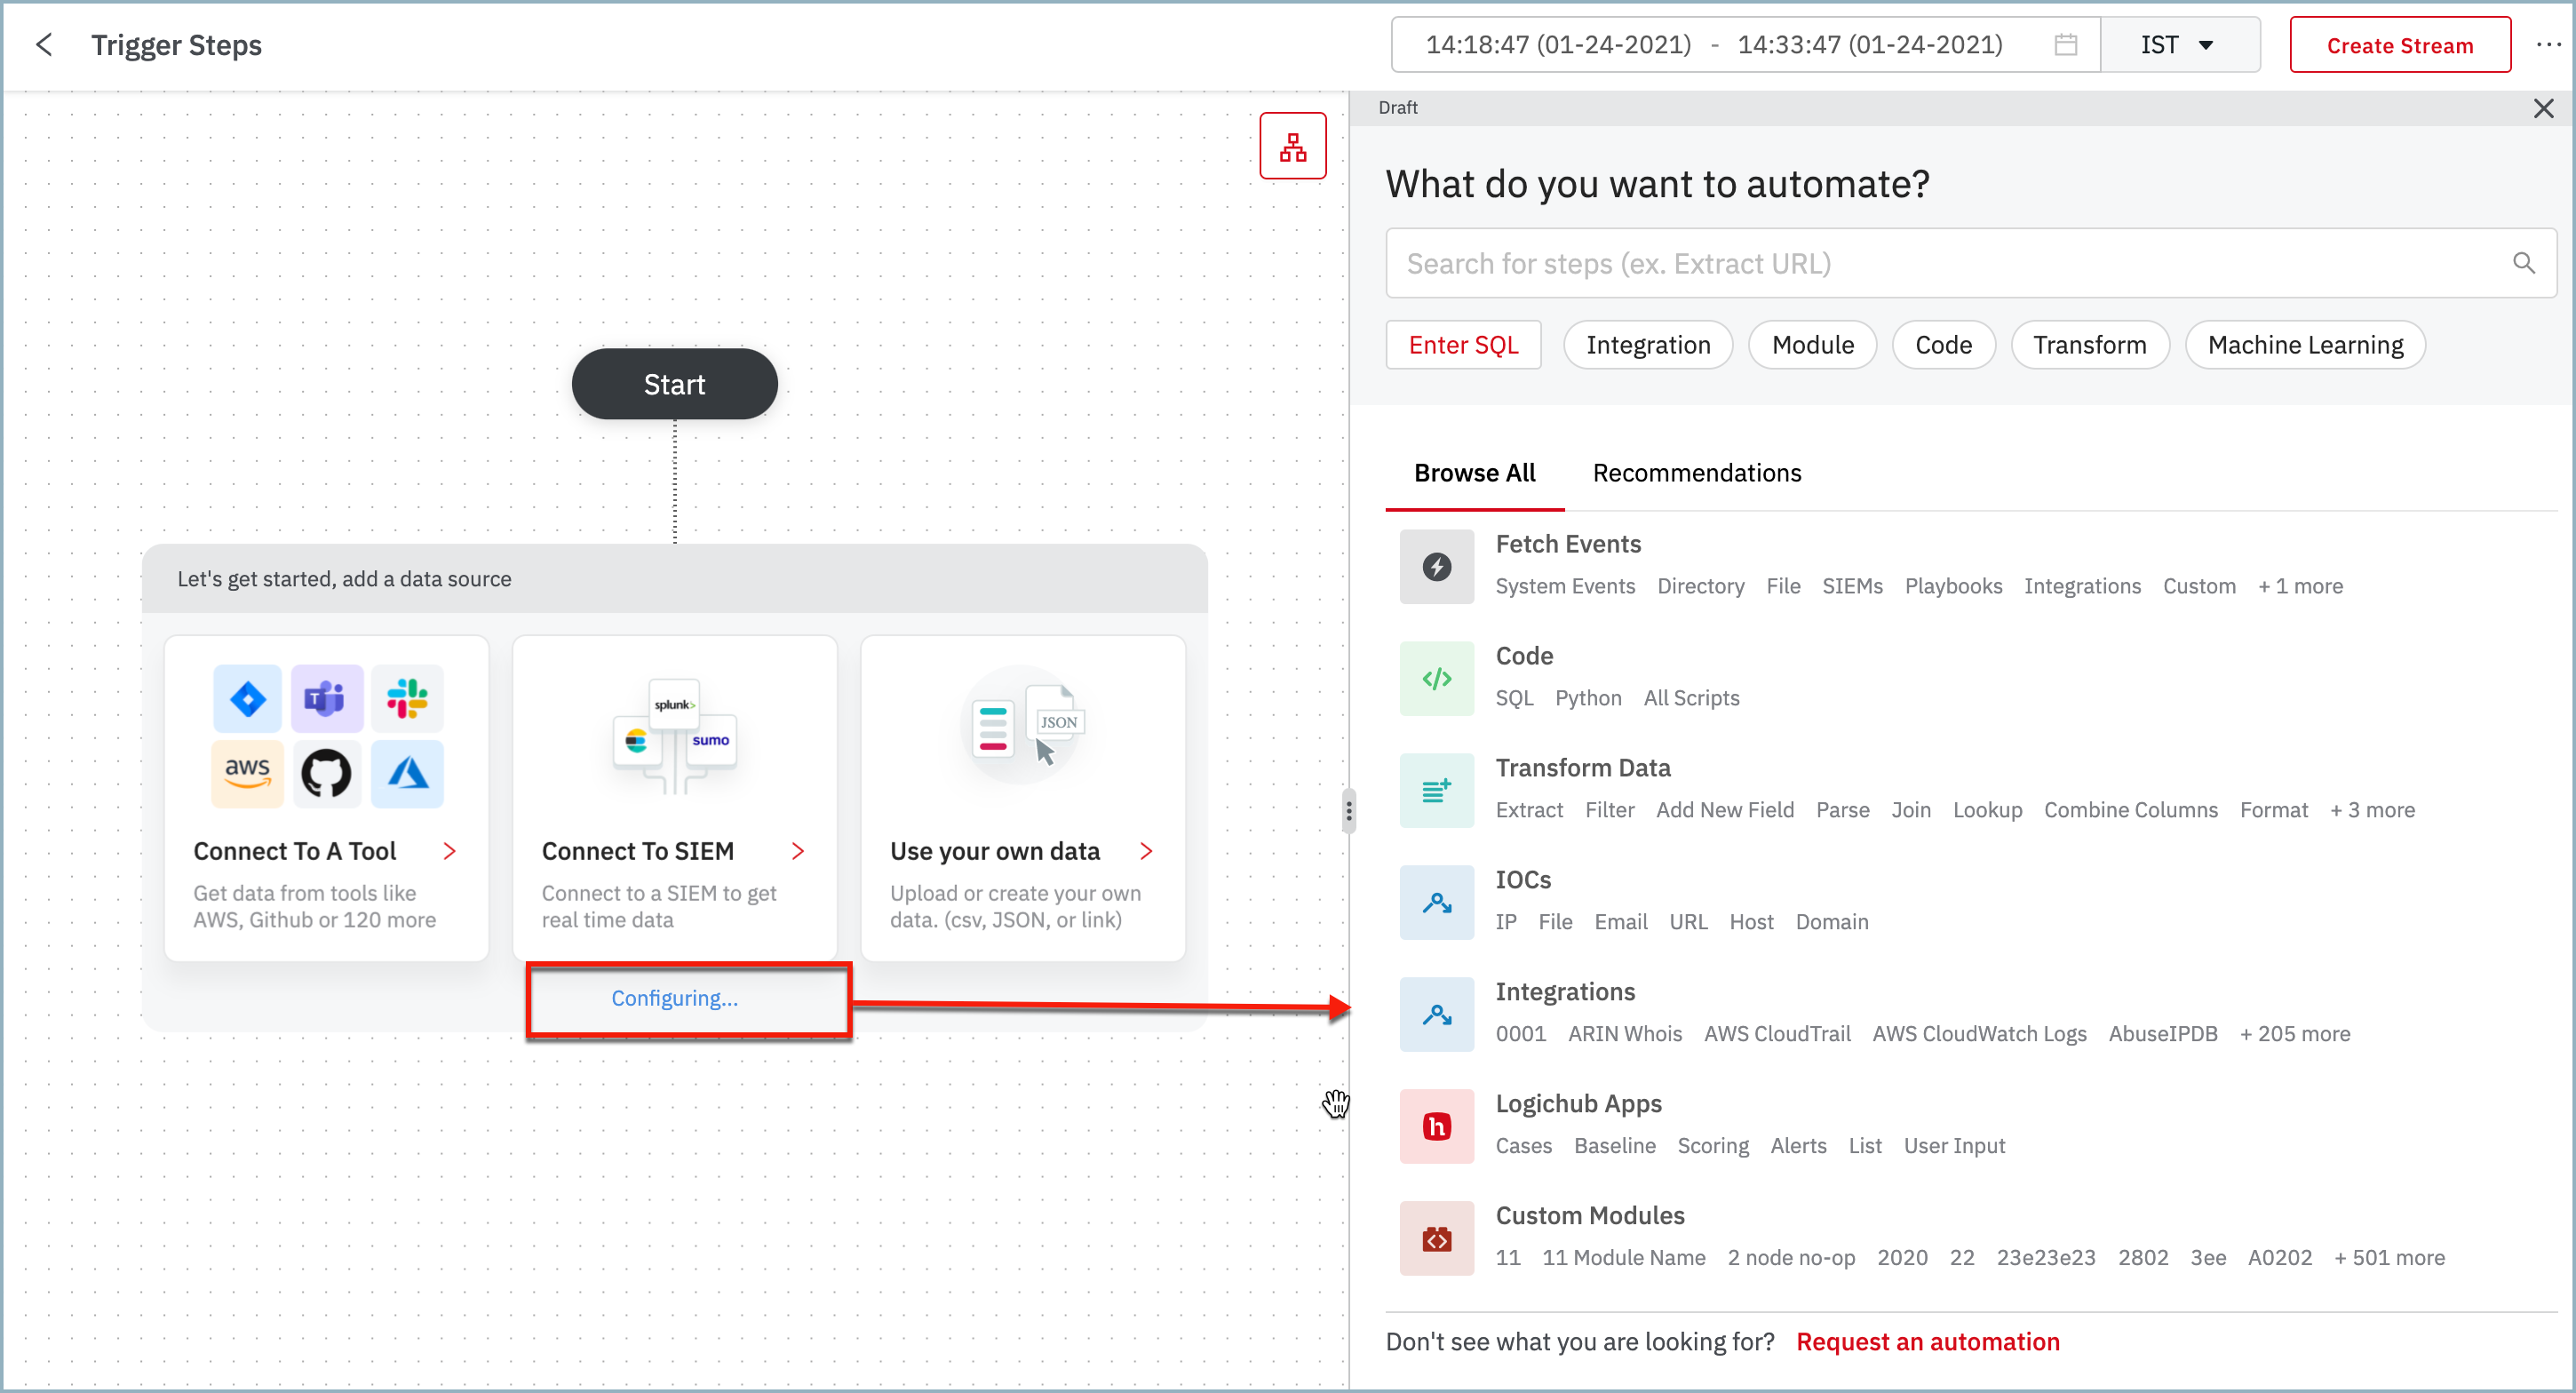
- To find automation to use, enter a search string and press Return. To prefilter the list for a type of automation, click the button filter button below the search field. If you can’t find the type of automation you’re looking for, click Request an automation. For more information, see Request an Automation.
Note
If you want to enter LQL directly or use LogicHub operators or UDFs, click Enter SQL. For more information, see Build a Step with SQL in Easy Mode.
-
Click automation to select it. Search and select any node that you want to add.
-
LogicHub now prompts you for the information that is needed to use the automation. For example, for the IMAP - Read Emails automation, you would select the connection for the IMAP integration. For Playbook Results, you would select the playbook that you want to draw from. All of the required fields are displayed. To display any optional fields, click Show Optional Fields.
For more information on the integration automation and the associated integration connections, see Add an Integration in Easy Mode.
-
Click Add Next Step to add additional steps as needed for your use case. Each time you configure a step, the results are shown in the results panel.
-
If additional configuration is required, click Save & Add Next Step and complete the configuration.
-
Click Save.
The settings are validated, the step is added to the playbook, and the results are displayed.

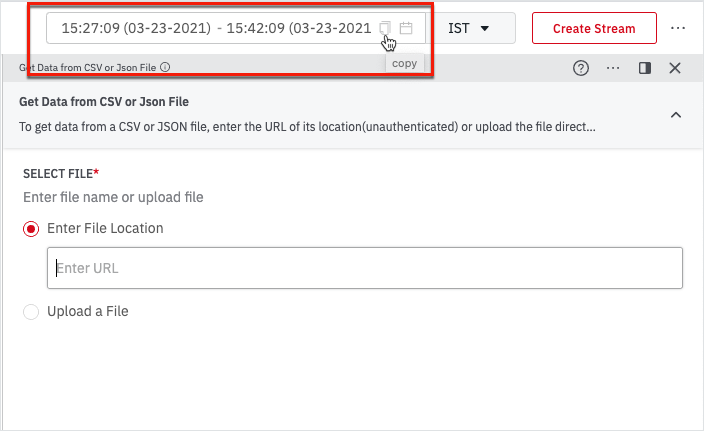
Additionally, the playbook allows you to copy and paste the time period from one flow to another in Easy Mode. When you click on the copy icon in the time period field, a Copied to clipboard message appears and you can use the copied time period in another flow.
Run a Playbook on a Schedule
In addition to viewing results in the results panel, you can add a stream to run a playbook on a schedule. For more information, see Create a Stream.
Work with Steps and Results Panel
The following controls and actions are available for the results panel and associated steps.
-
To toggle between the table view and JSON view, click the view mode icon.
-
To select the fields to display, click the field selection icon.
- To open the settings for viewing details and making changes, click the step box.
- To add another step, click + on the parent step.
- To delete a step, click the More icon (...) on the step and select Delete this Step.
- To edit the display name, click the More icon (...) on the step and select Edit Name and Description. Or click the name at the top of the screen, enter the new name, and click the checkbox icon.
- To close the results table and display only the canvas, click X.
Updated over 2 years ago