Create a New Module for Automation
A module is a pre-built automation function that you can add to your playbook to perform a specific action such as formatting output, parsing a string, checking IP addresses, or downloading emails.
The currently available modules are accessible from the module library by selecting Automations > Modules from the top menu bar. To select a module from the library and add it to a playbook, follow the instructions in Add a module to a playbook.
This topic describes how you can create your own modules and add them to the module library.
Creating a new module consists of the following actions:
- Start with a playbook that includes the logic that you want to incorporate into the module. You can start with an existing playbook or a new playbook that you have created for this purpose.
- Identify the steps to include in the module.
- Provide a name, description, and other basic information to identify the module.
- Generalize the logic in the module by parameterizing any values that users might want to vary. For example, you might have an existing playbook that computes a weighted average of 50 items. In the module definition, you would parameterize ‘50’ so the module can be used to compute a weighted average of any number of items.
- Save the module and add it to the module library.
An Example Playbook
To show how to go from a playbook to a module, we’ll use an example playbook that does phishing analysis. The playbook you start with might be completely different. This example is intended to provide guidance on working with your own playbook.
The example process begins with a pre-defined playbook that does a specific check for URLs that could cause problems if someone clicked on them in an email. The playbook extracts the domain names from the URLs and compares it with a known domain name.
The playbook includes steps a-e.
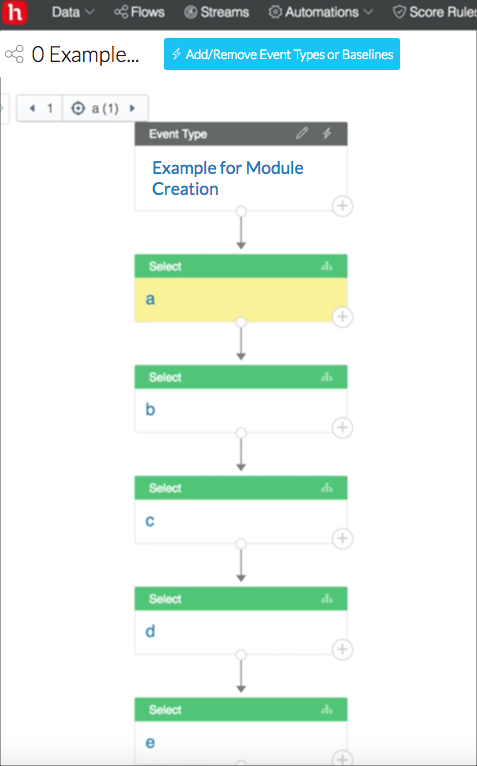
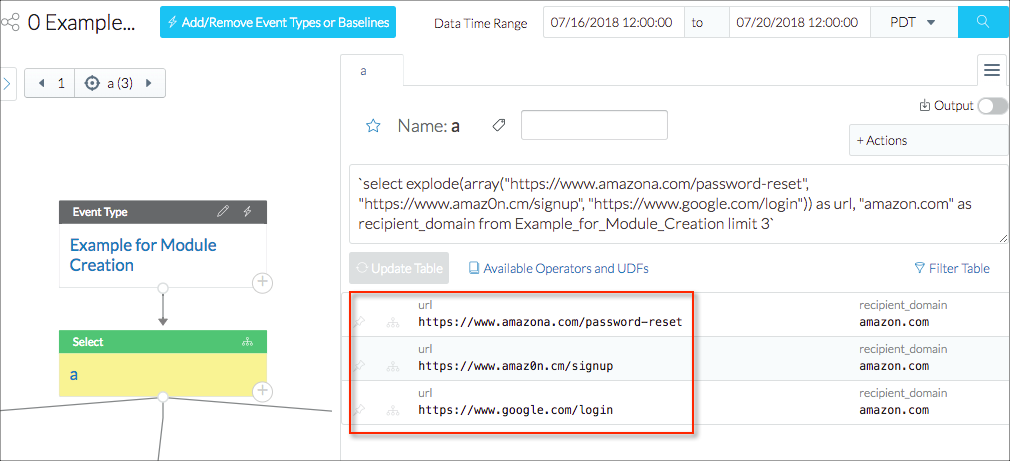
The first step uses a query to generate data for the example. The data that is generated from the query includes two fake URLs and one real URL.
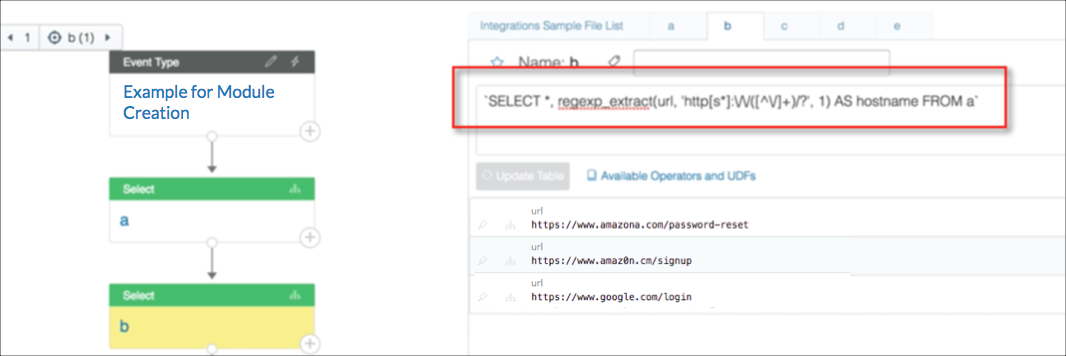
The next step uses regex to extract the part of the URL that is the hostname.
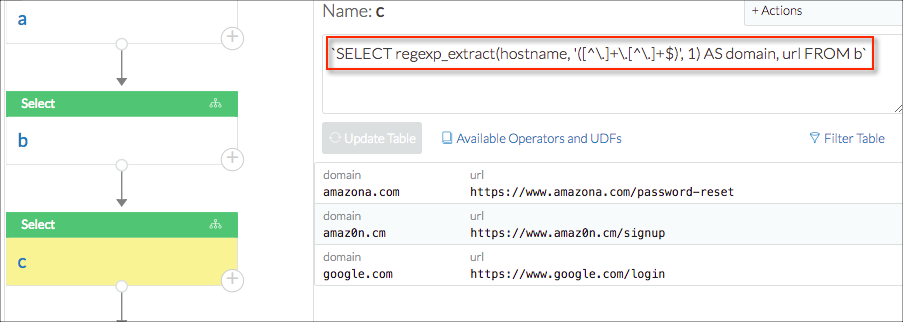
The next step extracts the domain from the hostname.
The next step uses a Levenshtein function to calculate the ‘distance’ between the known (correct) domain and the domain in the results table.
- If there is no difference between the domains, then there is no problem.
- If the difference is significant, it is also not a problem for this check because the user would have observed that the domain names are very different.
- The problem occurs when there is a difference that is small and possibly subtle. The entries of most interest in the results table are the first two, which are close to amazon.com, but not an exact match with the expected domain.
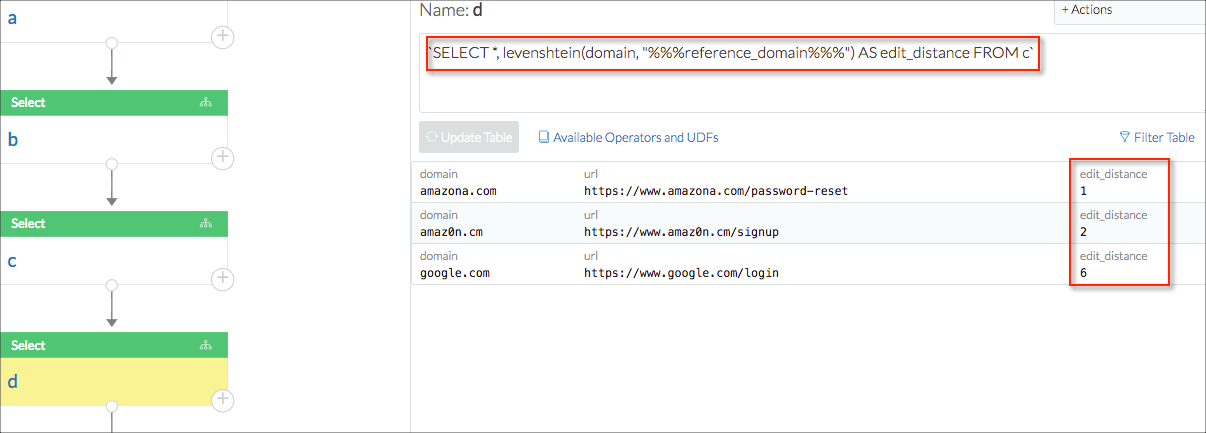
The last step uses the distance to compute an lhub_score.

This example source playbook shows all the individual steps that result in the calculation of the lhub_score for the phishing emails.
Most users will be interested only in the calculation, not in all the steps that contributed to it. They will also want a generalized version that can take other URLs as inputs and use different values to relate the Levenshtein distances to the lhub_scores.
The module creation process gives you control over what you include in the module and what you choose to parameterize.
The remainder of this topic provides detailed steps on creating a module from a playbook, with references to the phishing analysis example. You can apply these steps to other playbooks.
Create a Module
- In Advanced Mode, create your playbook or open a playbook from the Playbooks list.
- Verify that a date range is selected. The date range is needed to validate that the module works correctly.
- In the top icon bar, click Module.
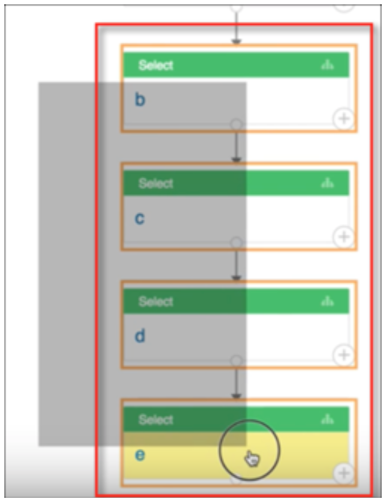
Use your cursor to select all the steps you want to add to the module. For the phishing analysis example, selecting steps b - e will take the original input and report the results of the lhub_score calculation.
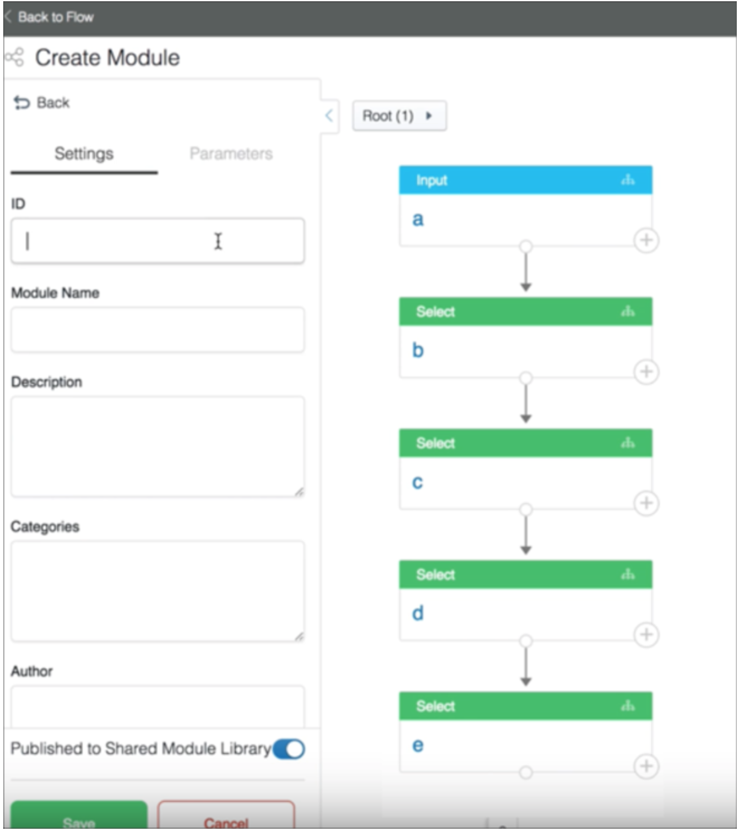
The module editor opens. The first step (with the blue header) is a synthetic input step that represents the data flowing into the module from the playbook that it is part of. This step is not editable.
-
Configure the following on the Settings tab to identify the module:
Enter a unique ID for the module.
Enter a descriptive name.
(optional) Enter a text description.
Enter a comma-separated list of categories. These are used to filter the modules shown in the Module library.
Include the person to be listed as the author of the module.
Select Published to Shared Module Library to make the module available to you and other users in the module library. We recommend that you do this for all modules. -
Click the Parameters tab to specify the values you want to parameterize. You may want to select different steps in the playbook to view the associated queries and identify elements to parameterize. When you have identified an element to parameterize, configure the following on the Parameters tab and click Apply.
In the Flow Value field, enter the value that you want to parameterize.
In the ID field, enter the variable name that you want to use to substitute for the playbook value.
Enter a descriptive name to identify the step.
Enter a data type. The type can be text, number, step or column. If the data type is Column, you must also select the table that the column comes from.
For input data types you can then specify the input type, which can be text or a password.
Alternatively for column data type, choose the parent step parameter that should be referenced to populate column names when using the module in a playbook.
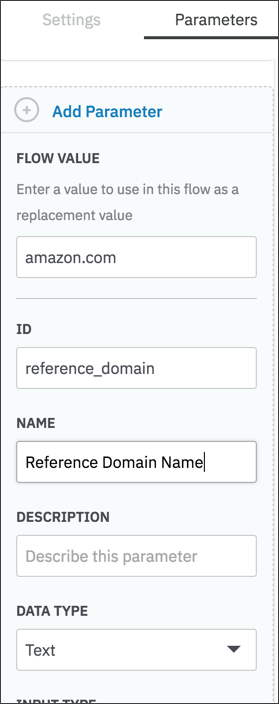
In the phishing analysis example, one of the steps in the input playbook includes bankofamerica.com as a playbook value. To generalize this to allow module users to specify another domain, a parameter was defined as follows:
Flow value = amazon.com
Id = reference_domain. (This setting allows you to generalize the domain by substituting %%%reference_domain%%% for amazon.com in any query in the module.)
Name = Reference Domain Name (enter a name to identify the parameter)
Description = (optional)
Data Type = Text (in this case the playbook value is a text value)
Input Type = Text (input type is either text or password)
You can now copy the parameter string from the parameter definition and paste it into the query for the relevant step.
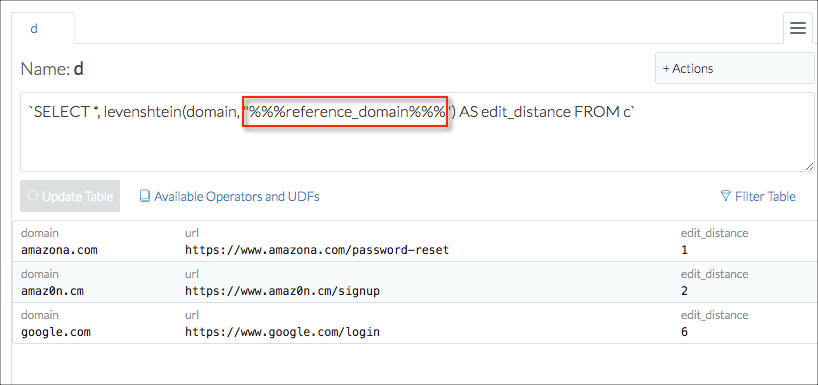
After creating the parameter, add it to the relevant LQL in the module. Copy the string for the parameter name and paste in into the LQL to replace an string in the query.
The query is now parameterized for reuse. To verify, click Update Table.
In this example, a parameter with ID ‘url_column_name’ query becomes ‘%%%url_column_name%%%’.

To simplify use of the parameter in the subsequent steps, you can normalize the parameter (to ‘url’ in this example).

Add additional parameters for any other playbook values that you want to generalize.
The final step in the module can also be parameterized. In the example, the edit distance for scoring is set manually. This can be parameterized as shown here.
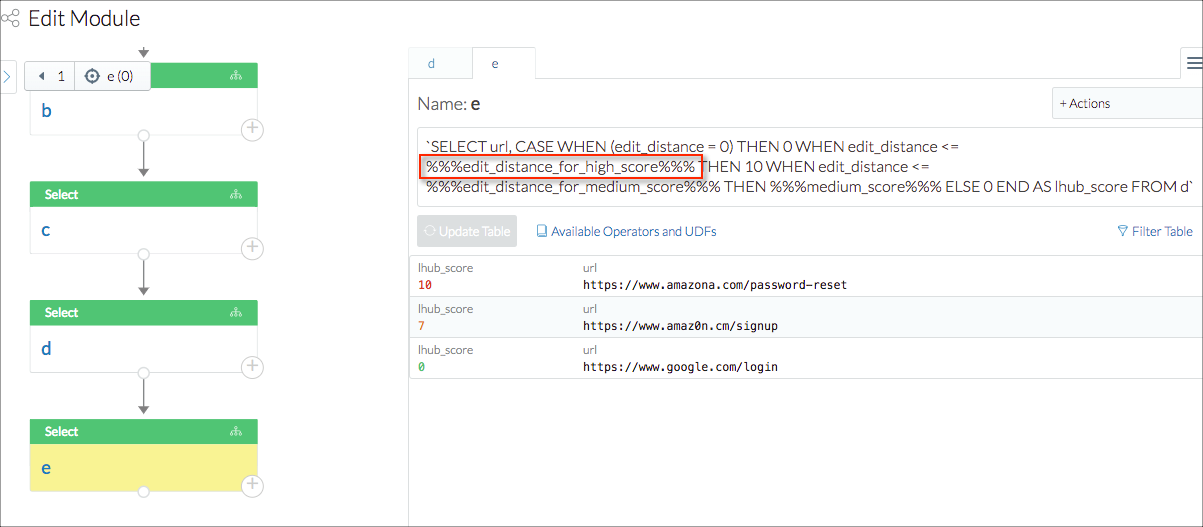
- When you are finished setting up the module, click Save on the Settings tab. This action saves the module, closes the editor, and shows the module as a single step in the original playbook.
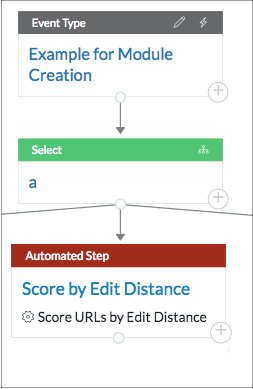
Use a Module
After you create a module and add it to the module library, it is now available for use.
- Select Automations > Modules from the top menu bar.
- Find the module you want to use and click +.

- The setup page lets you add a title, name, and description for the module step and node, and it displays the event type.
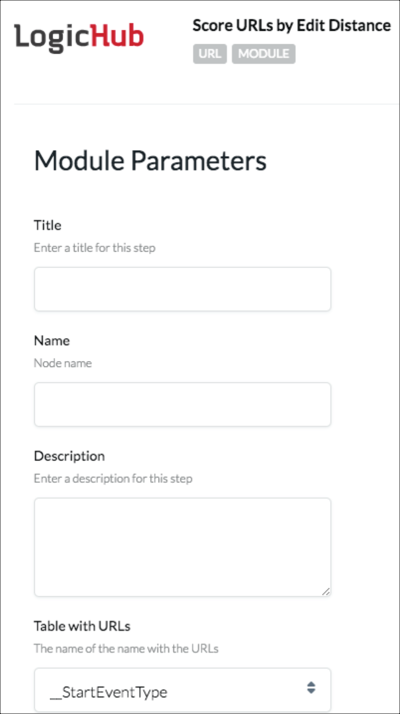
- The module parameters are also listed, so you can add the values you want to use for this instance of the module.
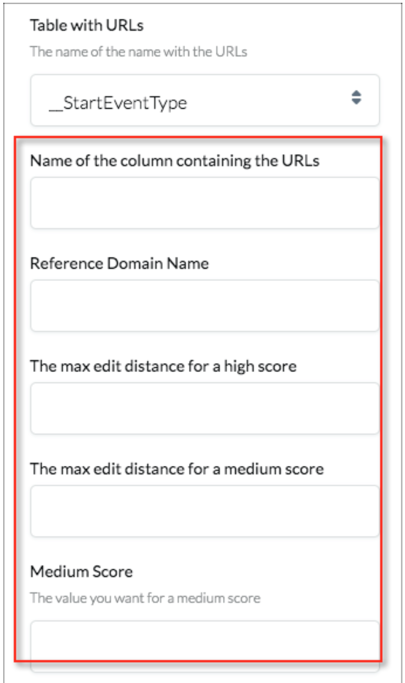
- Click Insert to add the module to your playbook.
Edit Module Definition
To edit the module definition after adding a module to a playbook, click + for the module and select Module Definition > Edit.
Edit Module Parameter Values
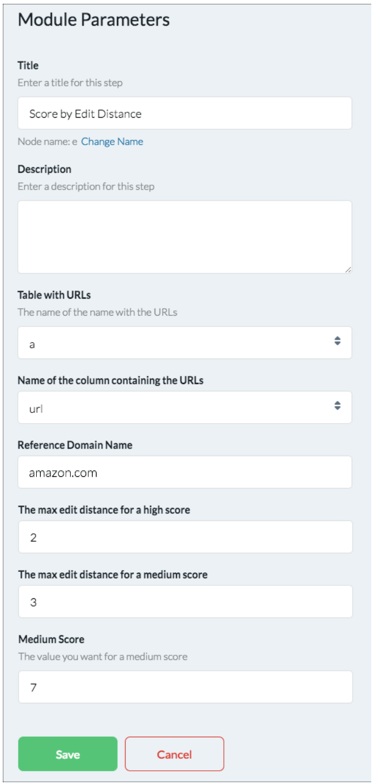
To change any parameter values for a module, click the module in the playbook designer, and then click Edit.
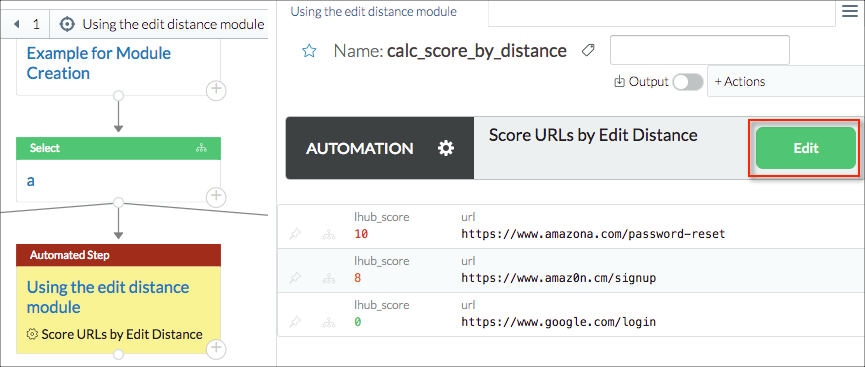
Change any of the values and click Save.
Module Versioning
Modules are versioned by the system. Right now we don't expose any control into custom module versions. Yet behind the scene, when you edit a custom module, the version of the module is incremented. In most cases, the minor version of the module is incremented. And the latest version will be used in all playbooks that use the module. However, if the change is not a backward compatible change, the major version will be incremented. Backward incompatible edits includes: (1) adding parameters; (2) changing the types of existing parameters.
Existing uses of that module will continue to use the older major version they were created with but will use the latest minor version that is available. This means that if you are using the same module in a few playbooks, and update one with a new parameter, the other playbooks will continue to use the older version. To upgrade to the latest version, edit the module in the playbook. This will present you with the new parameters. Once you provide all the new parameters, you upgrade the playbook to use the latest version of the module.
We have plans to make versioning clearer to the playbook authors in the UI.
Modules and Integrations
Integrations can be used in modules like other steps. Right now they can't be added in the module editing view, they have to be part of the initial steps selected.
A user adding a module with an integration will still need to select the connection for the integration but they will not be asked to enter in any of the other parameters for the integration action. Instead the values originally entered in the integration are used.
If you want to expose some of these parameters to a module user you can create them as module parameters, then use the parameter string in the integration configuration. This can be done with strings or columns.
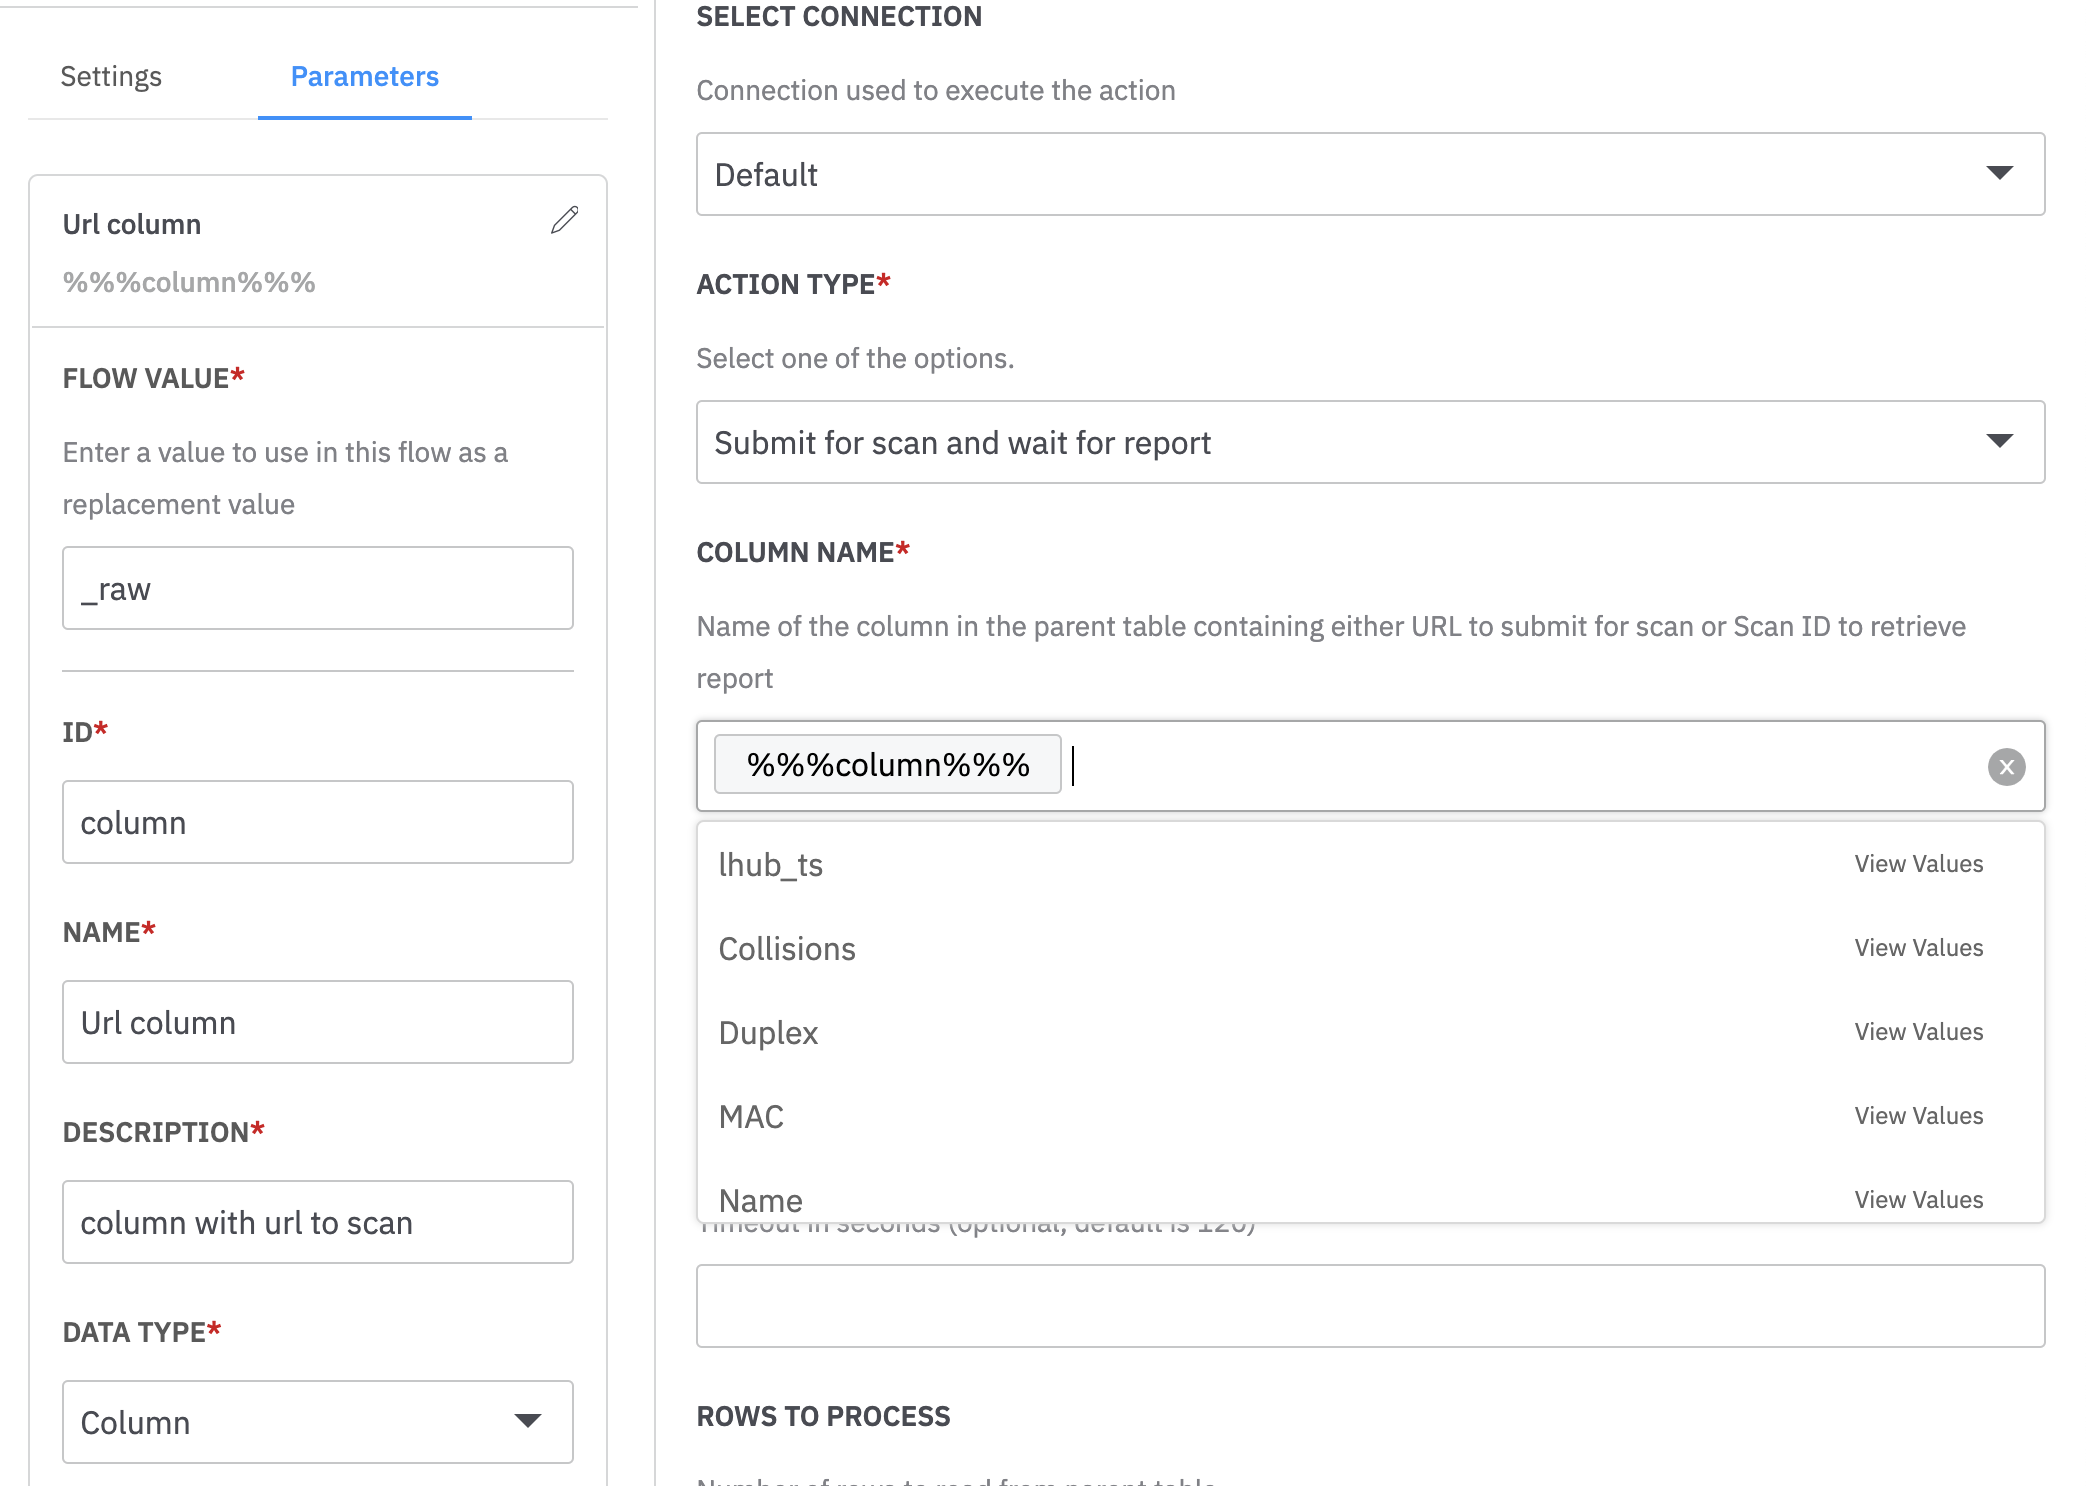
Updated over 2 years ago