Create Custom Data Table
To create your own custom data table:
- Go to Playbooks in Easy Mode, click New Playbook, > Use your own data > Create Custom Data.
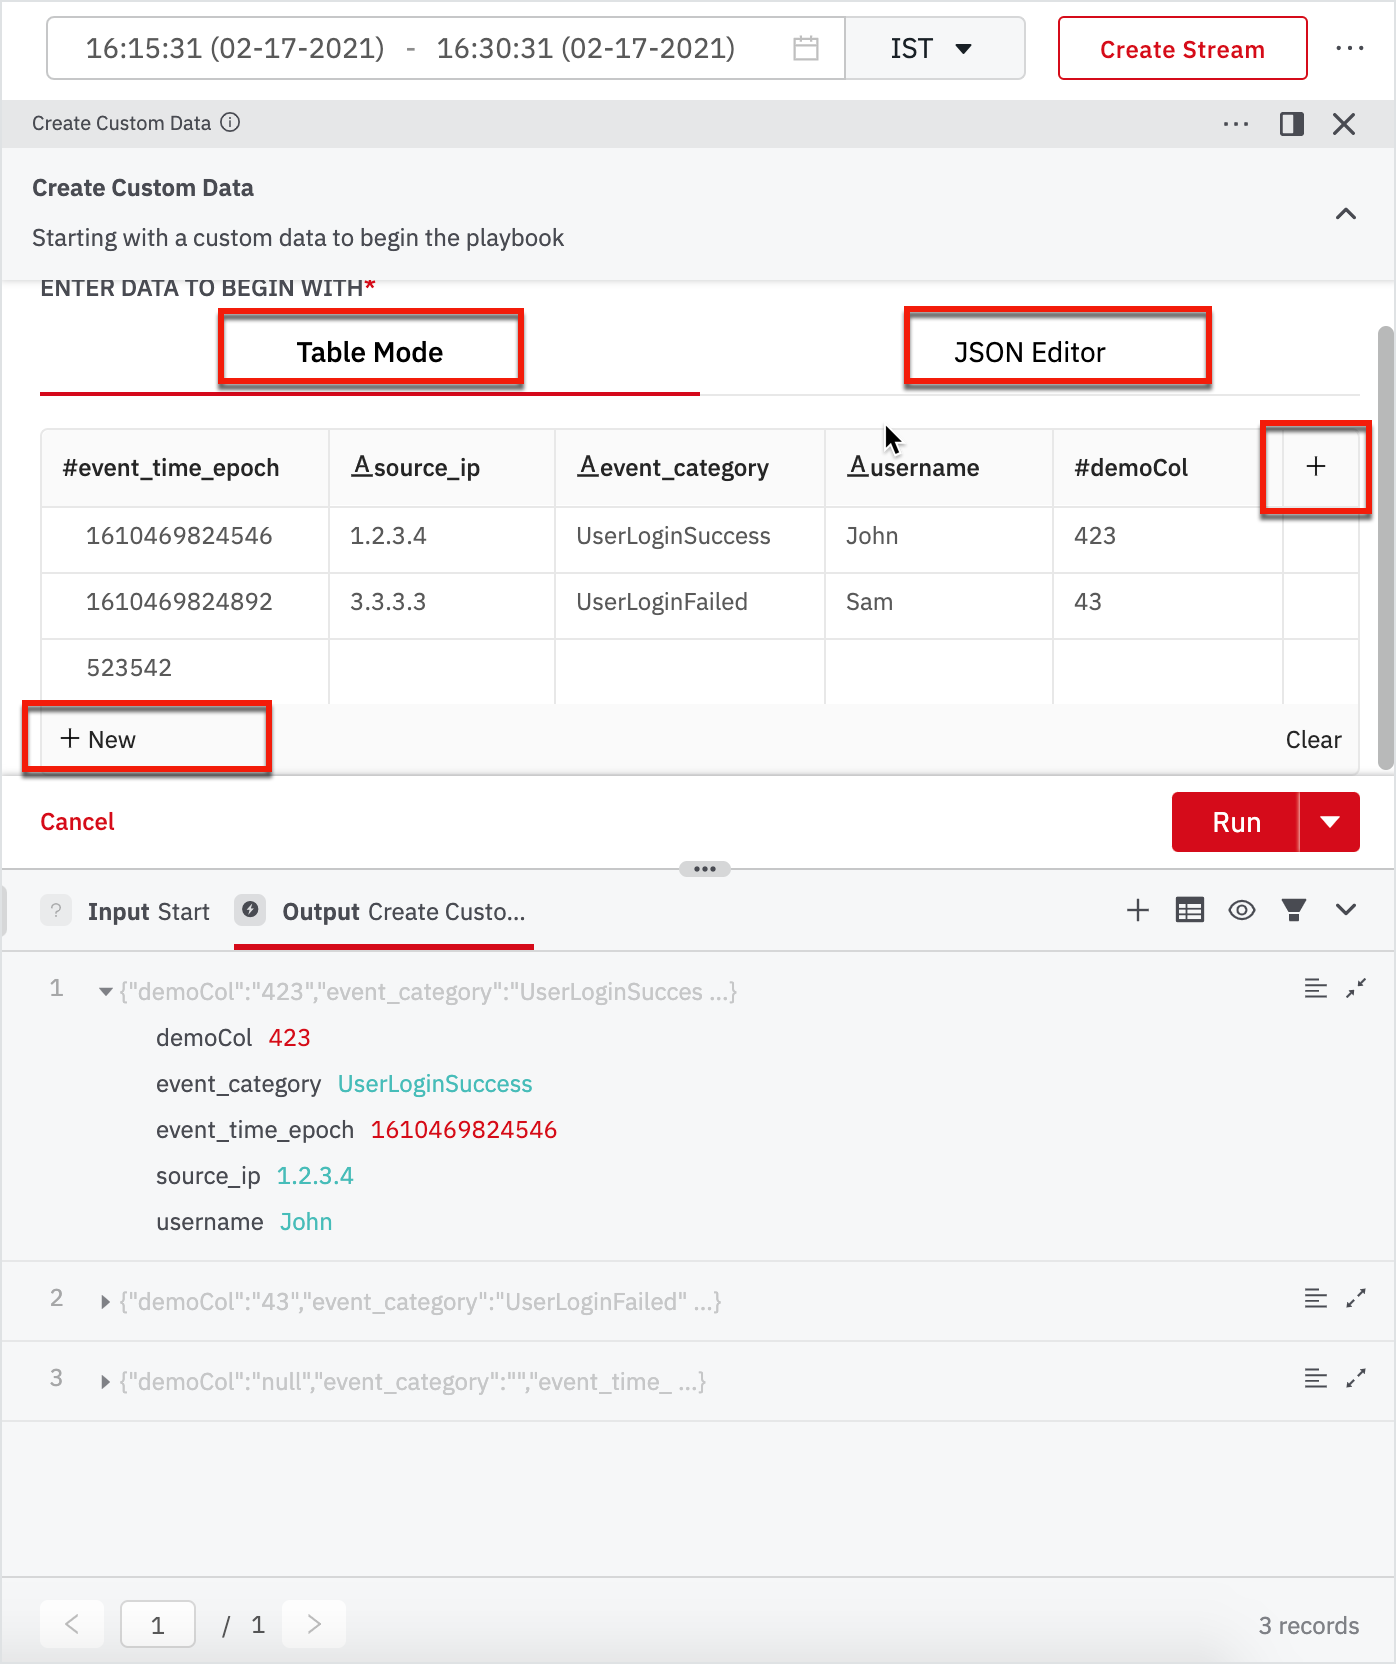
The following form opens up on the right pane.

-
In the Create Custom Data form, switch between the Table Mode and JSON Editor to view the custom data. By default, the view opens up to Table Mode.
-
Click New to add new rows at the bottom of the table and click + to add new columns to the right. You can add as many new rows and columns as desired.
-
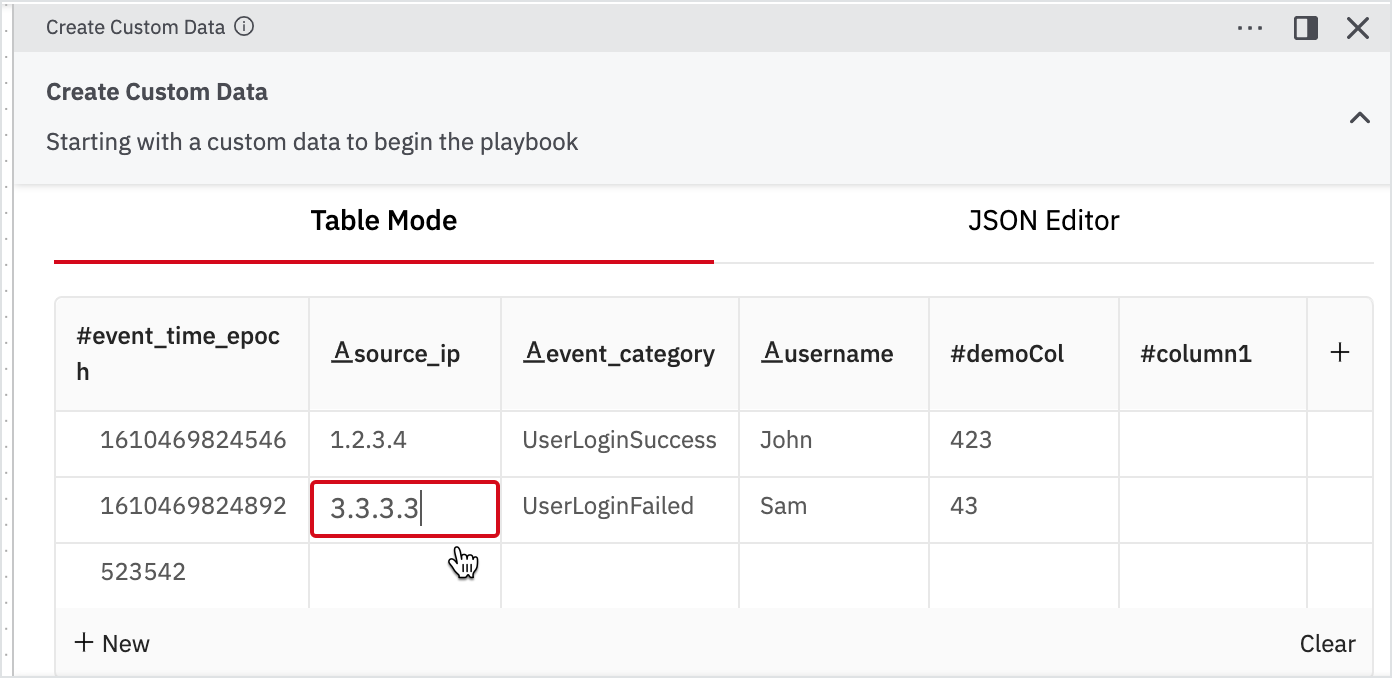
Click to edit each cell and update accordingly and click Run.

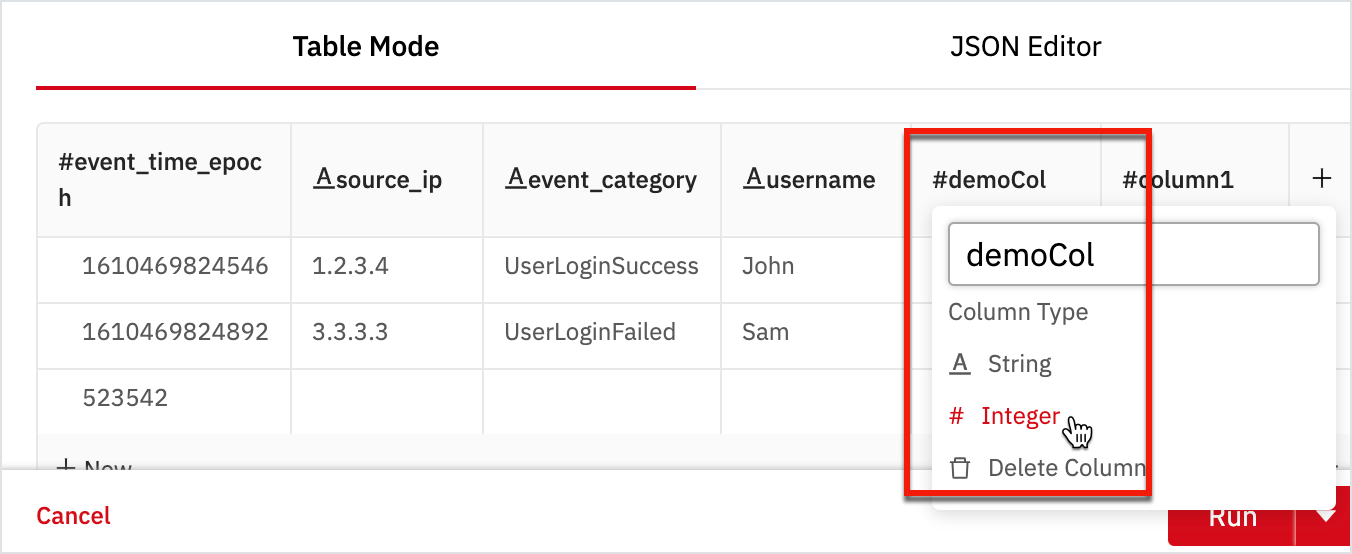
- Click on the newly added column name to rename and select the type of column: String or Integer.

Note
In the table, the # indicates Integer, and A (underlined) indicates a String.
-
Click the delete icon at the end of the row to delete the rows and click Delete Column to delete the columns.
-
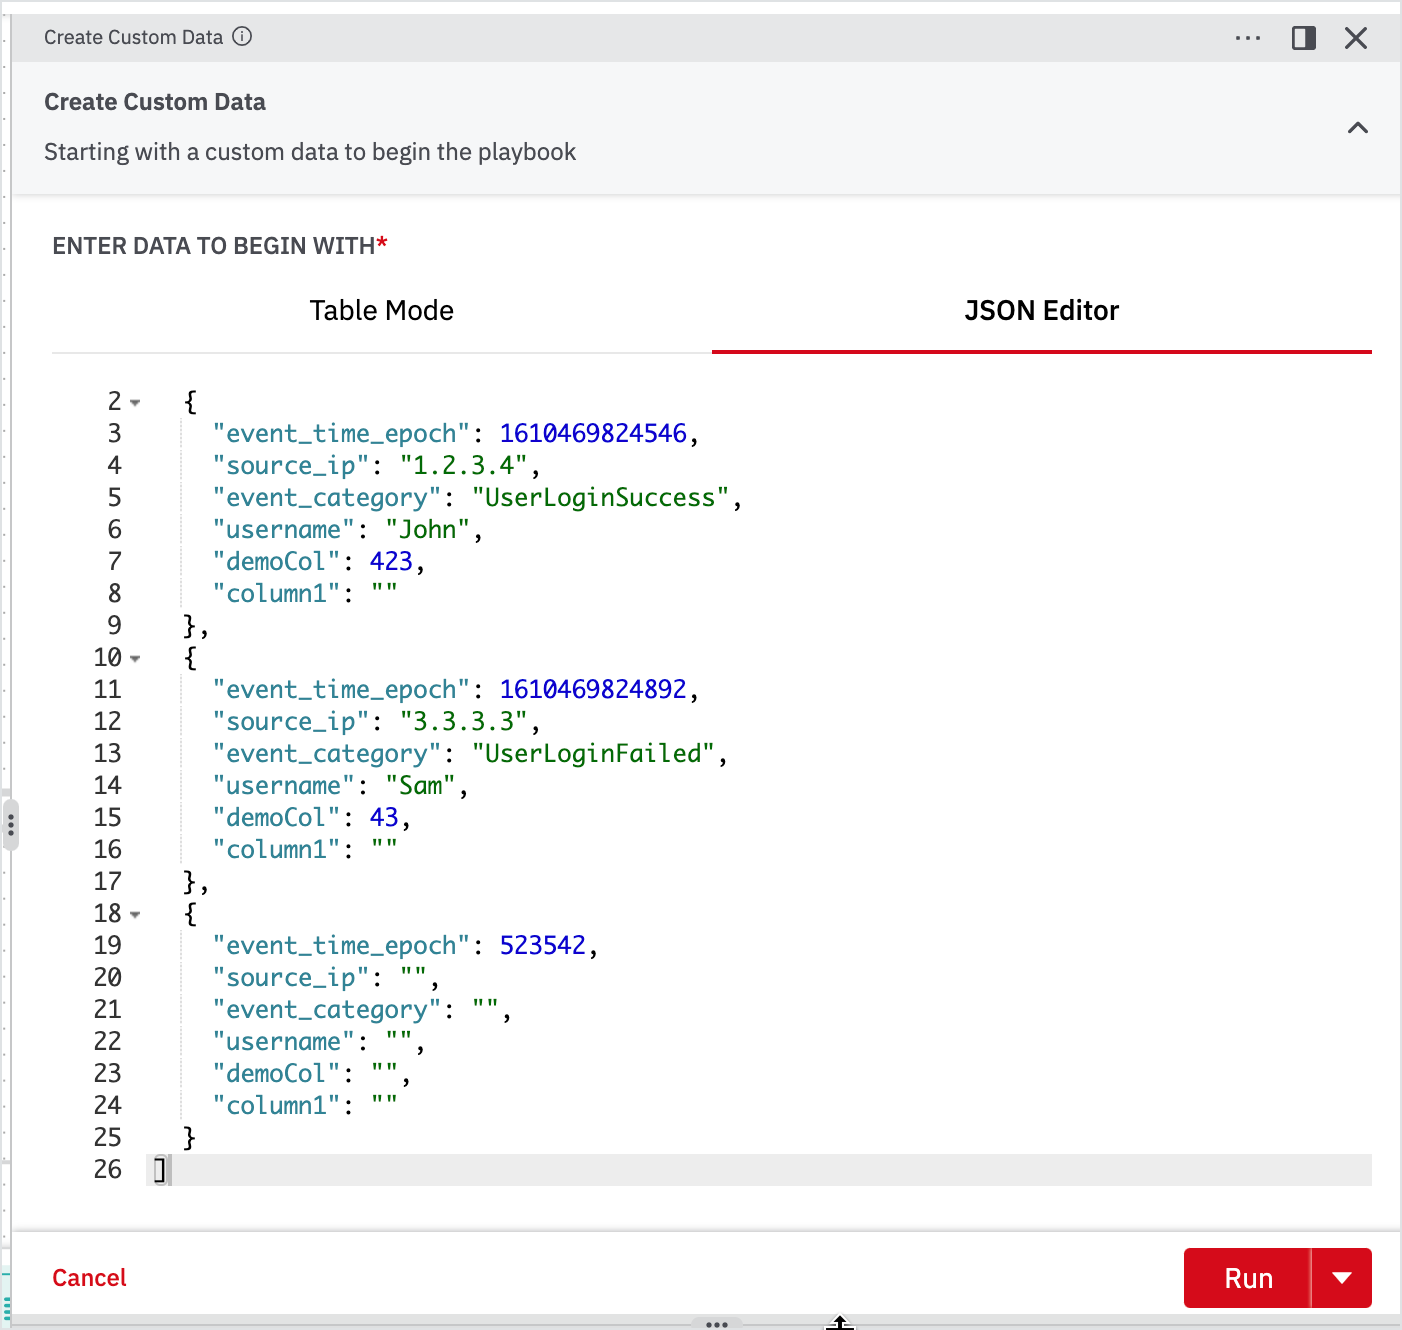
Click JSON Editor to view the JSON data format.

Updated over 2 years ago
What's Next