Manage Case Workflow
The status workflow in case management is a set of statuses and transitions that a case moves through during its lifecycle and typically represents the processes. Each workflow is defined by a set of statuses and the allowable transitions between them. There are default built-in workflows that cannot be edited; however, you can clone and use these workflows to create your own. You can also create your own workflows from scratch using custom statuses.
Statuses and Transitions
Status is the state of a case at a specific point in your workflow. A case can be in only one status at a given point in time.
Transition is a link between two statuses that allows a case to move from one status to another. In order for a case to move between two statuses, a transition must exist.
Creating Workflows
Workflows are an integral part of the case management feature that allows you to create your own custom steps and transitions based on your business requirements. There are three things that you can do in a workflow: clone, create a new workflow, and edit/configure a workflow using the transitions.
Clone an Existing Workflow
- Go to Settings > Case Settings on the left navigation.
- Click Status Workflow from the tab menu to open the workflows page, which displays all the workflows, including the default workflows.
- Click on the three dots that appear in each of the workflows and choose Clone.
- The cloned workflow will get the same name with Copy 1 at the end of the name.
- Click to open the cloned workflow and customize it by adding or editing the steps and transitions.
How to Create a Status Workflow
- Go to Settings > Case Settings on the left navigation and click Status Workflow from the tab menu.
- Click New Workflow to add a new workflow.
- By default, the workflow will contain the ToDo and Done statuses.
- Click New Status to add the status as per your requirement to create your own workflow.
- Enter a name.
- Select the status type from the drop-down.
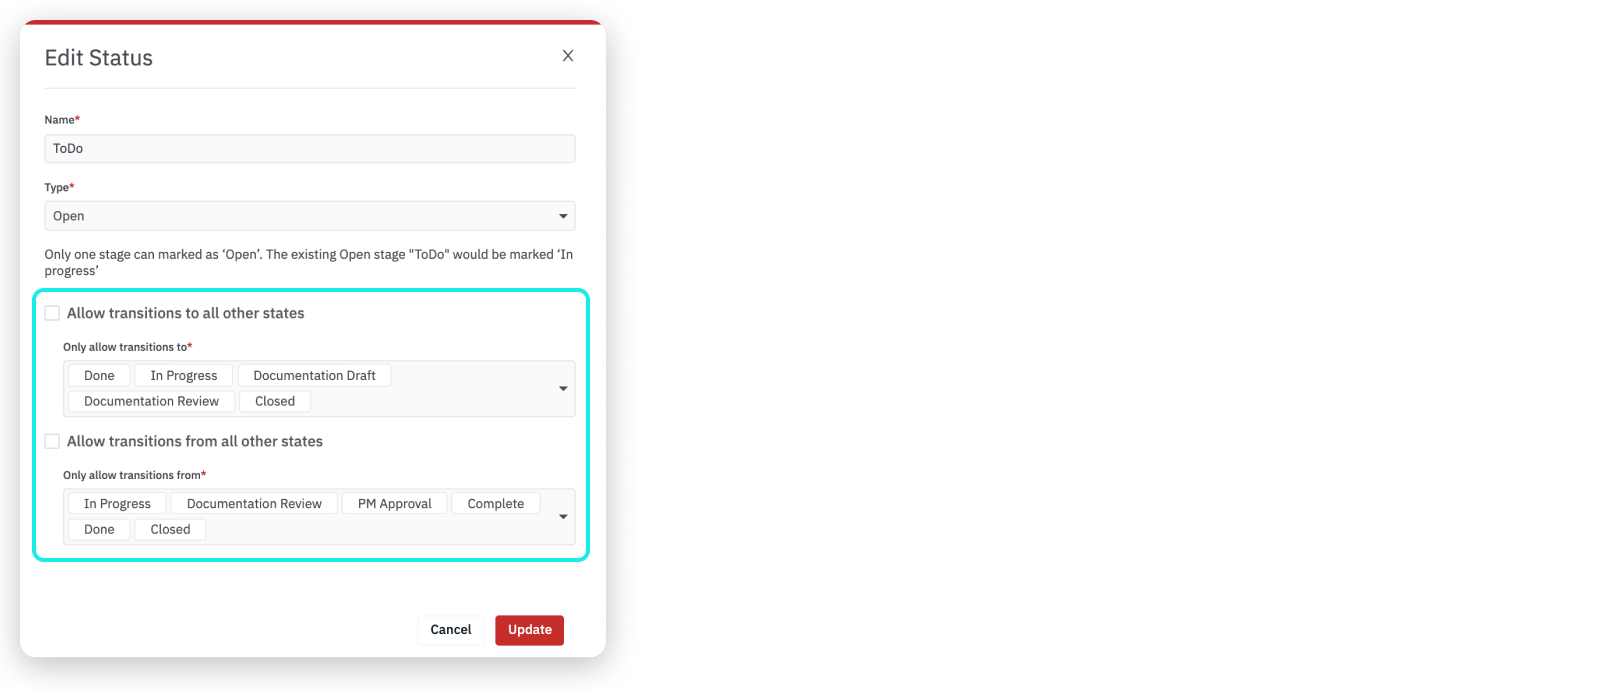
- Indicate whether to allow transitions to and transitions from all other states. If you deselect these options, you will be prompted to select the states for which transitions are permitted.
- Click Save.
- Drag to reorder the statuses, if required.
- Click Publish to make the workflow available for use.
- The new status will be added to the Workflow page.
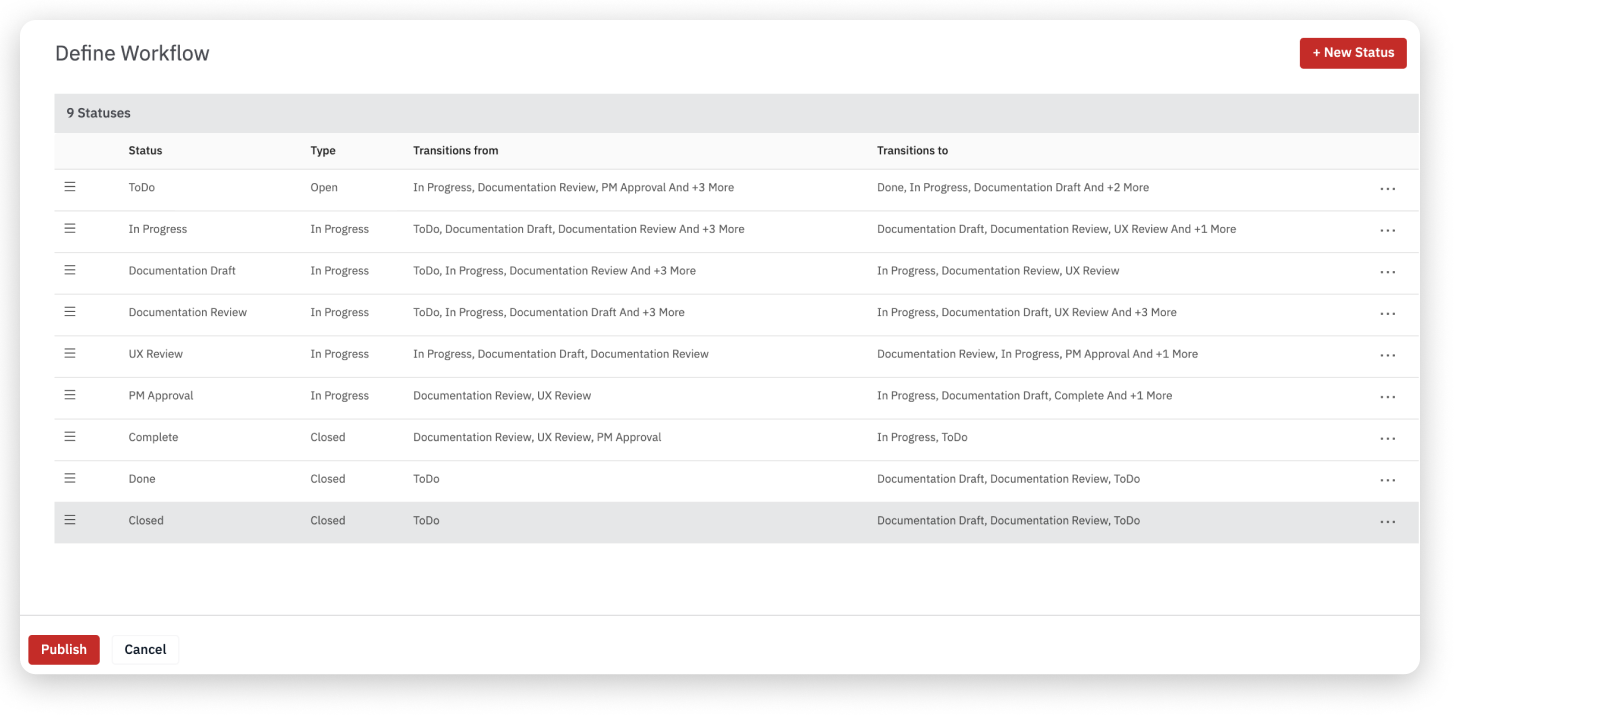
Following is an example of a workflow that contains a set of statuses.

The workflow will be available for selection when you create a case type. If you edit or delete a status or a workflow, you will be prompted to redefine any transitions that involve the state that has been modified or deleted. The case will be automatically updated to reflect the changes.
The Status Workflows tab lists the currently defined workflows and the case types that they’re associated with. To see the full list of case types hover over the entry in the table.
How to Configure a Status Workflow
- Go to Settings > Case Settings on the left navigation and click Status Workflow from the tab menu.
- Click to open a workflow to configure.
- Click on the three dots that appear in each status and choose Edit.
- In the Edit Status window, you can set the transitions to and from other states and click Update.

Use the Workflow in Case Type
- Go to Settings > Case Settings on the left navigation.
- Click Case Types from the tab menu.
- Open a case type for which you want to update a new workflow.
- Click Transitions and select a workflow from the drop-down.
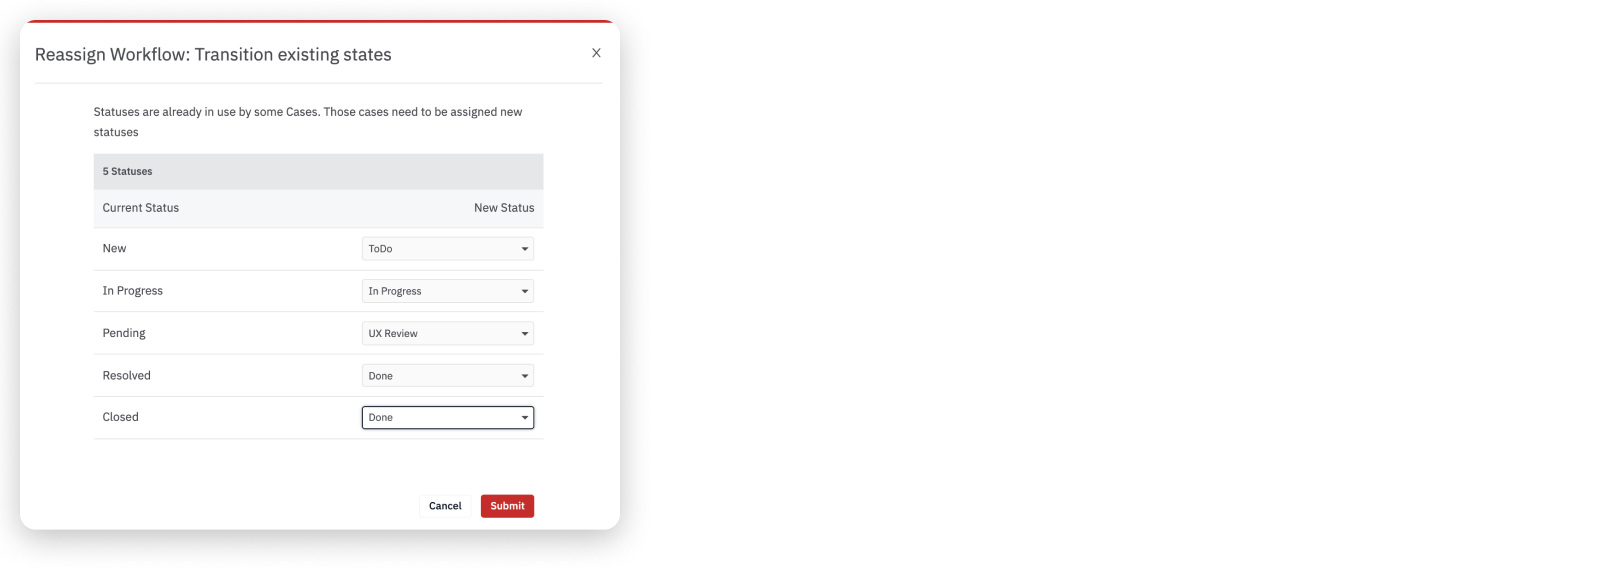
- When you select a workflow, you need to assign new statuses and click Submit.

What's Next
Updated over 2 years ago