Create a Stream
Streams automate your playbook by executing it in batches at preset intervals.
How to Create Streams in Easy Mode
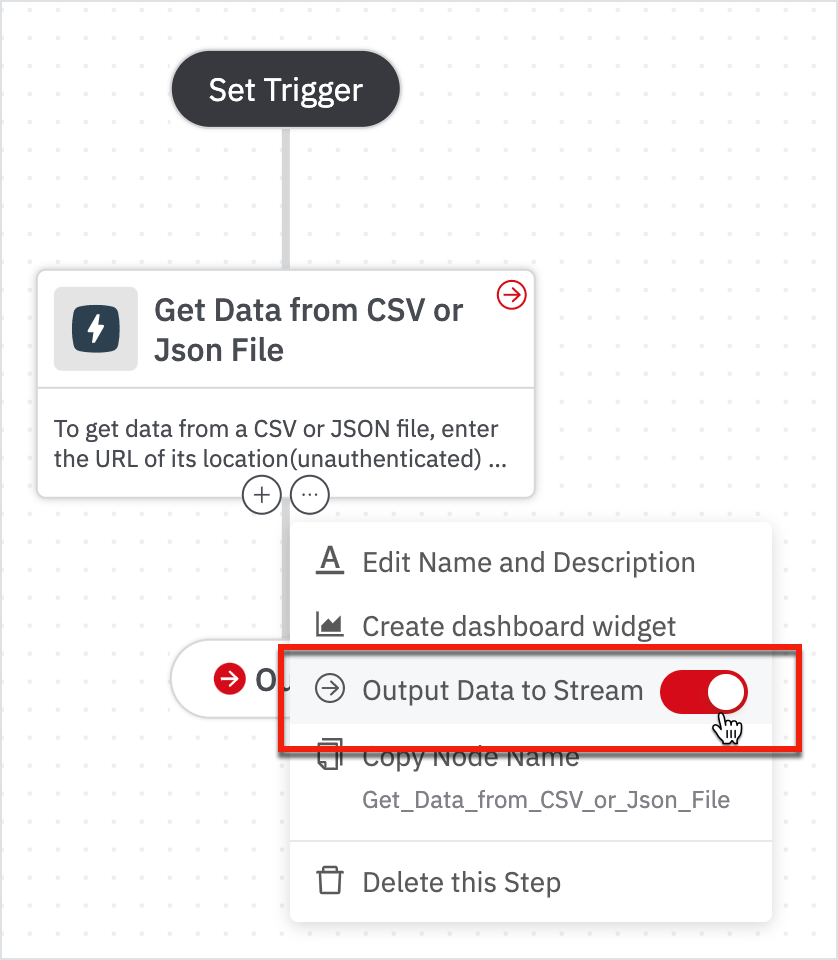
Let's assume that you already have a playbook with nodes created for which you want to schedule a stream. In your playbook, identify the step from which you want to generate output. Click the More icon (...) and select Output Data to Stream or click Set Trigger.
Note
Adding an output node is an important step to create a stream. If you haven't added an output step, the system will prompt you to select one or more steps.
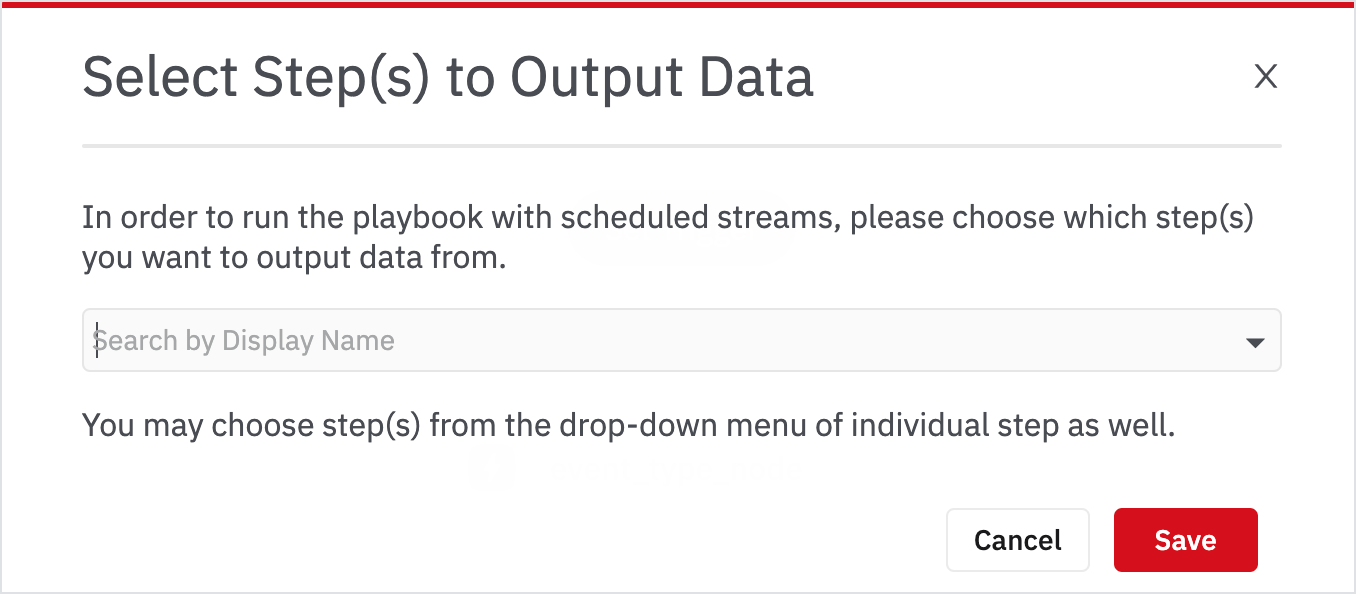
If there is no output node in the playbook, the system prompt will appear - Select Step(s) to Output Data. Enter the node name that you want to output and click Save.
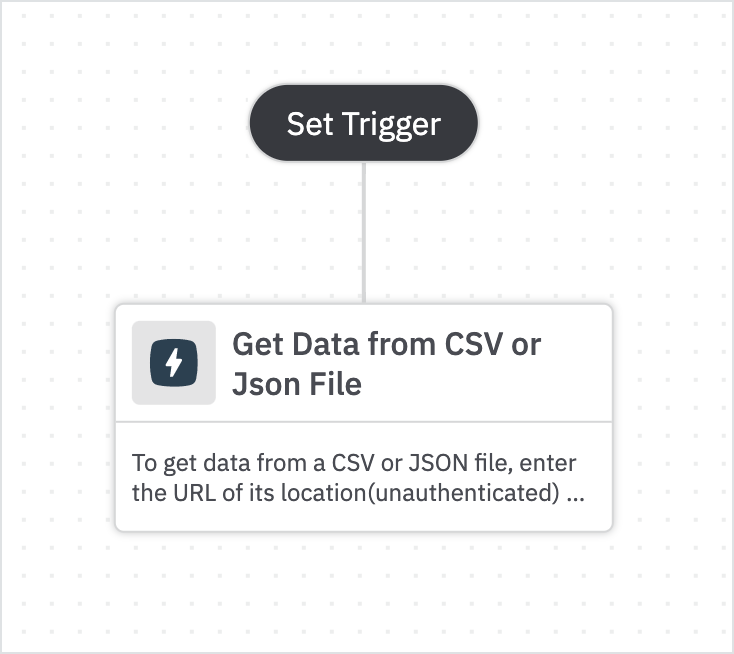
Set Trigger
Set Trigger in playbooks is used to schedule streams. Playbooks also allow you to invoke on demand streams via webhook. To schedule a stream in the playbook, you must add at least one node and mark at least one node as the output. After you schedule a stream, the batches will run automatically in the scheduled time. Go to the Streams page and click on any stream to view the batch listing information.
To set a trigger in the playbook:
- Open an already created playbook that has at least one node in it.
- Make sure to have at least one output node to create a stream. Click on the three dots on any node that you want to output your data. Enable the Output Data to Stream toggle button.
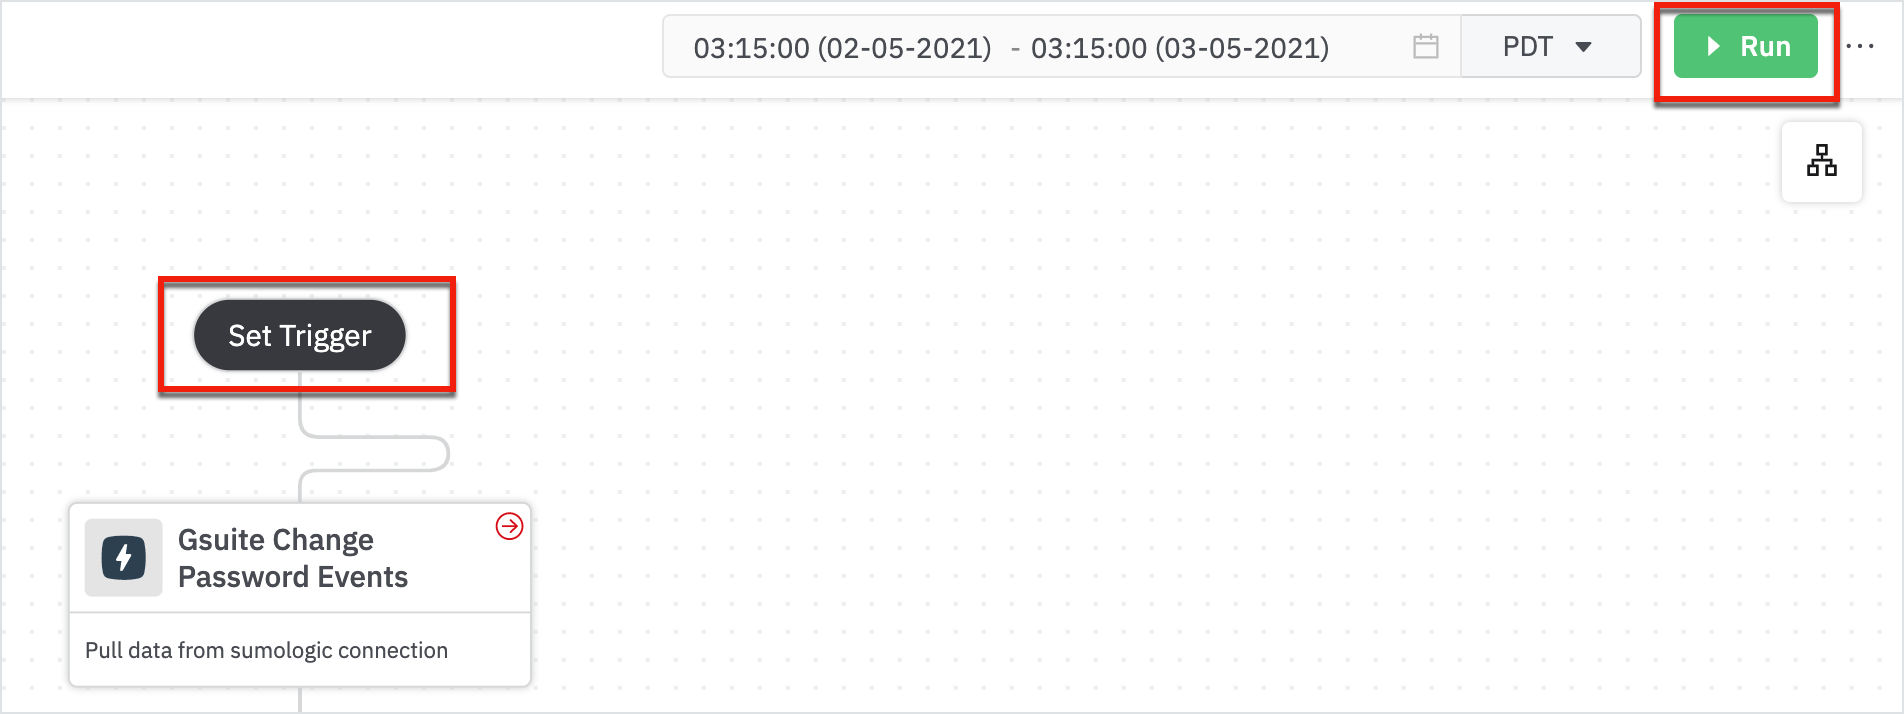
- Once you have the output node created, click on Set Trigger or Run to schedule a stream. A Set trigger as a Stream form opens up.
A Stream form opens up.
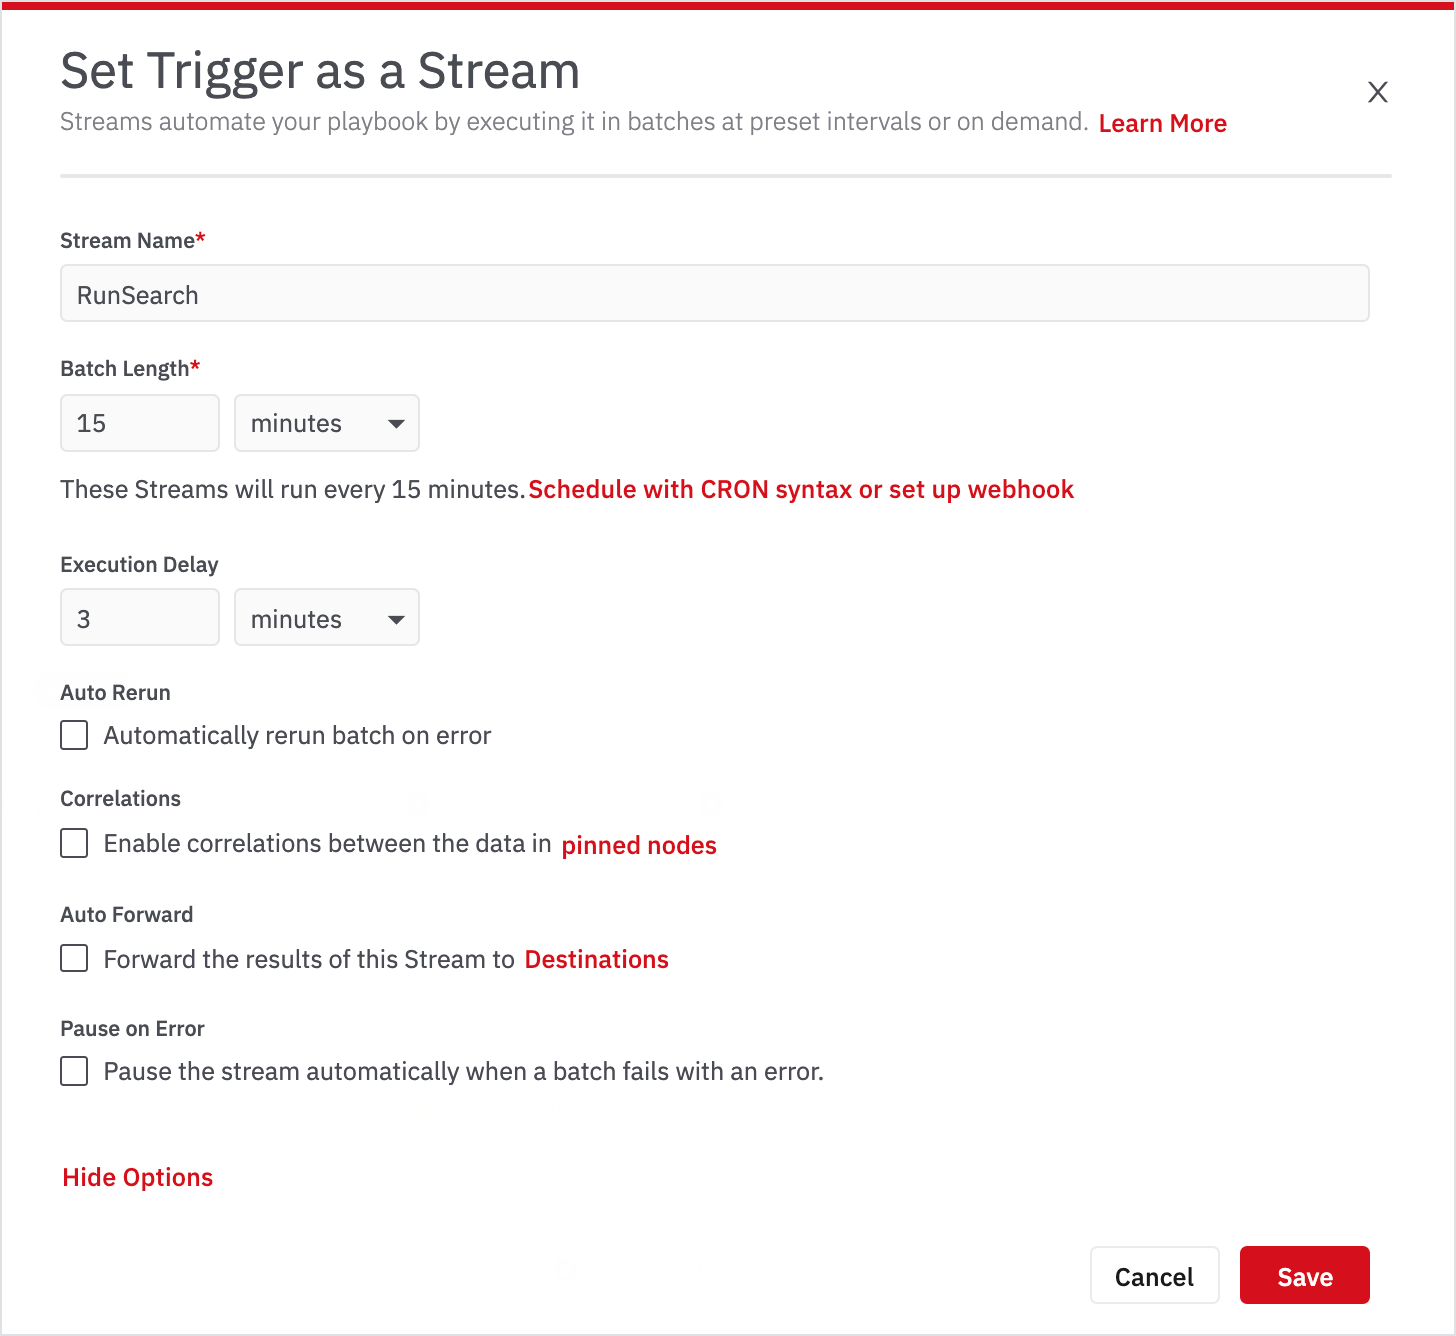
Enter the following details in the form. The specific settings depend on the options that you display and whether you're setting up a stream for one playbook or using the Schedule option on the Playbooks page to set up streams for multiple playbooks at once.
| Field Name | Description |
|---|---|
| Stream Name | Enter a name to identify the stream. |
| Batch length | Enter the time in minutes (or hours) between successive batch runs. When each batch runs, it collects the data for that interval, plus any overlap. If you selected multiple playbooks and want to specify a different batch length for each, click Customize for each playbook, select the interval for each, and click Done. |
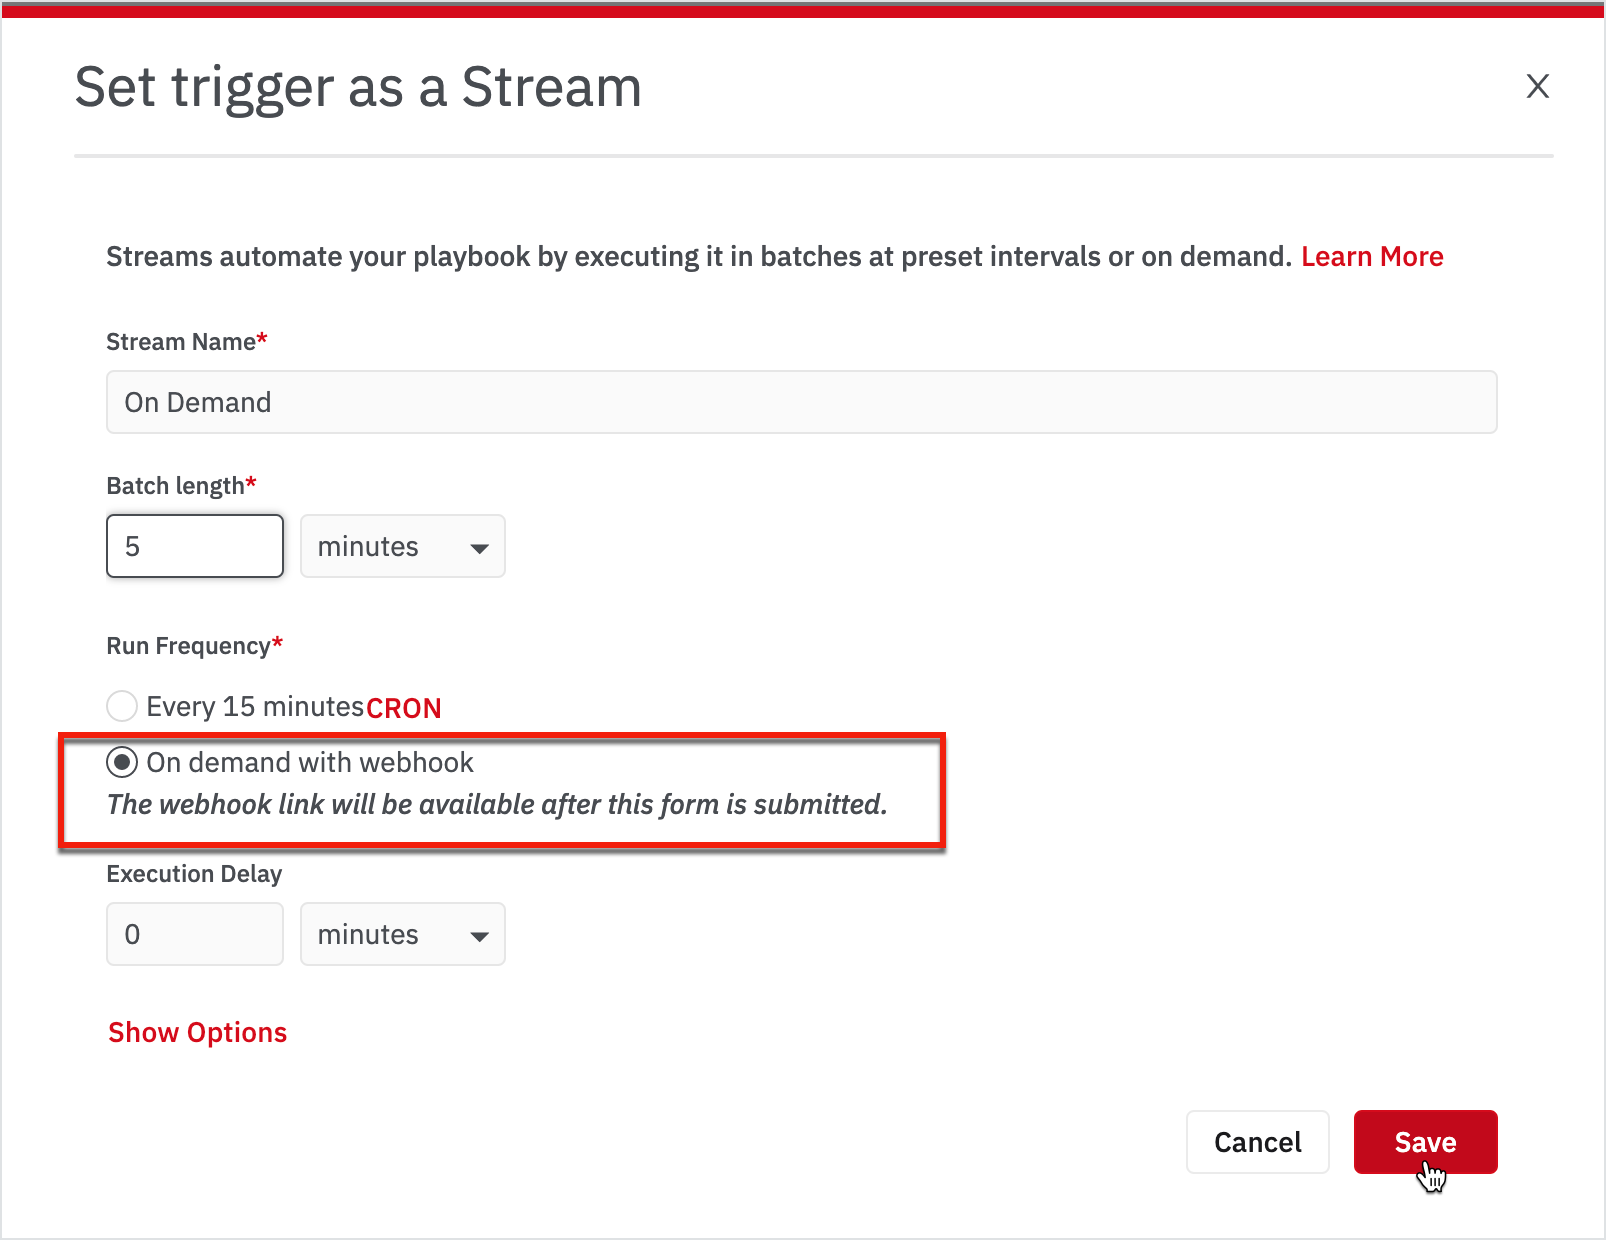
| CRON | Click CRON to specify the run schedule. - Specify the frequency with a value and time units or click CRON to specify a schedule by the time of day. For help with cron syntax, use a formatter such as crontab guru. The cron scheduling is done in the UTC timezone. Any cron schedule you specify overrides the batch length-based scheduling. To use batch length-based scheduling, make sure that the cron field is empty. - To run the stream on-demand using webhook, select On-demand with webhook. After you save the stream settings, a webhook link is provided. |
| Execution Delay | To delay the stream execution for a set interval, enter the delay interval in minutes (or hours). |
| Click Show Options to display additional settings. | Auto Rerun: Select this option to automatically rerun the batches on error. Correlations: When this option is enabled, the system computes the correlations between the data in the steps in the playbook. Correlations are useful only if you want to use the Pinning feature when inspecting the data of a batch. This option is disabled by default. Auto Forward: Turn this option on to automatically forward the events that meet the score threshold to the selected destination. Pause on Error: Select this option to pause the stream automatically when a batch fails on error. |
| When you select the Auto Forward checkbox, the following options will be displayed. Destinations | Select the destination to receive the results. |
| Score Threshold | Select the threshold for sending events based on the logic in your playbook. |
| Max Events to Forward per Batch | Enter the maximum number of events to send in each batch. This option allows you to limit the data volume to be ingested into your connection service. |
After you save the settings, a new stream will be created for the playbook node. You can also create multiple streams and on demand streams. The set trigger name will be changed to the one that is lastly created (in this case, it is On demand with Webhook) and indicates +2 streams that are created.
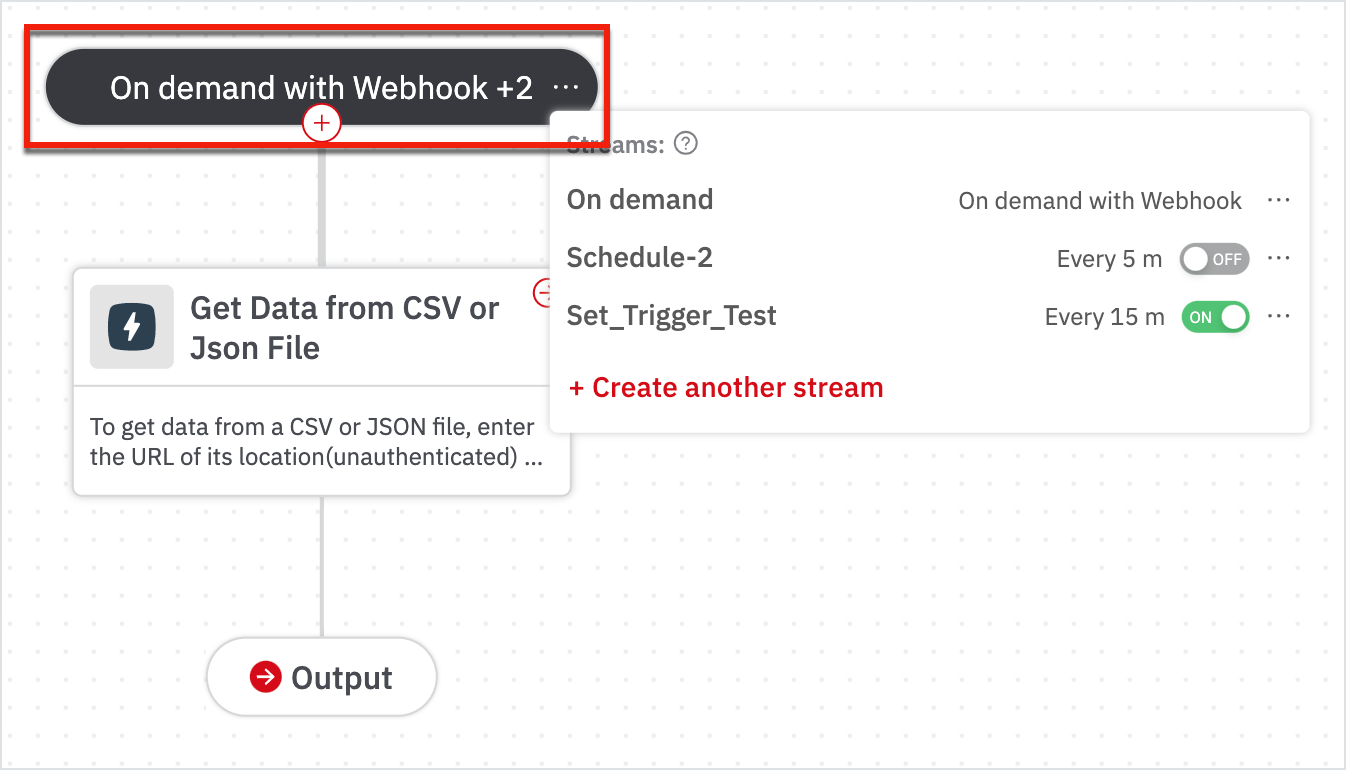
The newly created stream will be listed on the streams listing page. Go to My Library > Streams page to see a list of all the defined streams. For more information, see Manage your Streams.
Playbook allows you to create multiple streams and on demand streams. Click on the Running ( ) drop-down on the top-right corner of the playbook page to view the streams created. The number next to Running indicates the number of currently running streams.
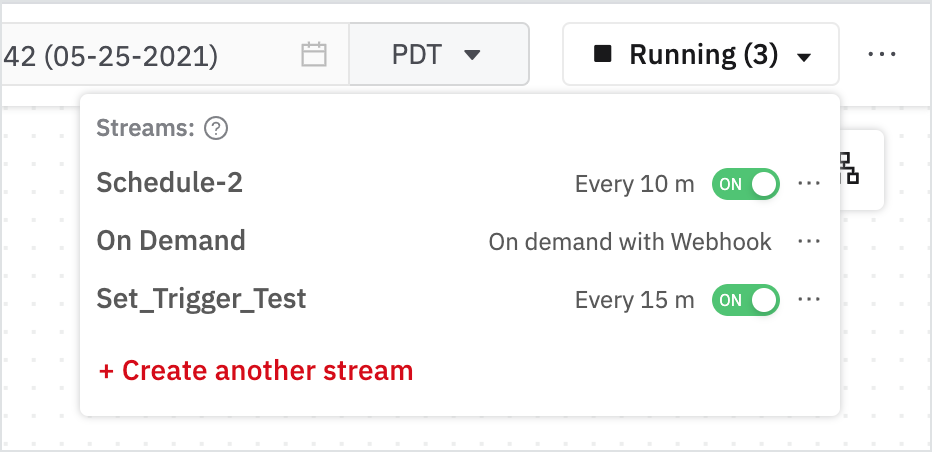
Click on the running streams on the top-right corner or on the Set Trigger to turn off any of the running streams. Click on the toggle button to turn off a stream. You can toggle again to turn on the stream at any point in time.
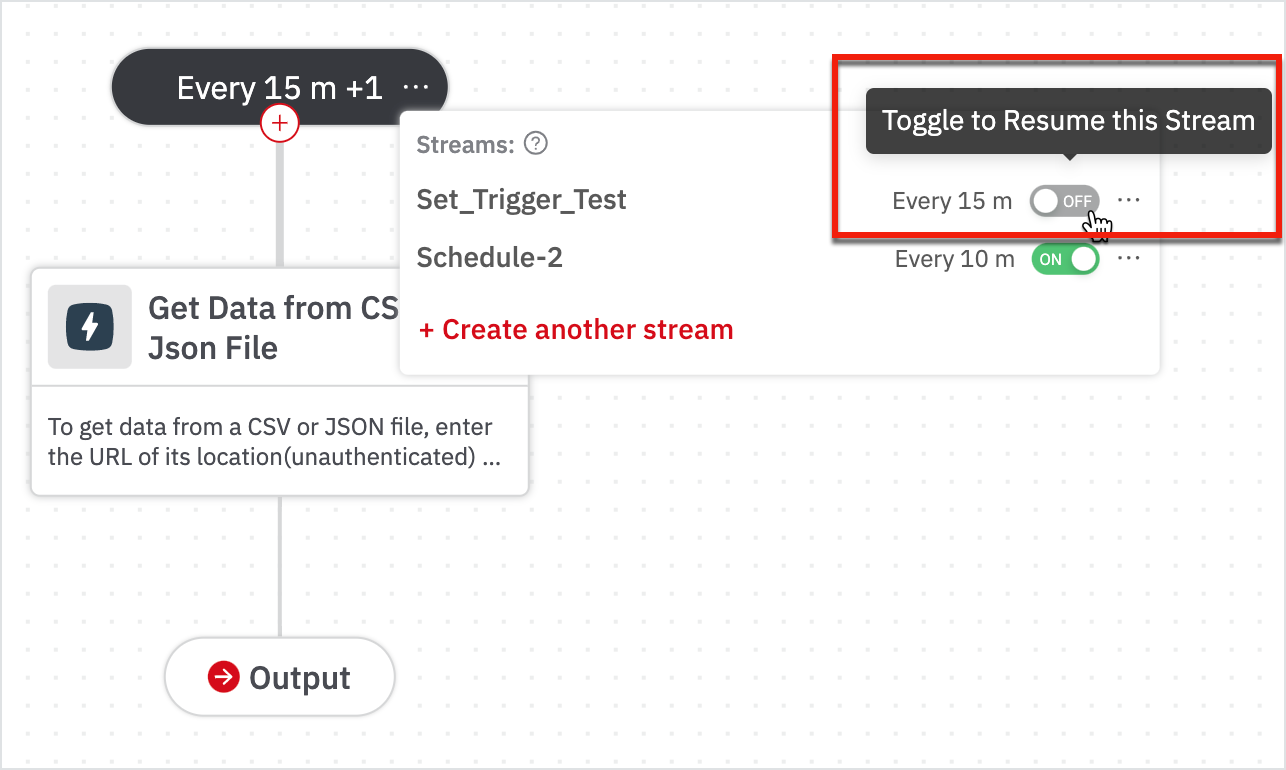
If you pause any stream, then the number of running streams will be updated accordingly. For example, in the below screenshot, there are three streams created out of which one of them is paused, therefore the number of running streams shows as 'Running (2)'.
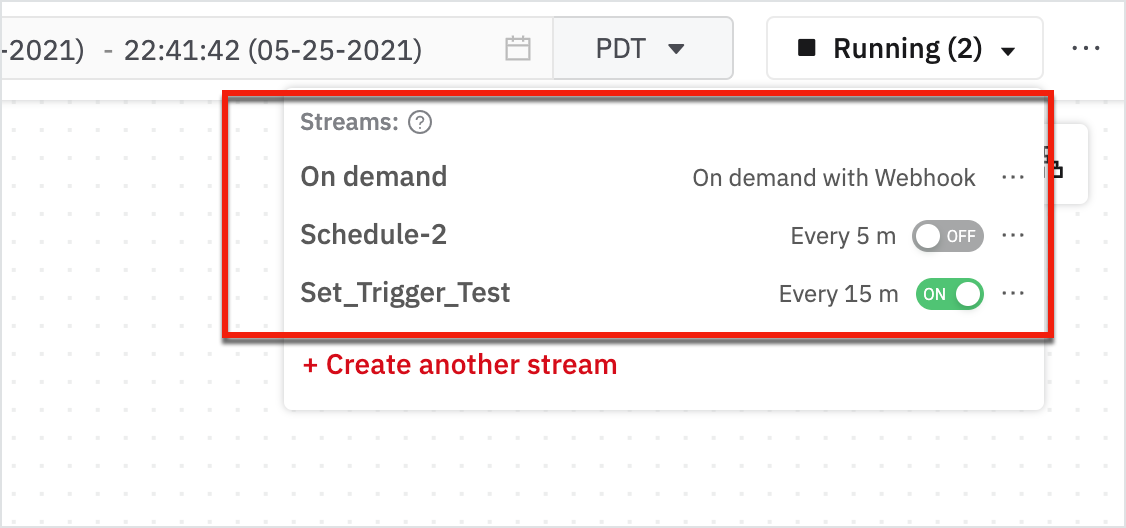
Click on any scheduled streams to view the batch details.
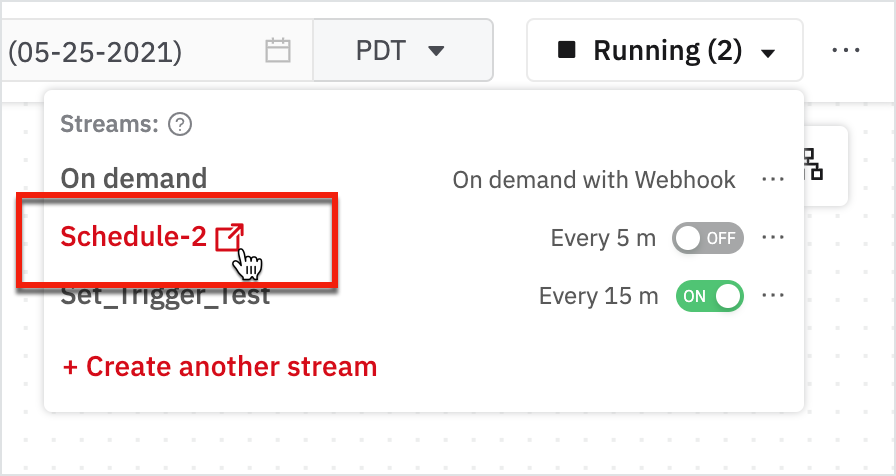
The Batch listing page opens up.

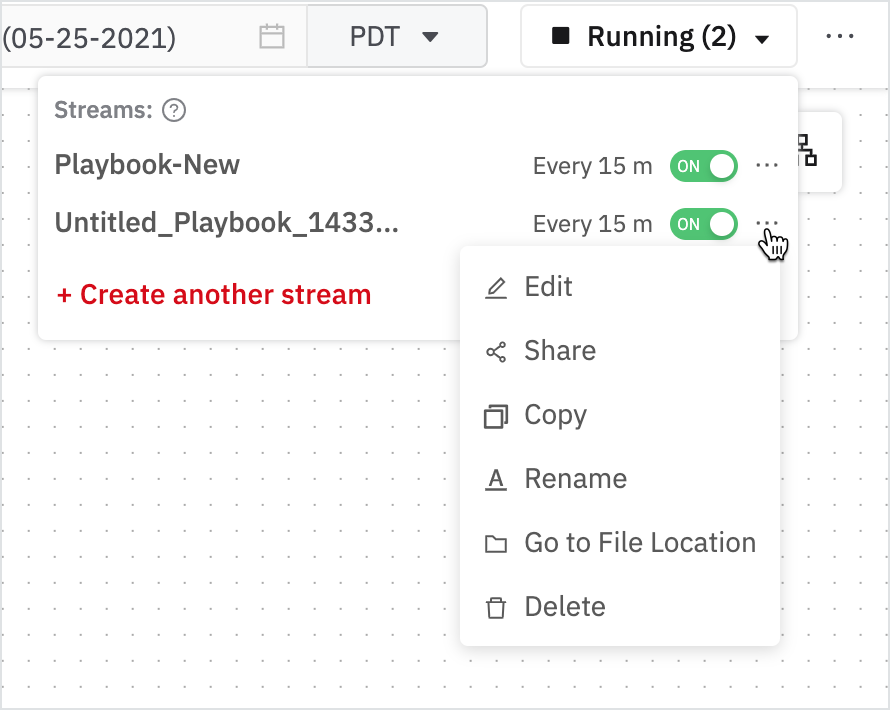
Click on the three dots to perform the actions in the drop-down for a stream. Use the toggle button to turn on and off the schedule for a stream.
To create an on demand stream, click on the Schedule with CRON syntax or set up webhook in the Set trigger as a Stream window and select the On demand with webhook option. A link will be generated after your click Save.
For more information on creating on-demand with webhook, see Create a Stream and Execute Playbooks with Webhook.
How to Create Streams in Advanced Mode
Playbooks allow you to create streams in Advanced Mode. See How to Add an Output Step
To create streams:
- Click on Streams to view the scheduled streams in the right menu bar.
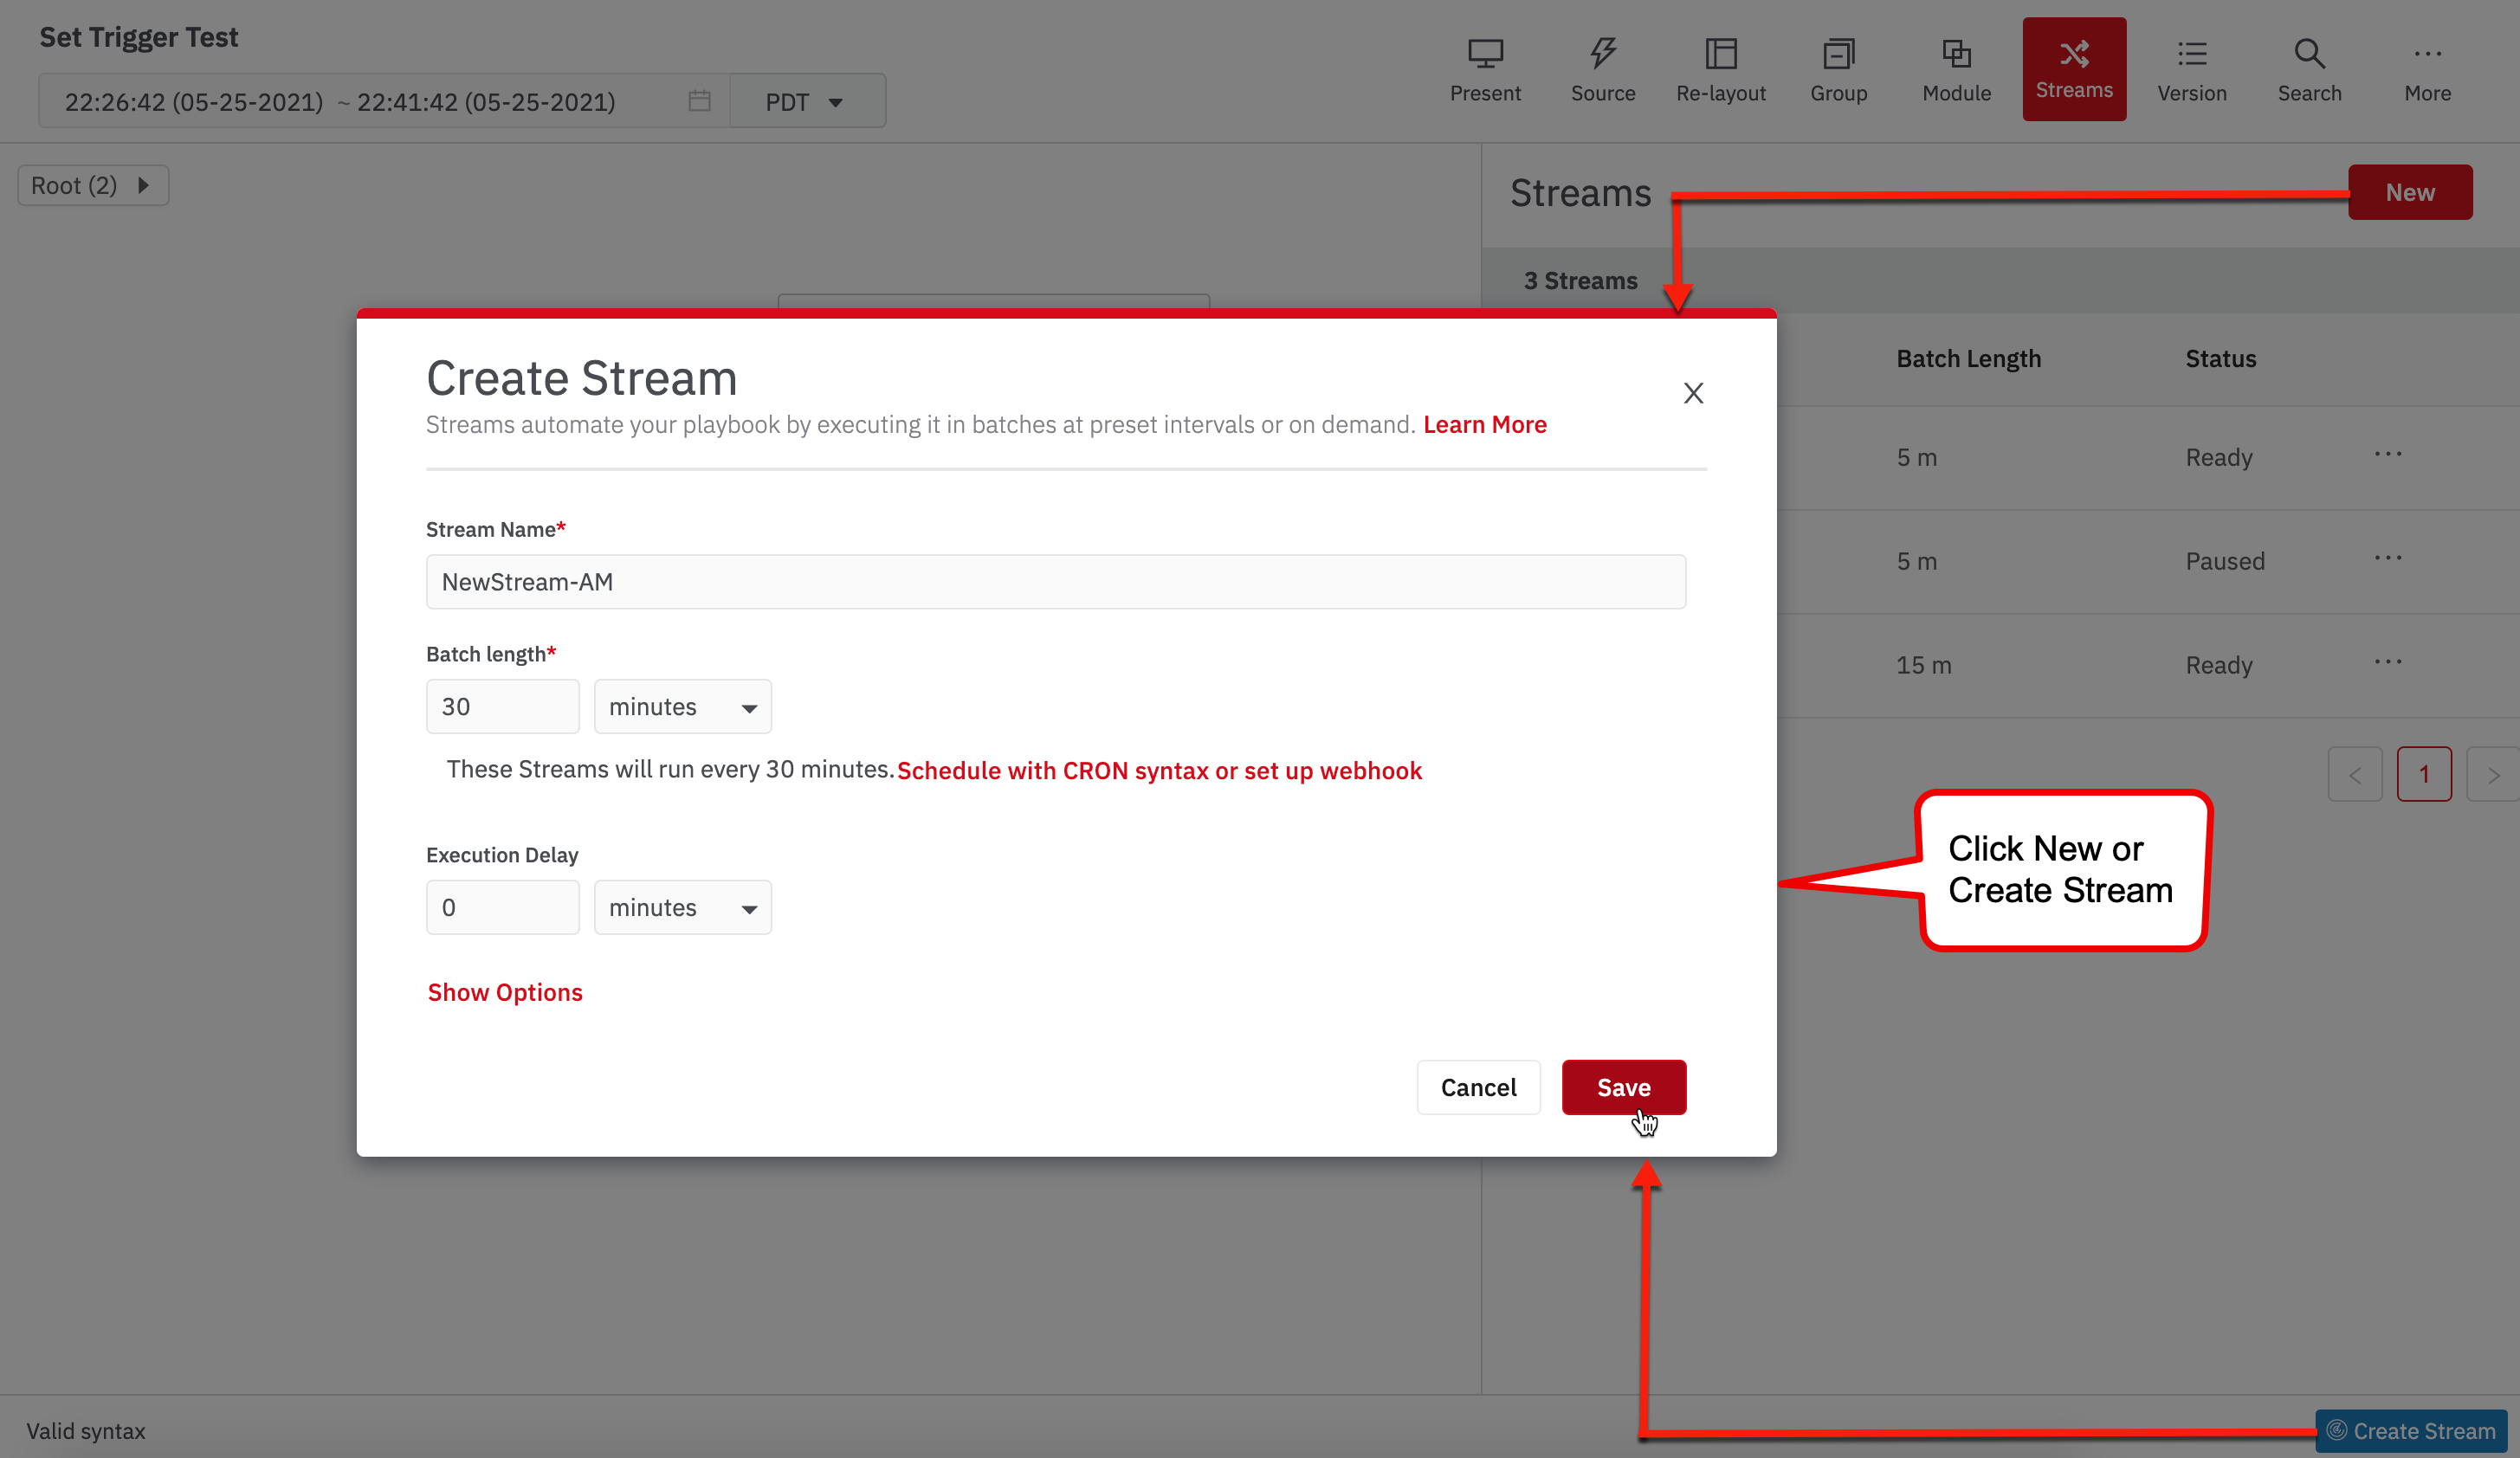
- Click New or click Create Stream at the right-bottom of the page.
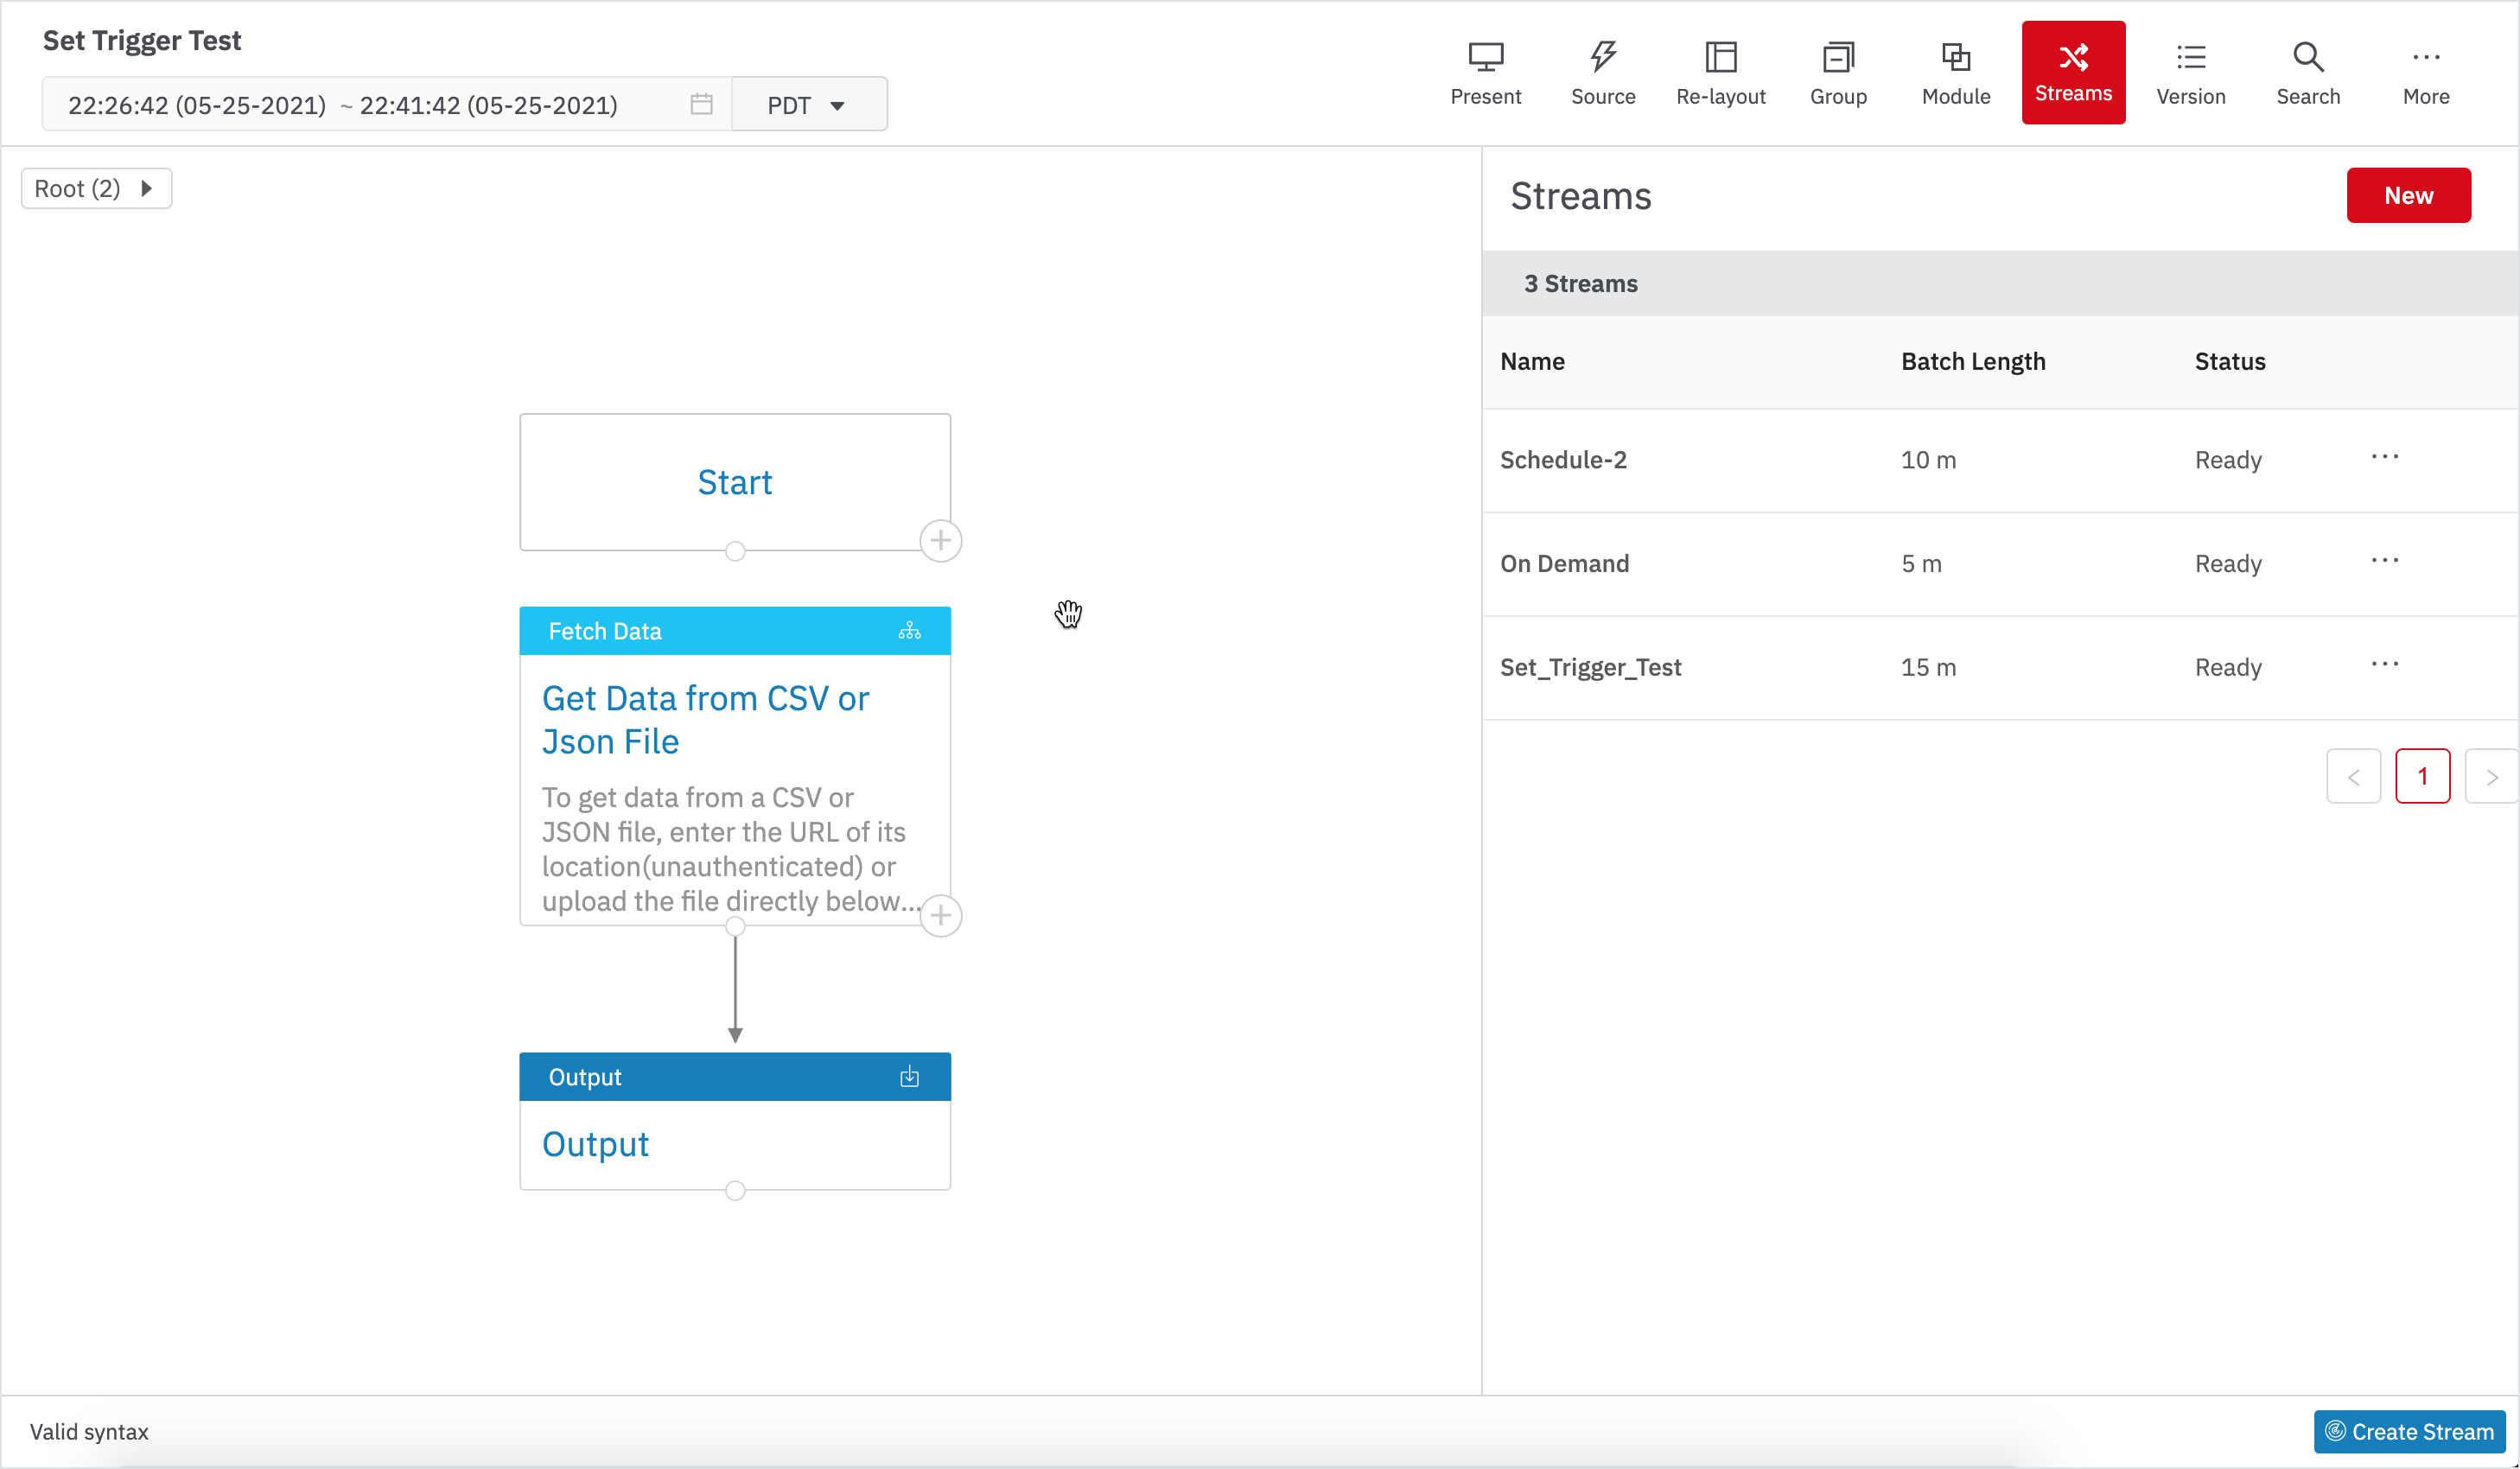
A Create Stream form opens up (similar to Easy Mode). Enter the name and batch length details and click Save to create a stream in Advanced Mode. Refresh the page to view the newly created stream in the stream list.
Auto Rerun
Select this option to schedule an automatic rerun of the batches on error. By default, the max rerun is set as 3. You can choose to increase or decrease the number of reruns as needed.
Note
By default, the wait time to rerun the batch is 4 minutes.
Example: In case of batch error, you can choose to schedule a rerun of the batch. Before the batch runs, the batch will wait for 4 minutes before executing the first automatic rerun, then the batch will again wait for 4 minutes and then rerun the second one and it continues until the number of reruns is set.
Pause on Error
Selecting this option automatically pauses the stream when a batch fails on an error and the status of the stream will change to Auto-paused. You can select the stream and resume at any point in time by clicking on Resume on the streams page.
Updated over 2 years ago