Use Okta SSO to Authenticate Access to LogicHub
LogicHub supports Okta single sign-on to authenticate users for access to the LogicHub UI.
To set up Okta SSO:
- Go to Settings > User Management from the left navigation.
- Click on the Single Sign ON tab.
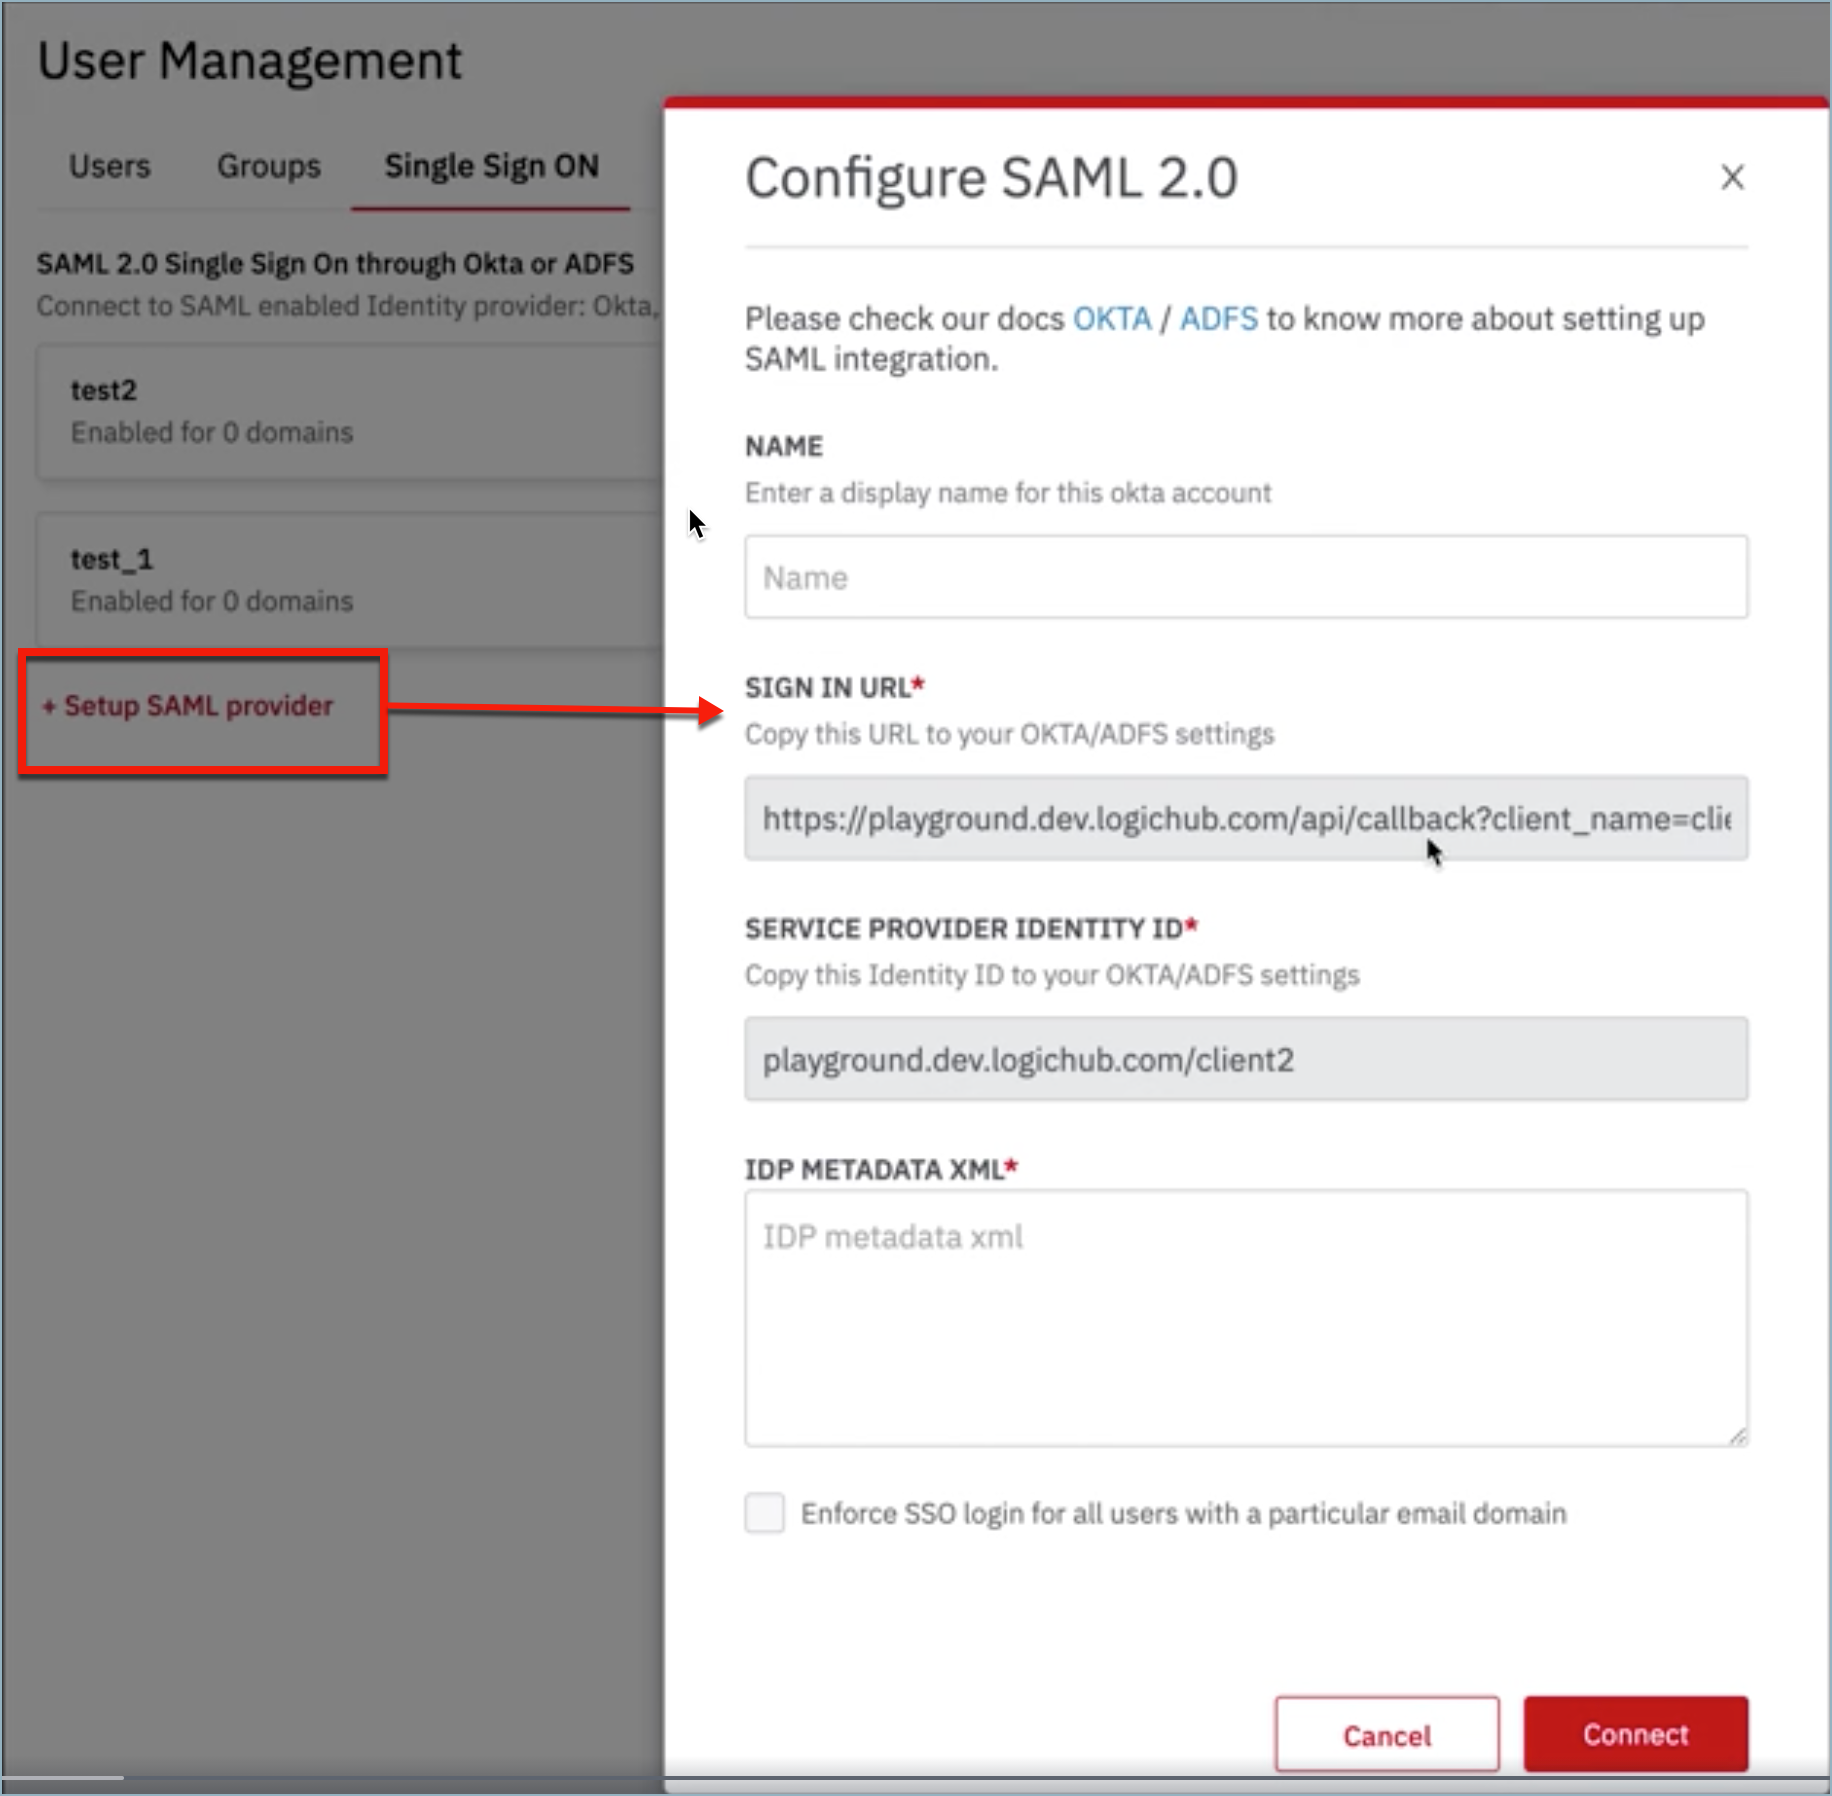
- Click New SAML 2.0 provider.
- The page that opens shows the LogicHub URL for the SSO.
- Use this URL when setting up the connection to LogicHub in Okta. The page also includes an area to paste in the XML IDP metadata from Okta.
- Enter the details in the configure SAML form to identify the Okta account.
Important
Once you have this LogicHub Configure window that has the Sign In URL and Servicer Provider ID, keep this ready for use on the Okta page.
-
Go to Okta to get the Identity Provider Metadata XML.
-
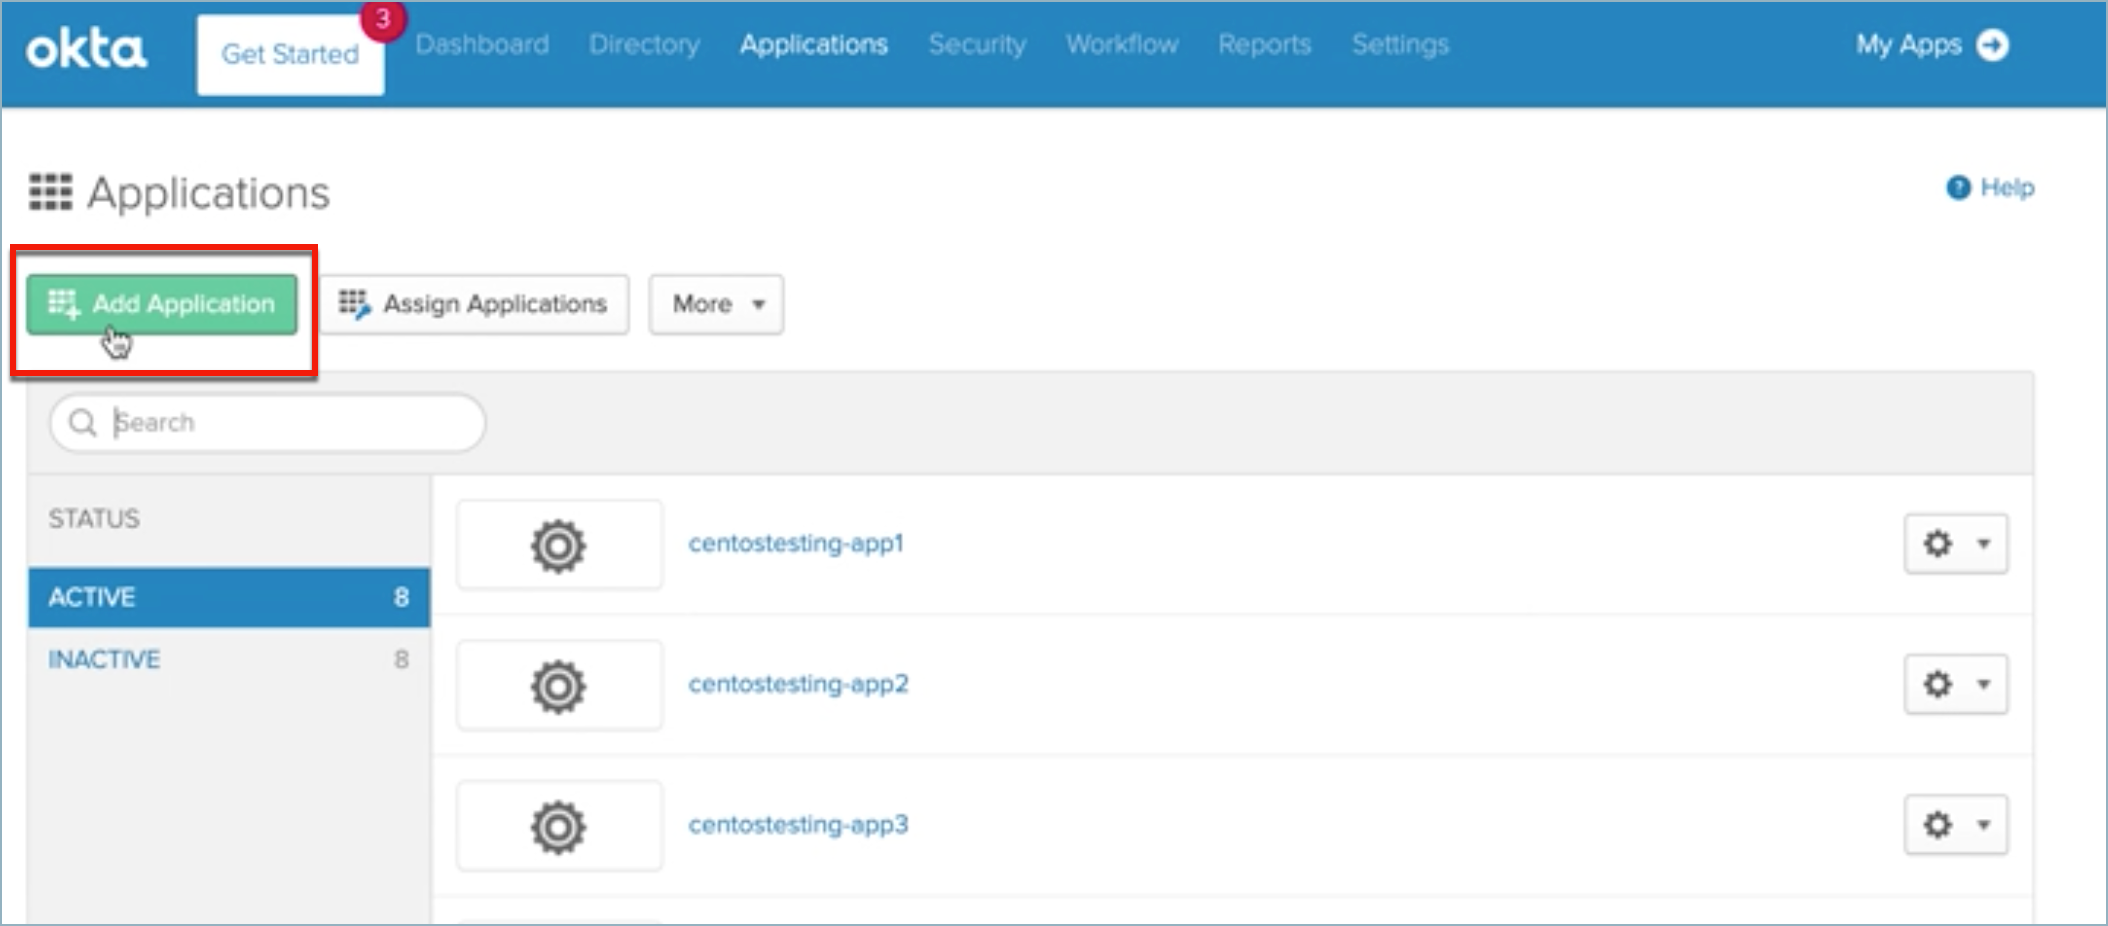
Click on Add Application.
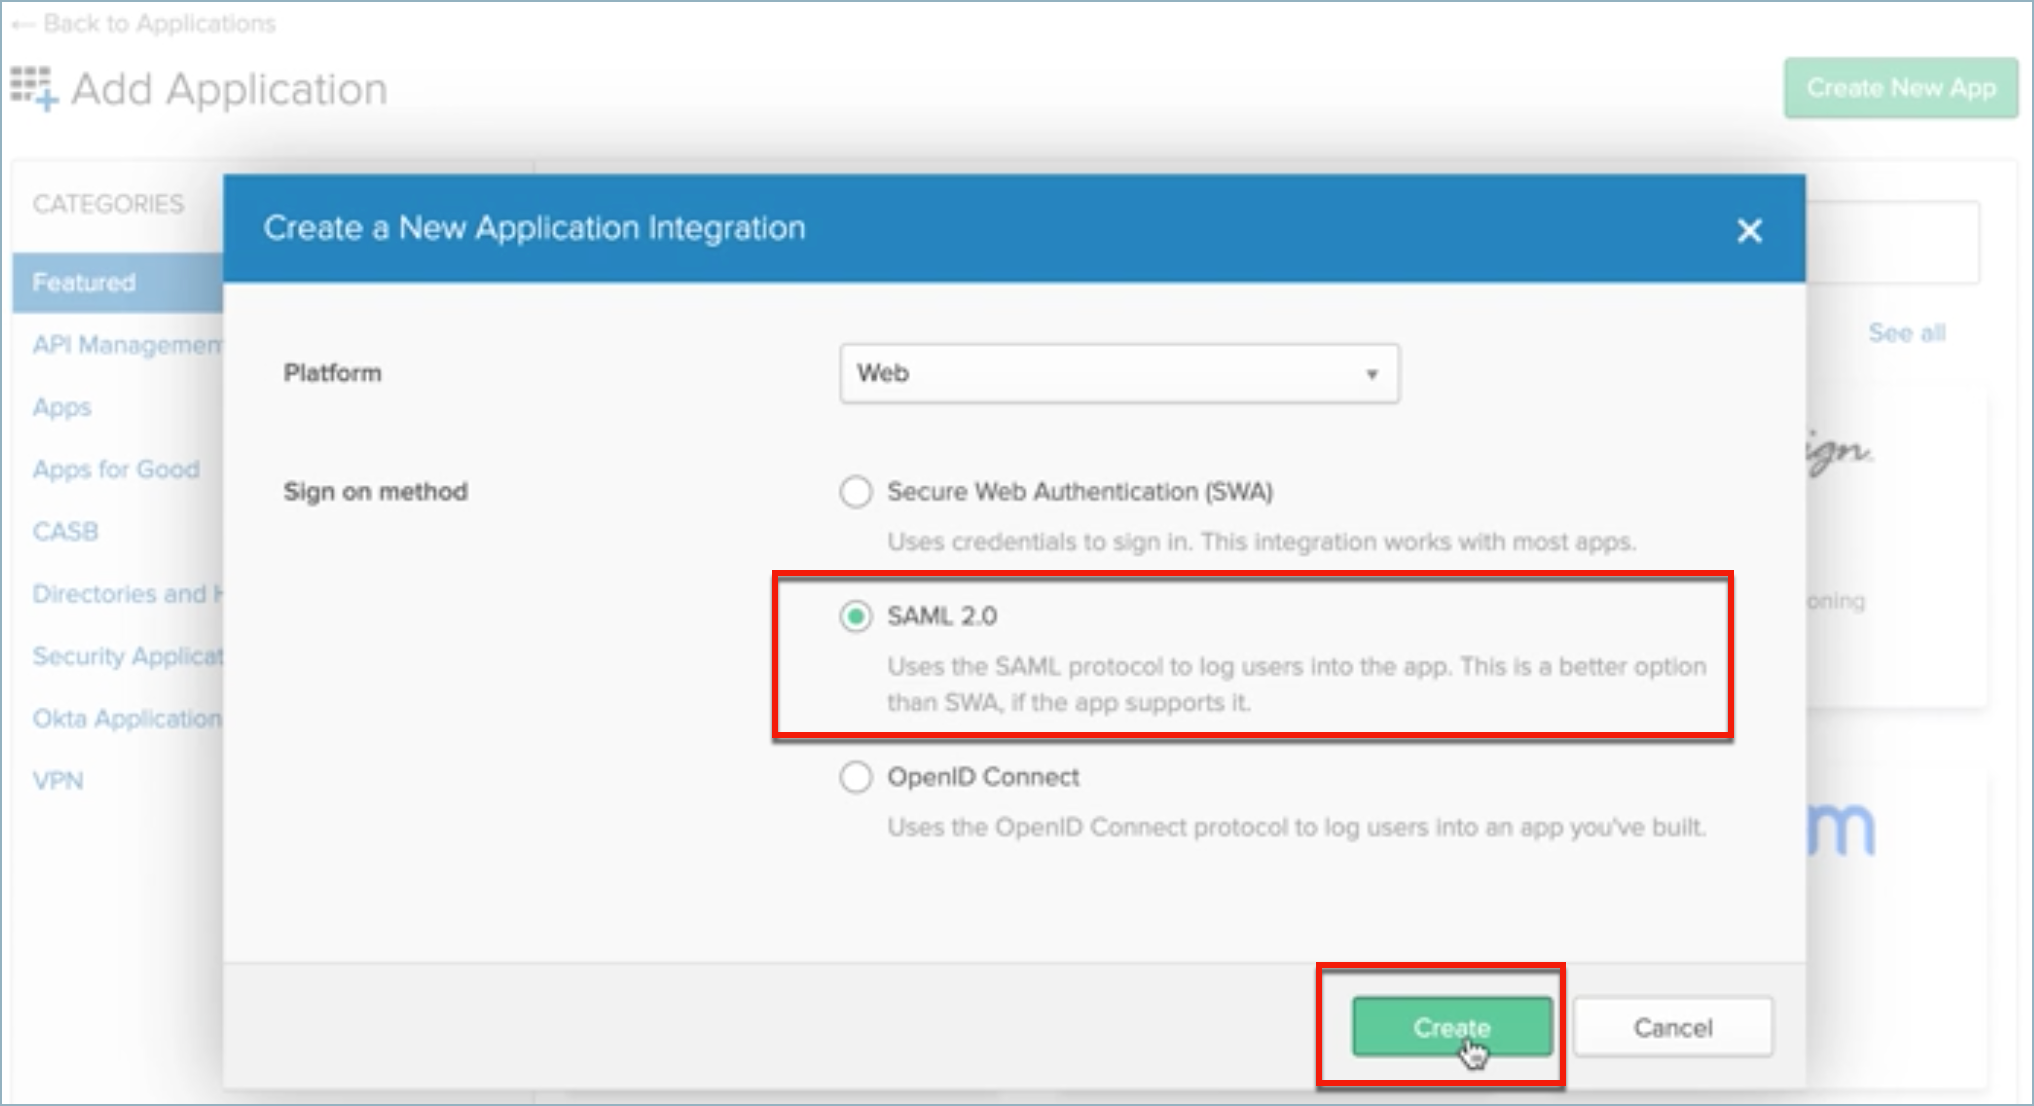
- Select SAML 2.0 and click Create.
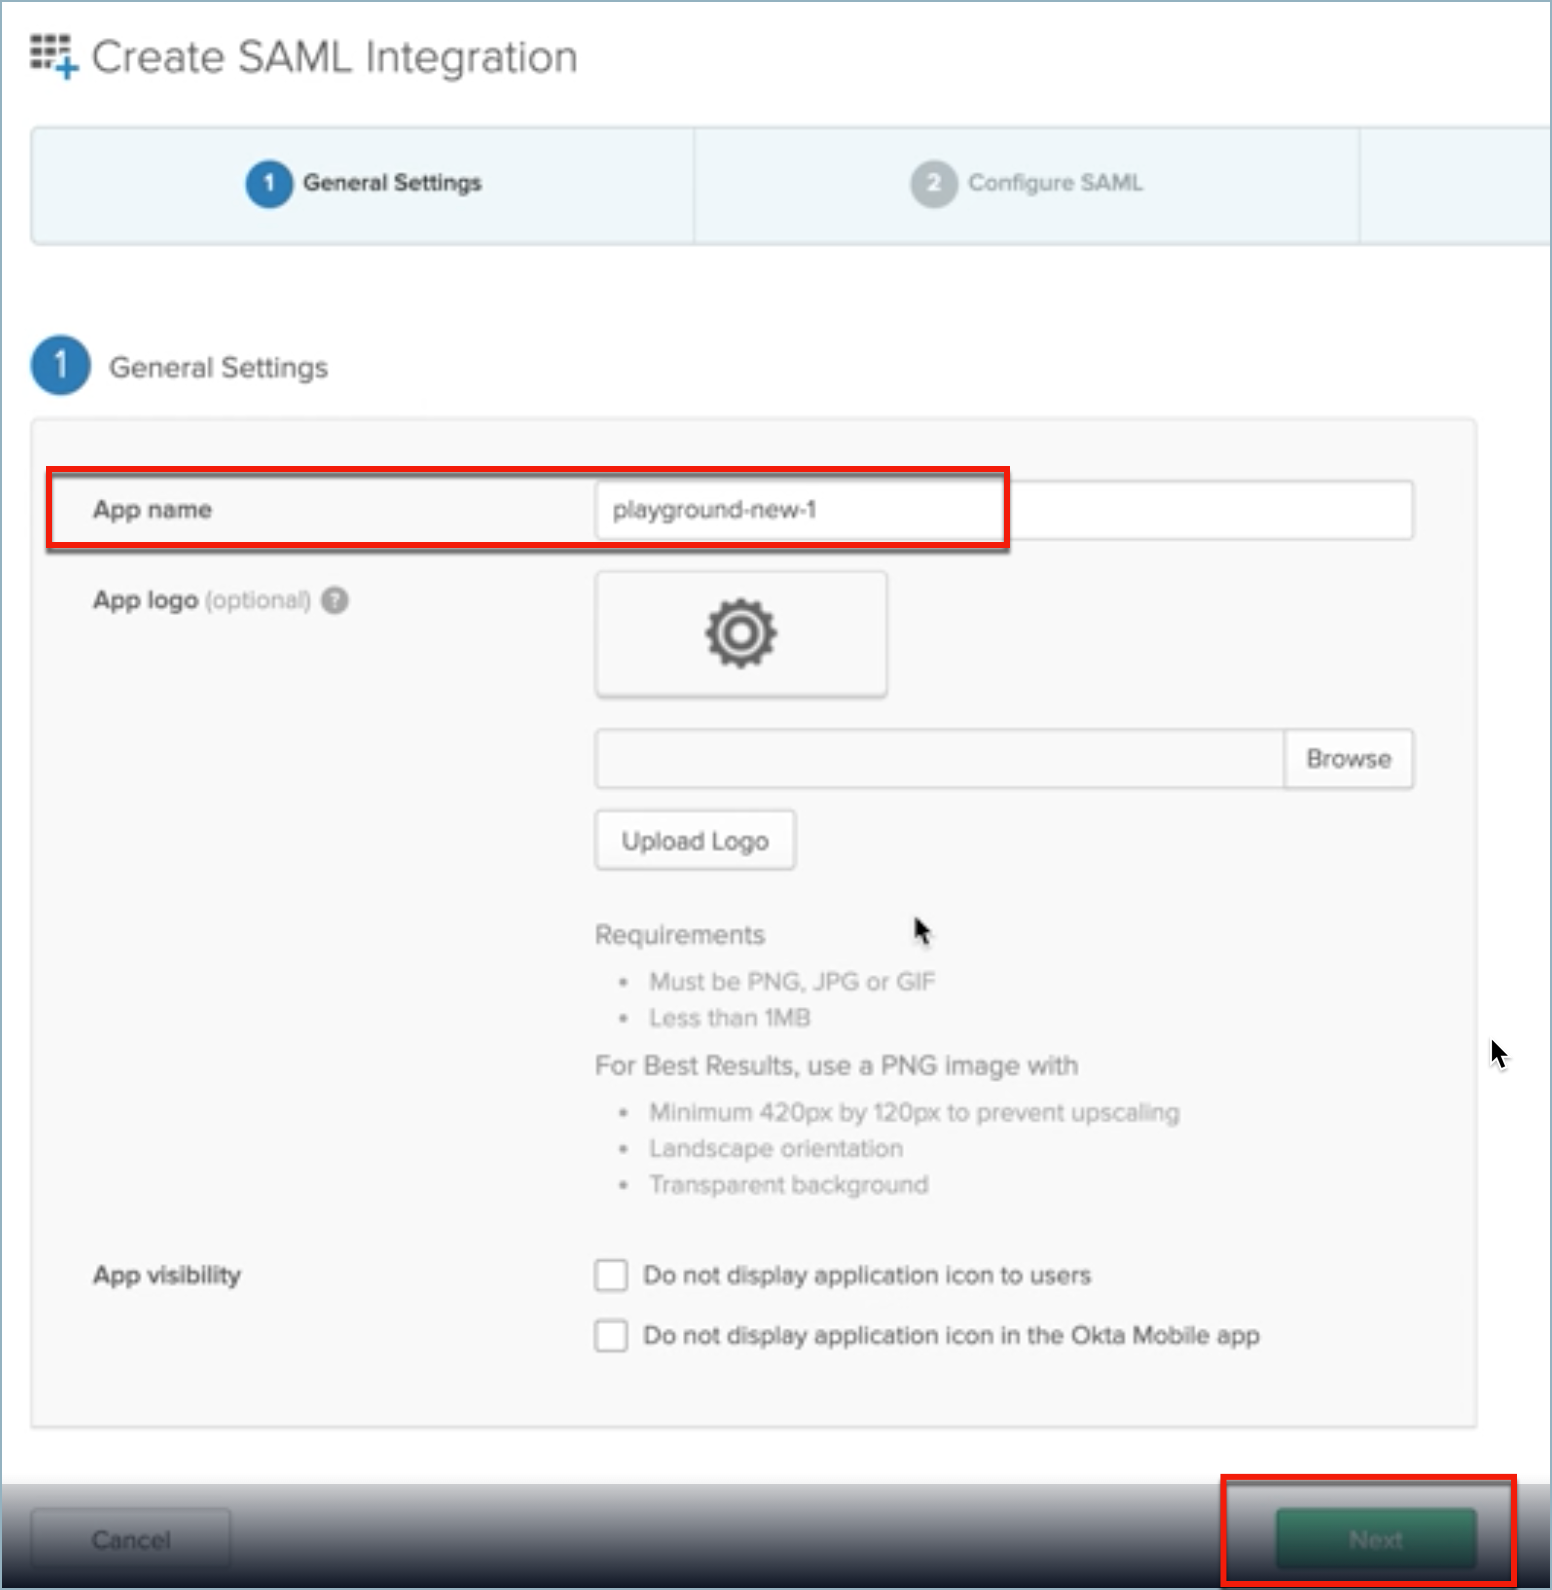
- The Create SAML Integration page opens up. Enter the App name and click Next.
-
On the SAML Settings page, paste the Sign In URL from LogicHub Configure window into Single sign on URL and Default Relay State
-
On the SAML Settings page, paste the Service Provider Identity ID from LogicHub Configure window into Audience URI (SP Entity ID).
-
Click Next.
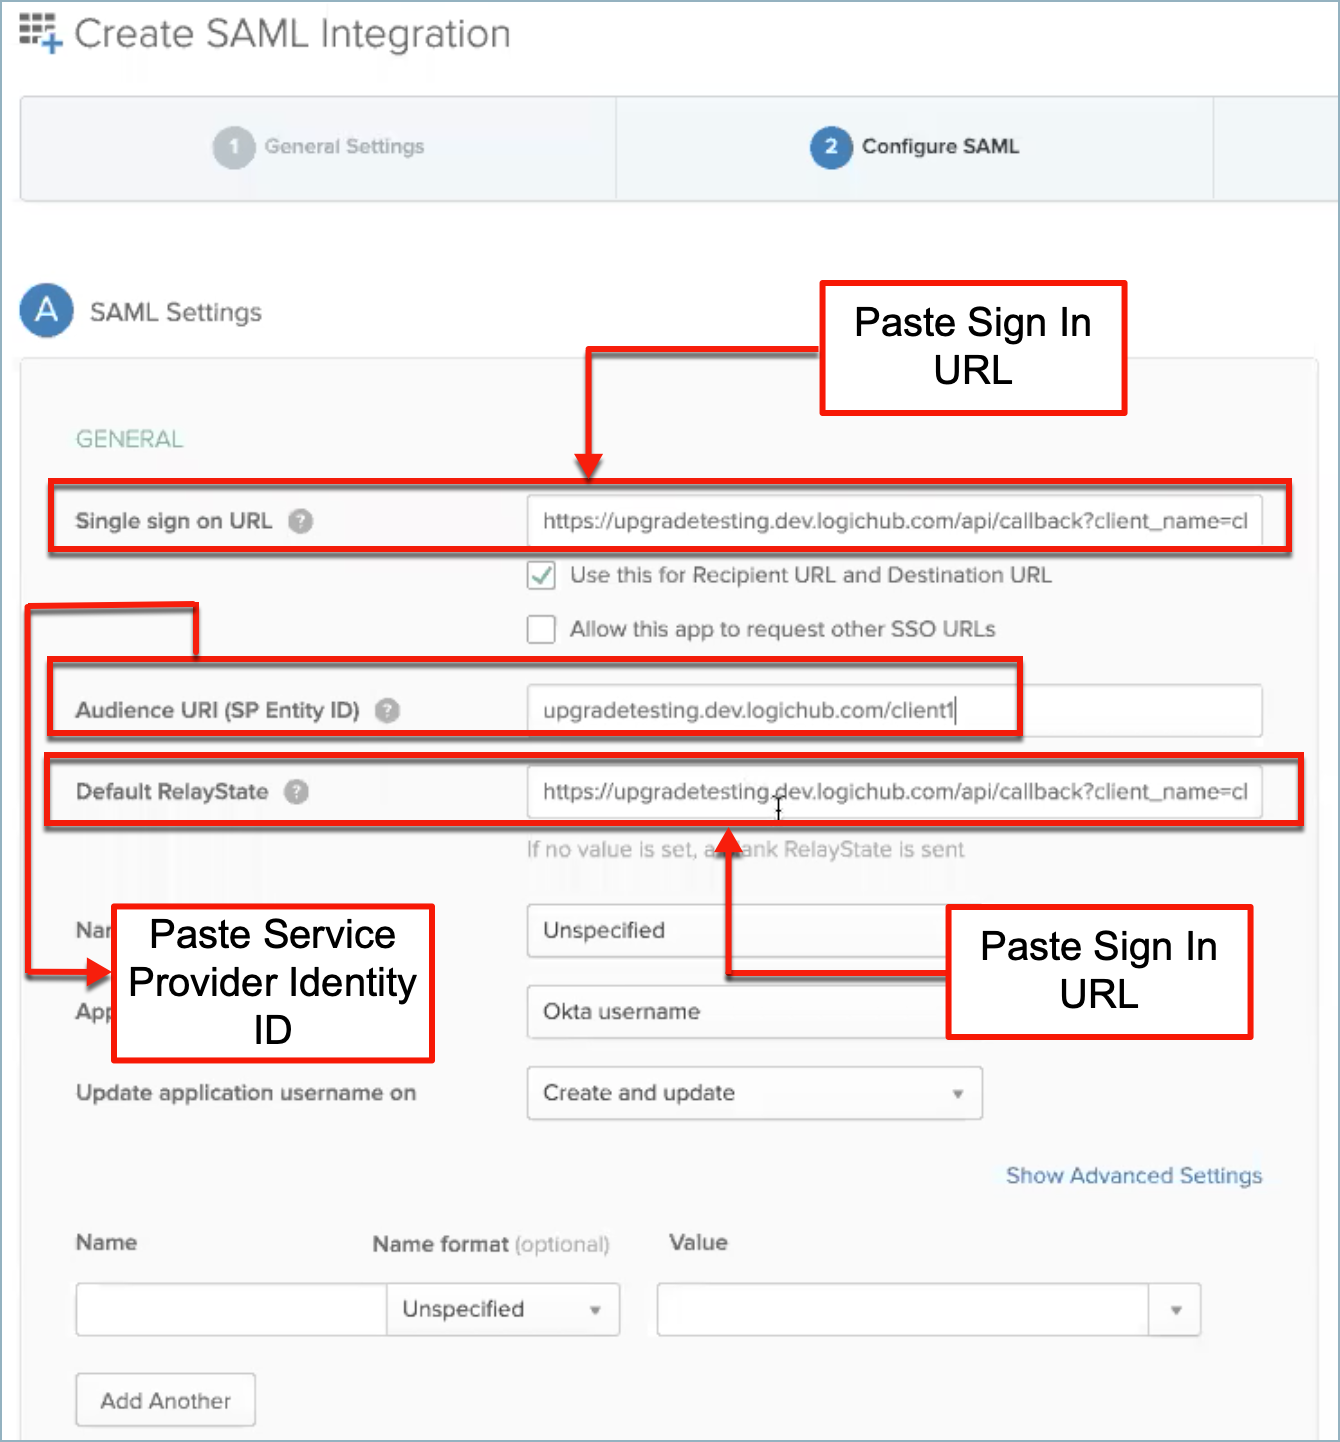
- After you click Next, on the next setting page, select I'm a software vendor. I'd like to integrate my app with Okta and click Finish.
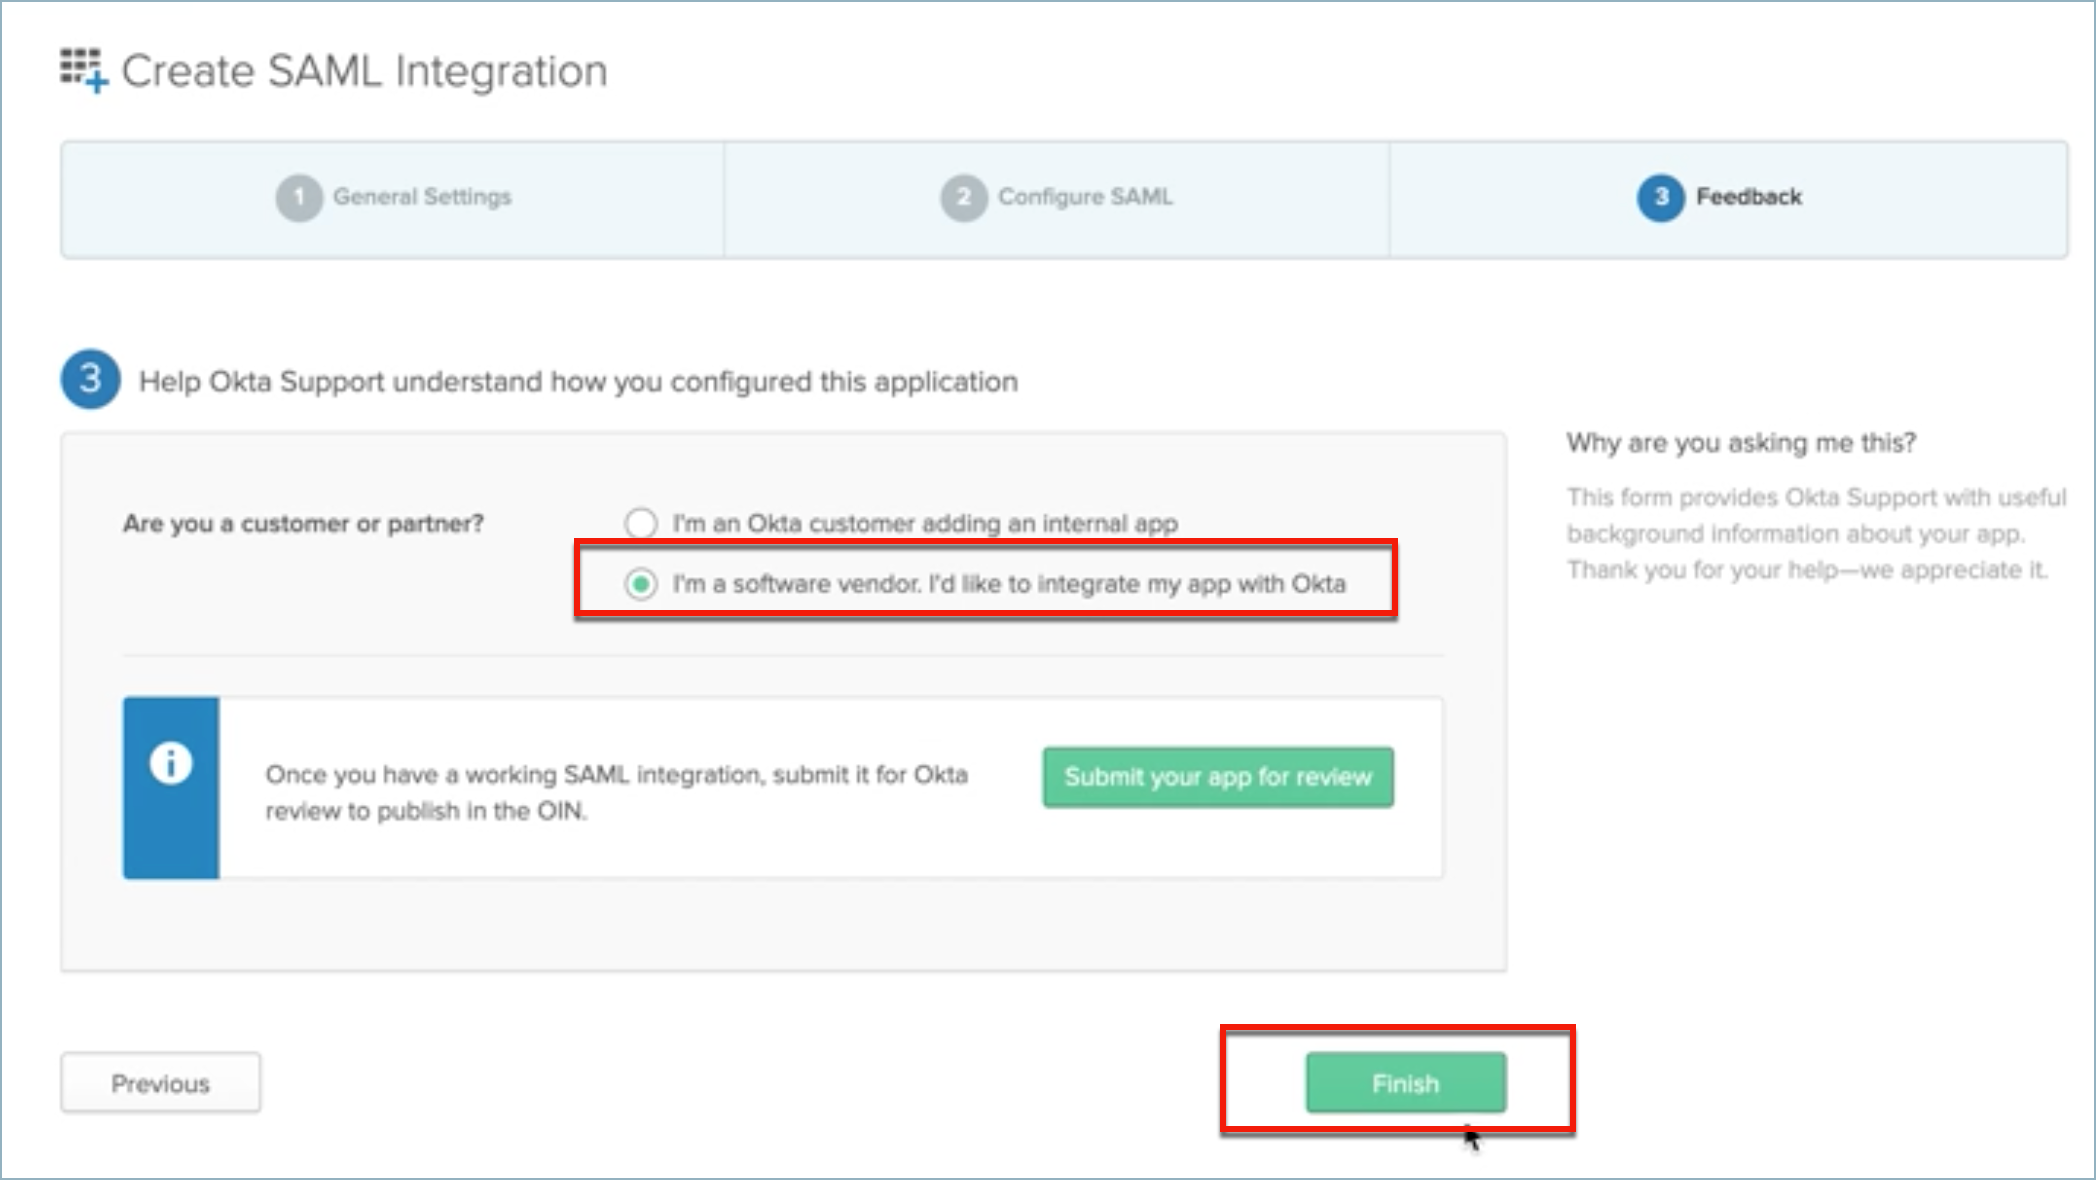
- On the Settings page, click on View Setup Instructions to get the certificate ID.
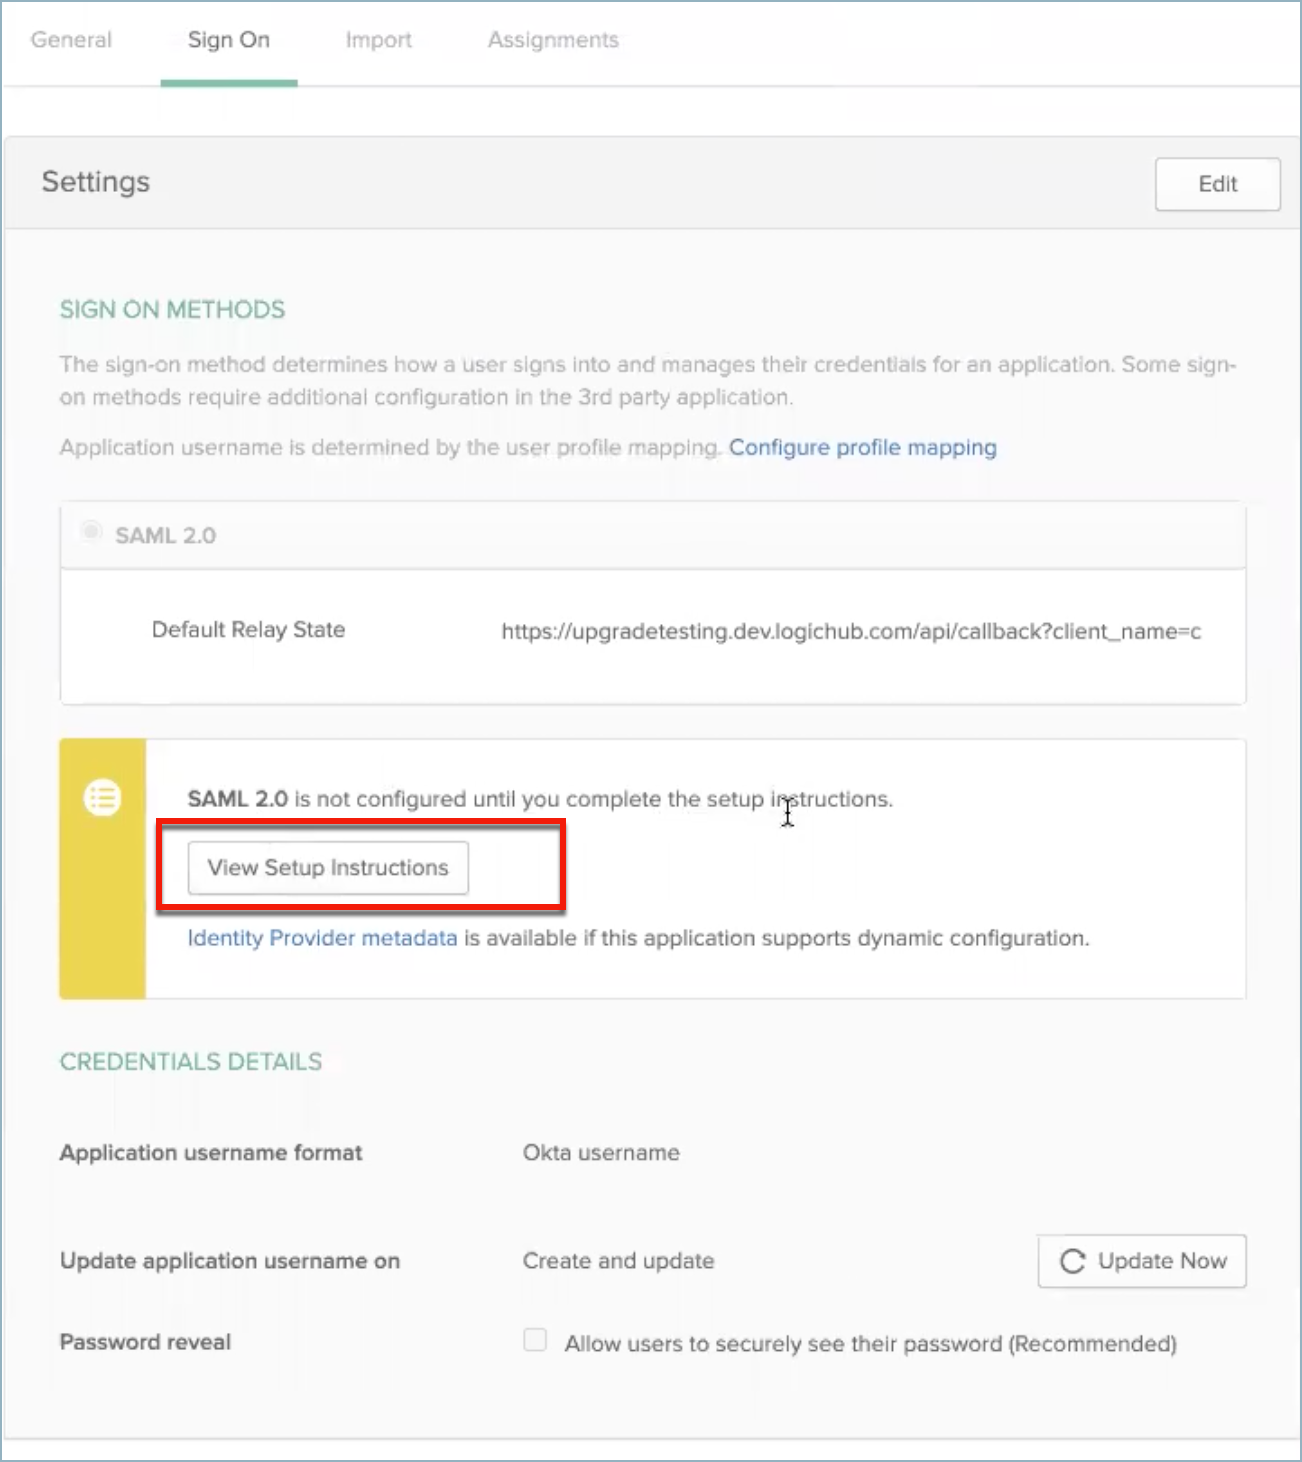
- The instruction page opens up that contains the IDP Metadata. Copy the metadata to use it in the LogicHub Configure window.
- Go back to the LogicHub Configure window and paste the metadata in the IDP Metadata XML field and enter a display name for the Okta account, click Save.
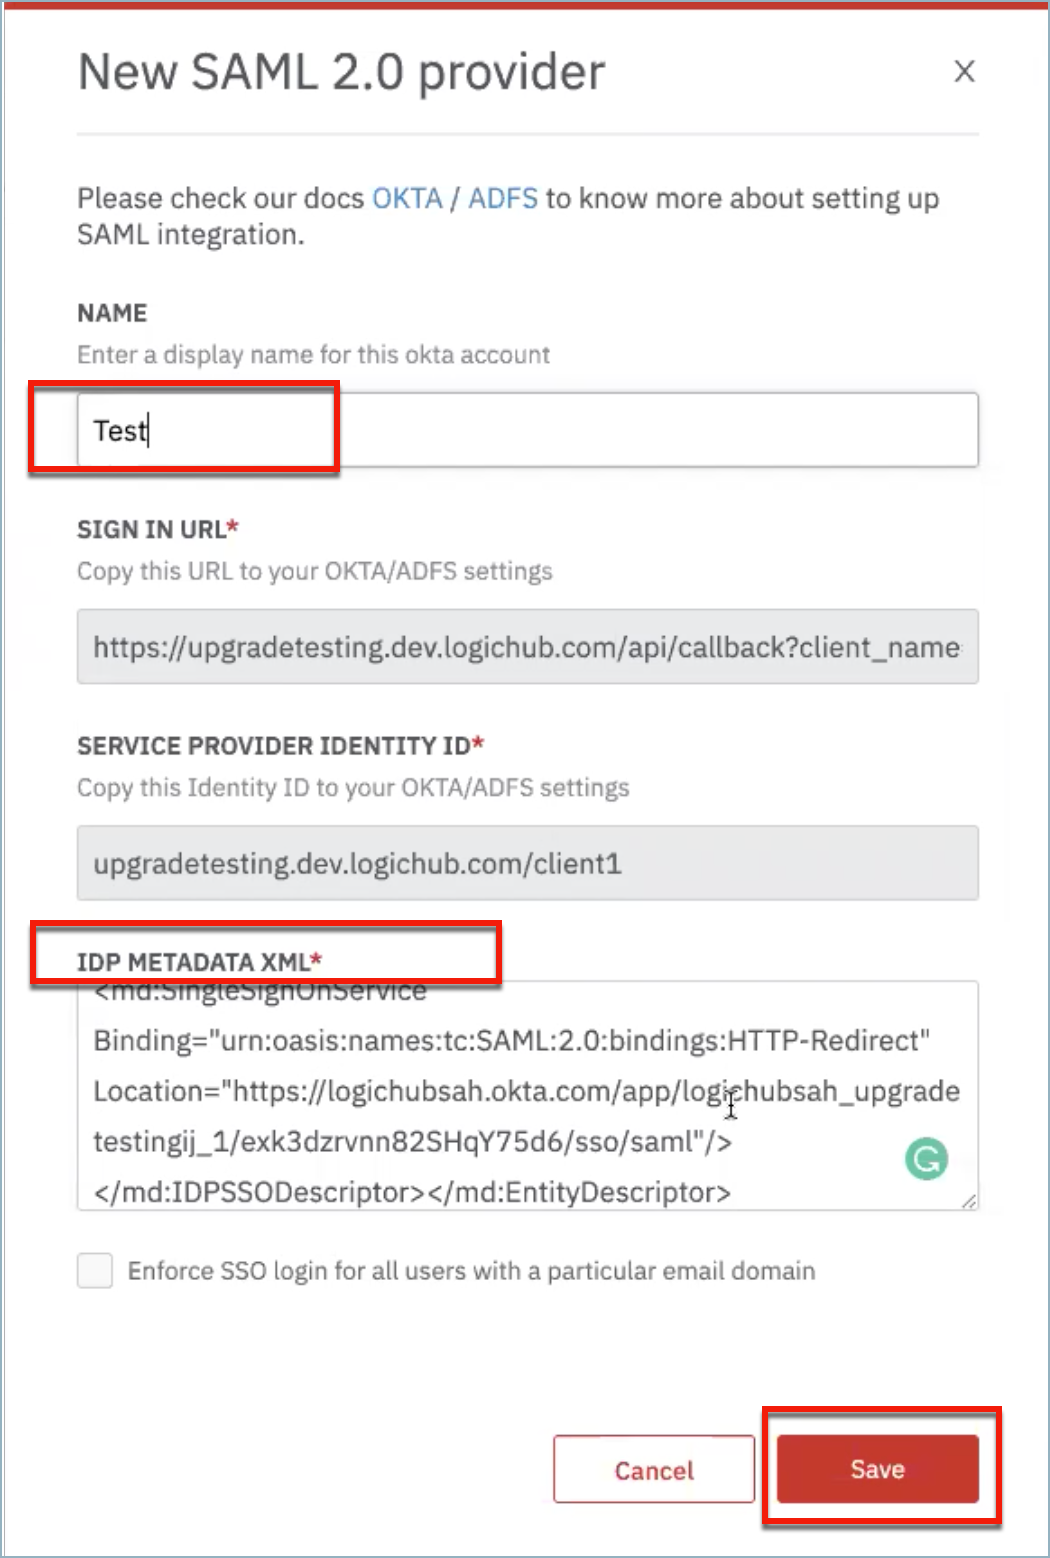
- After you click Save, the SAML will be successfully set up. You now have to connect the SAML to Okta; to do so, click on the Edit icon on the newly set up SAML and copy the Sign In URL and Service Provider Identity ID.
Attention
Your SAML Integration is set up successfully.
To view the newly set up SAML Integration (authentication type):
- Navigate to Settings > Users. The User Management page opens up.
- Click on New User. A Create a New User pop-up window opens up.
- In the AUTHENTICATION drop-down, select the newly created Okta account, for example, Test.
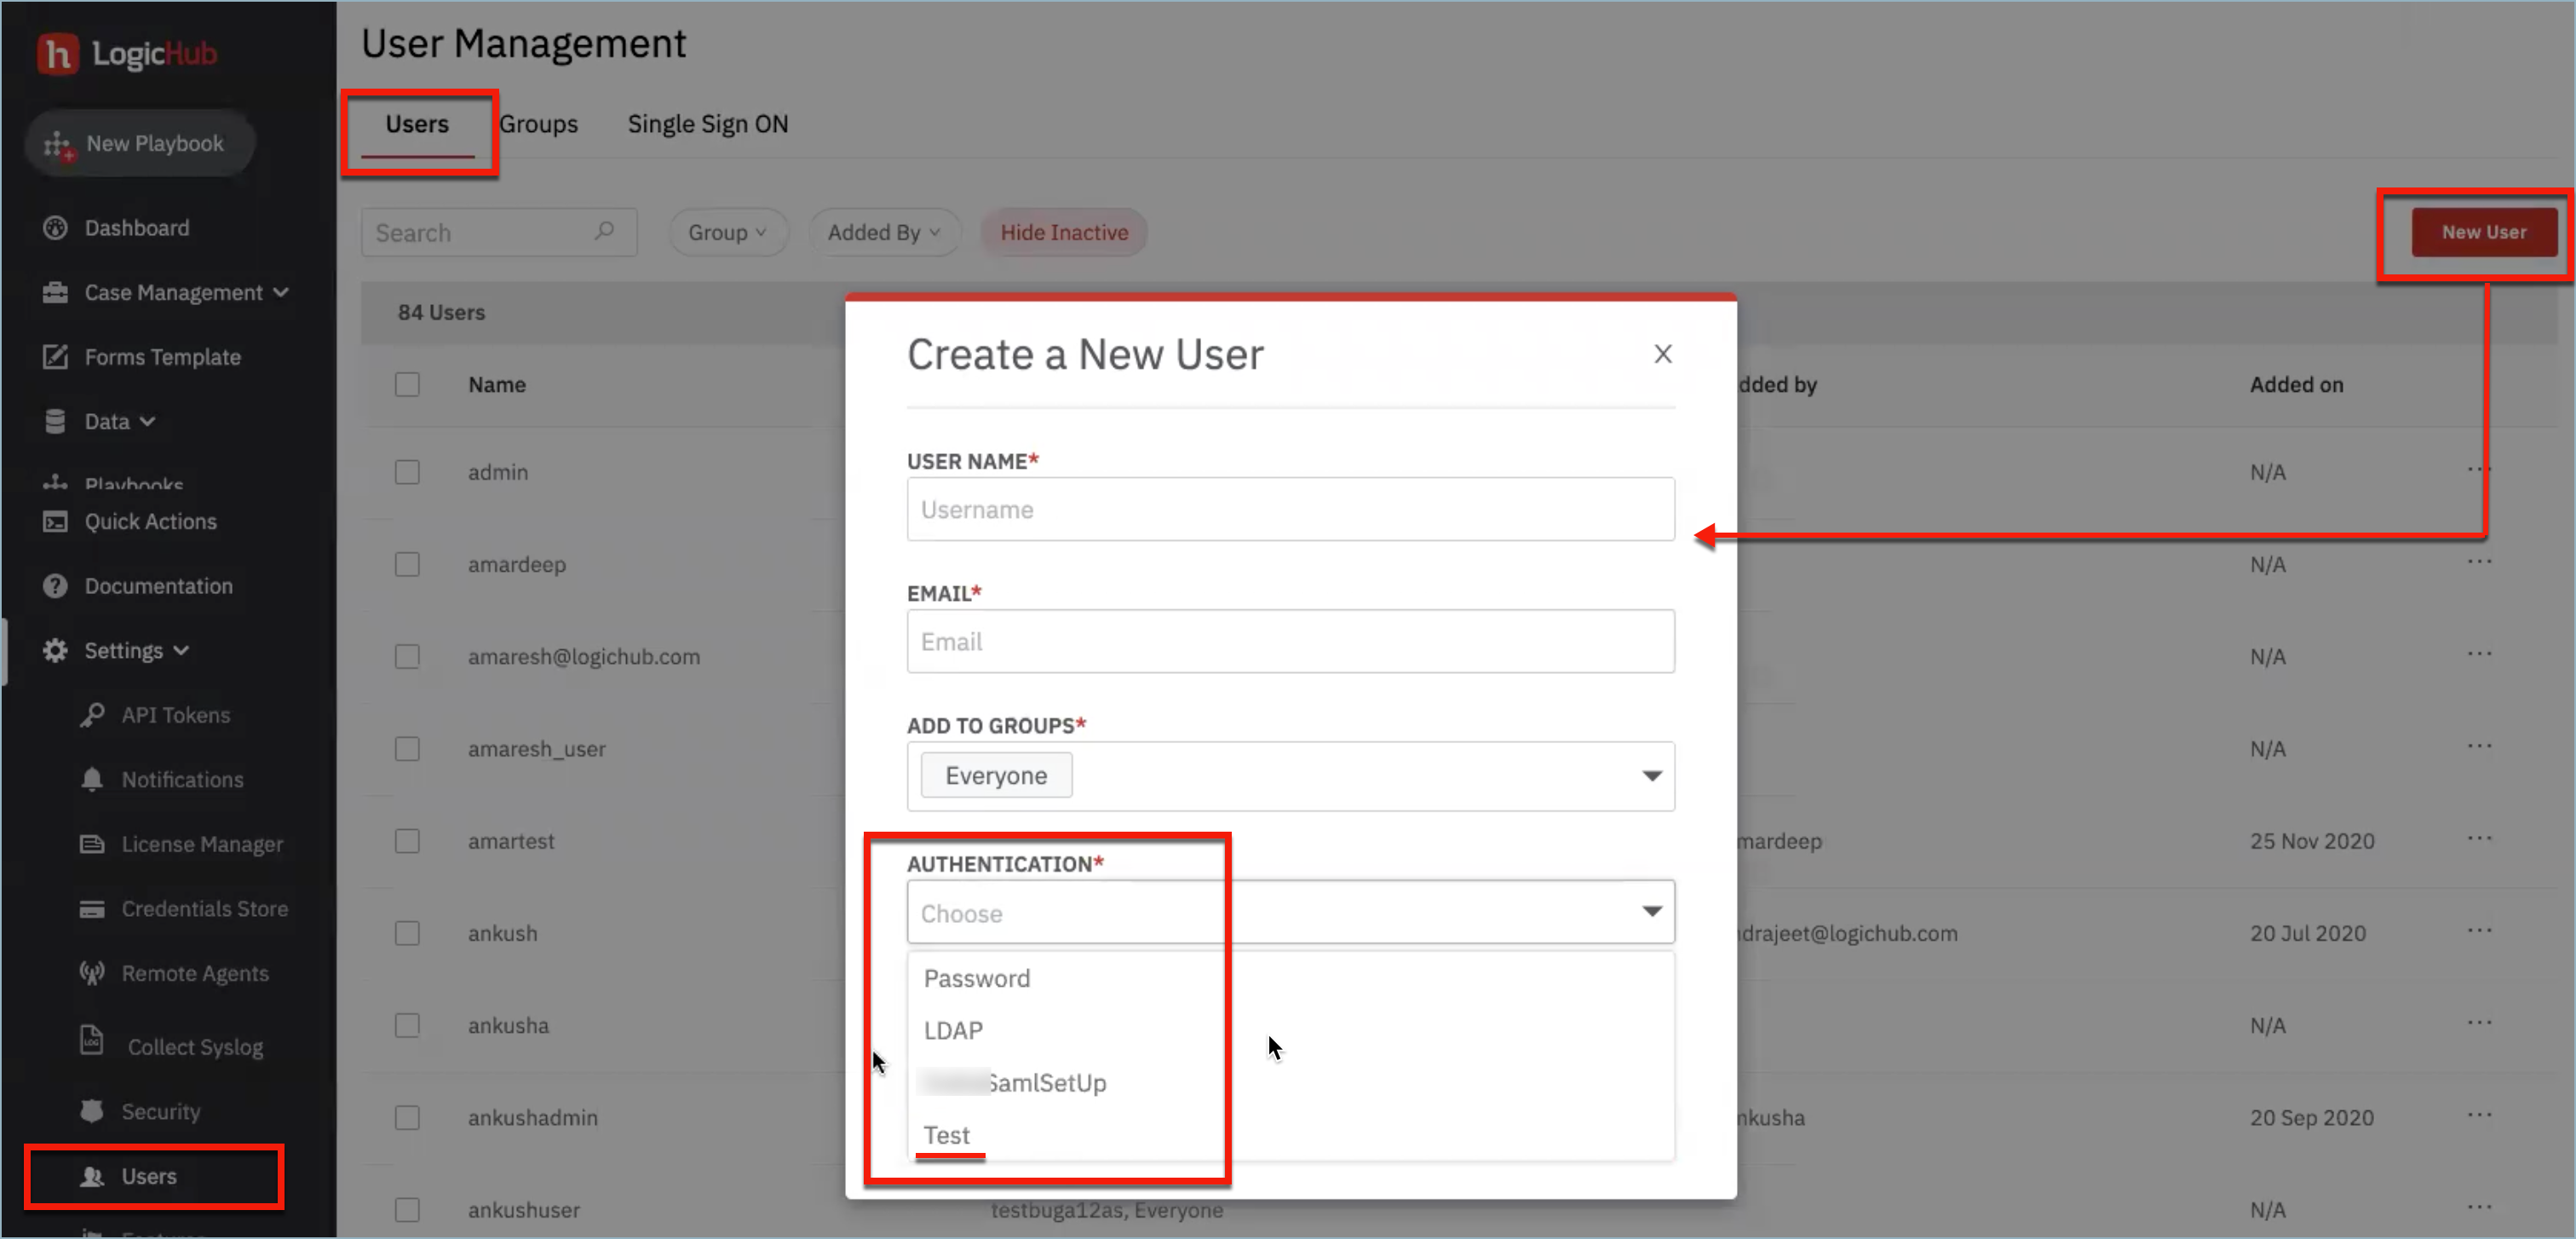
Once you have the integration done, you must assign it to the users.
Note
Only administrators can assign a user in the Okta settings.
Assign a User
- On the Okta settings, go to Assignments > Assign > Assign to People.
- Click on Save and Go Back and Done.
- Go to LogicHub, navigate to Settings > Users. In the User Management page, search for the assigned user, click Edit and select the newly created Okta account and click Save.
- Select the check box All this user to bypass SSO (SAML) with a password. This option allows the user to login through the Password.
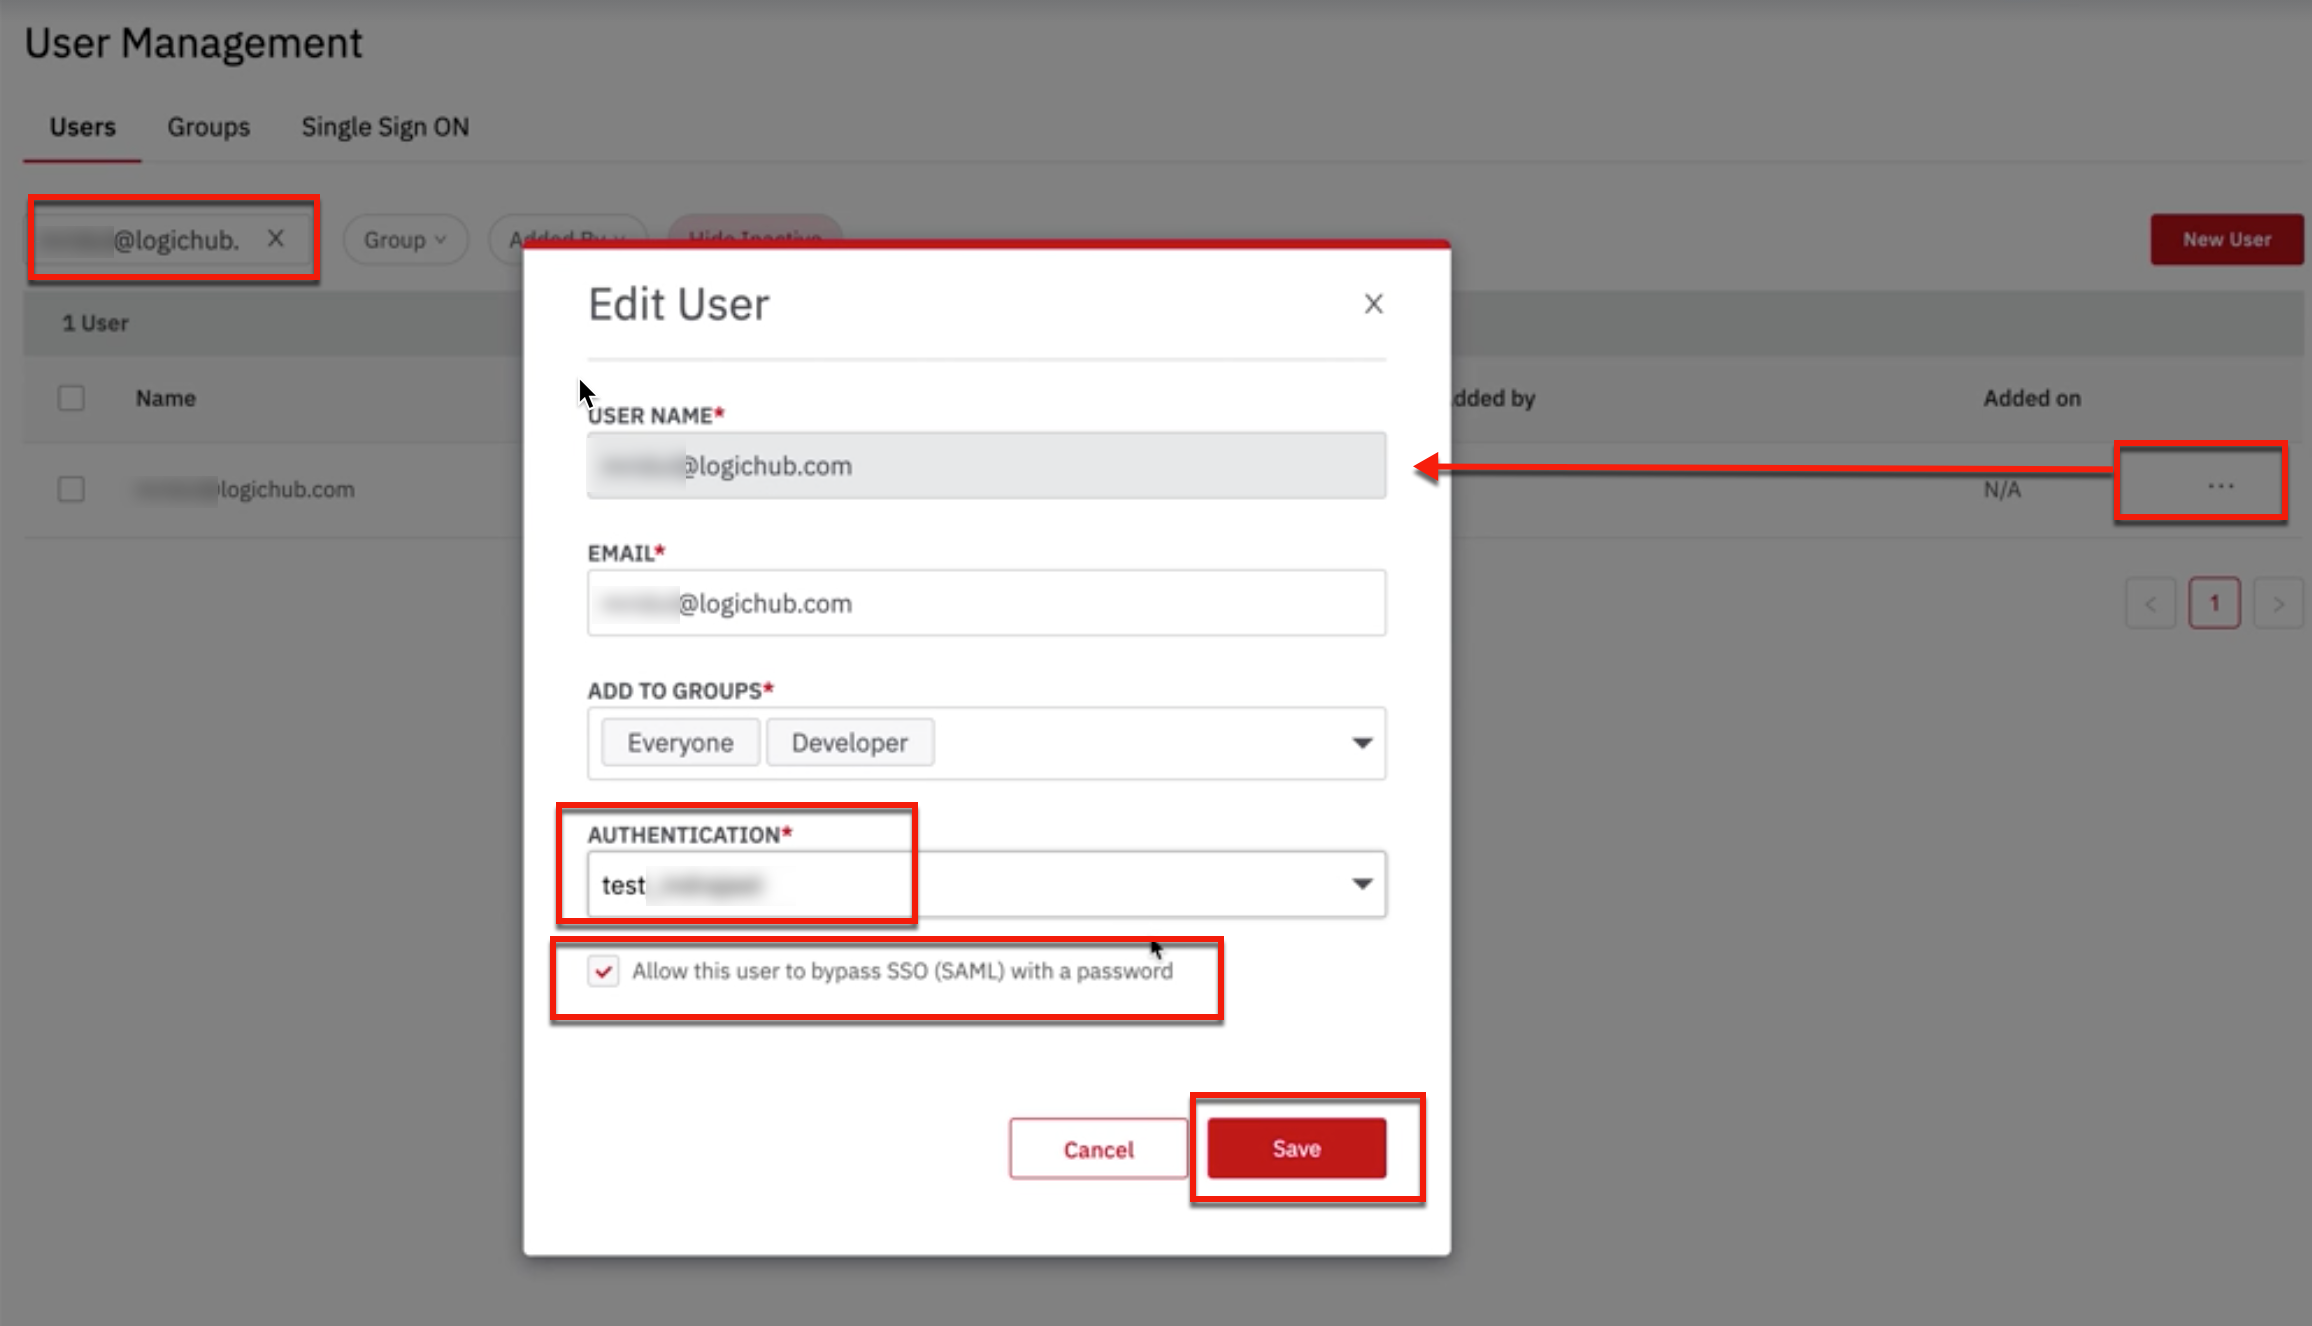
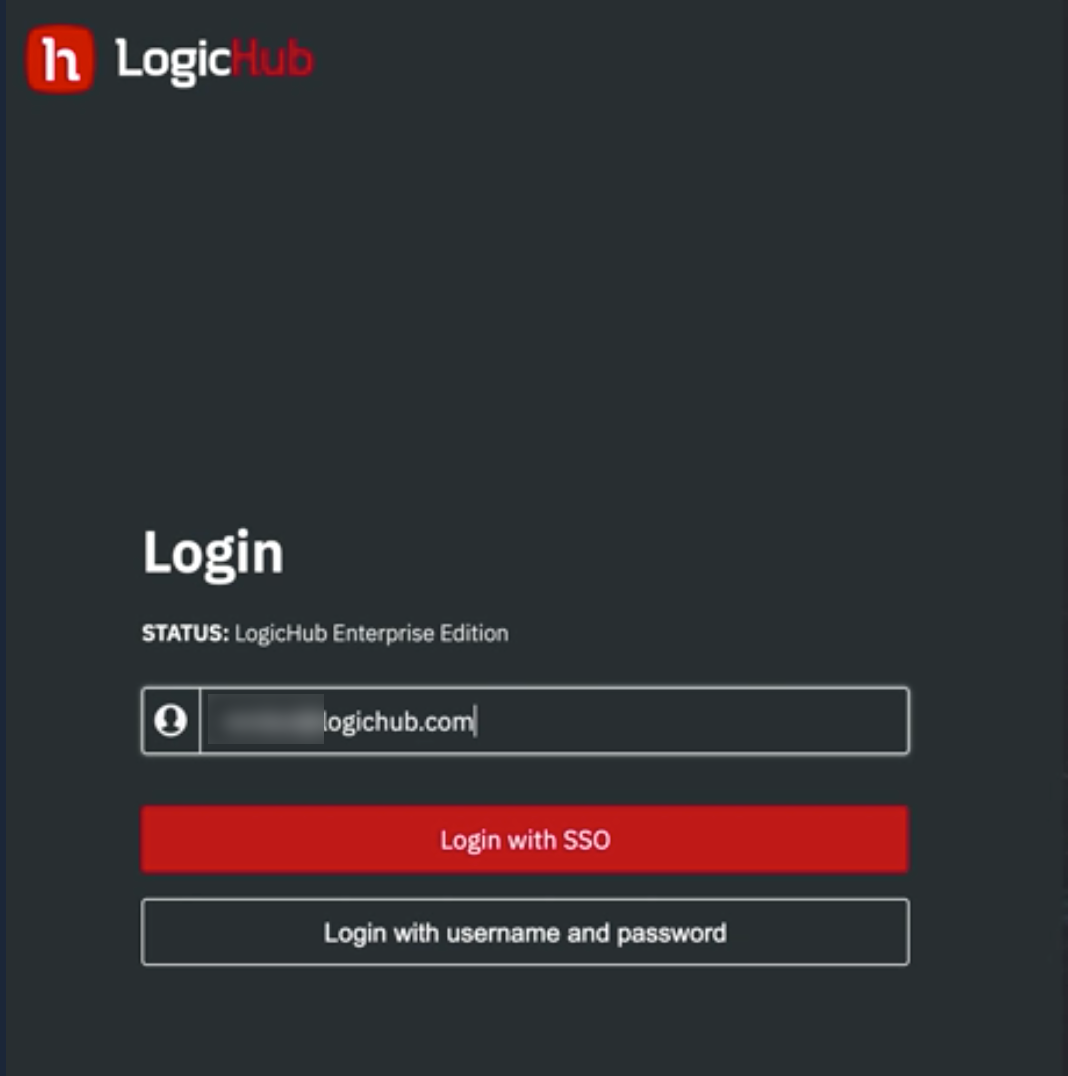
- We recommended you to logout from the LogicHub account and log in again to test the SSO. The login page looks like this:
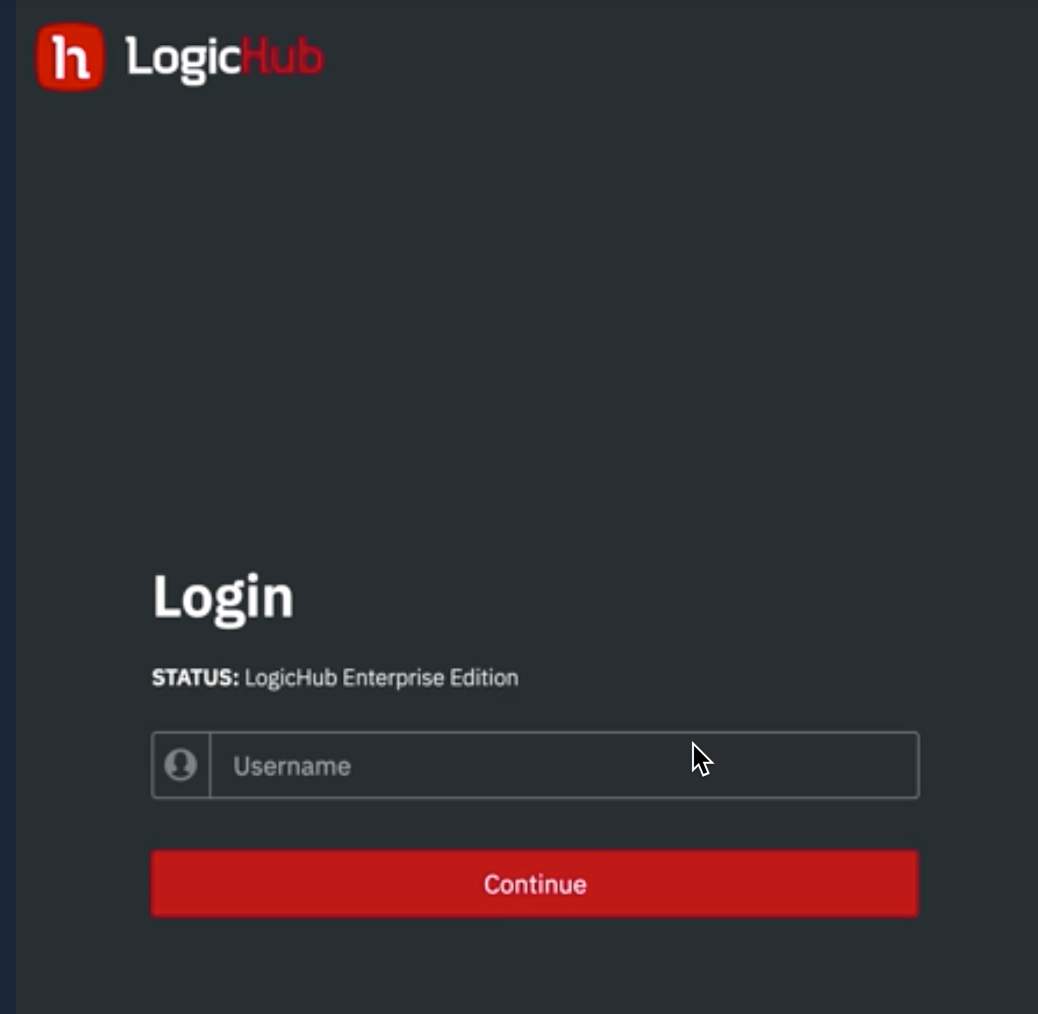
- Enter the username and click Continue. The login page provides you with two options to log in as shown in the below screenshot.
Updated over 2 years ago