Customize Case Layouts
After configuring your fields and case types, case management provides the ability to customize the case layout that suits your requirements. The case management provides different types of case layouts, such as:
- Create case layout
- Case view layout
- Case report layout
and also allows you to select the predefined or custom layout partitioning to structure your case page.
Customize Create Case Layout
- Go to Settings > Case Settings.
- Switch to the tab Case Types.
- Open a case type that you want to customize.
To customize create case layout:
- Click Transitions > Edit layout to edit a create case layout.
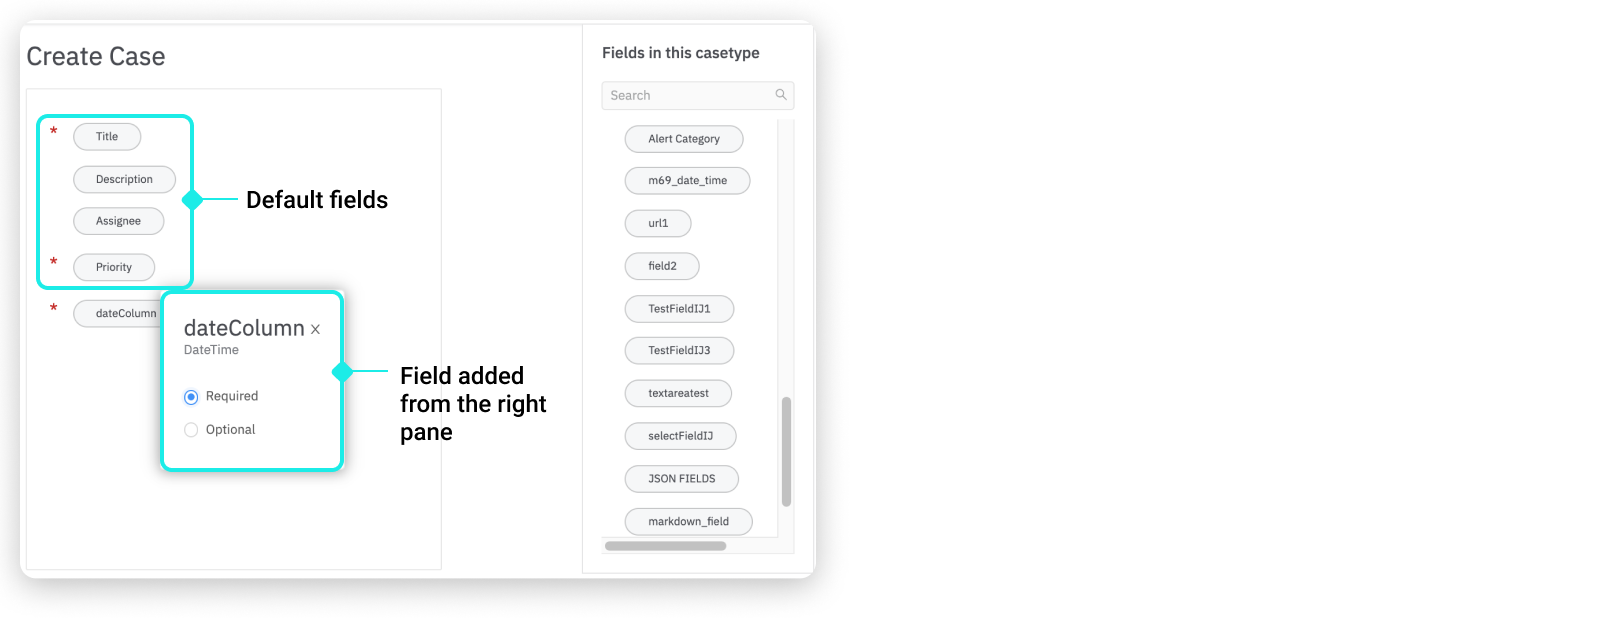
- In the Edit Case Type page, you can add multiple fields from the right pane by dragging and dropping them. By default, there will be four fields available which you cannot modify or delete from the case layout.
- Click on the newly added field and change it as Required or Optional.
- Drag to reorder the fields in the create case layout.

- When you have finished customizing the layout, click Save.
Customize Case Type Layout
- Go to Settings > Case Settings.
- Switch to the tab Case Types.
- Open a case type that you want to customize.
To customize case type layout:
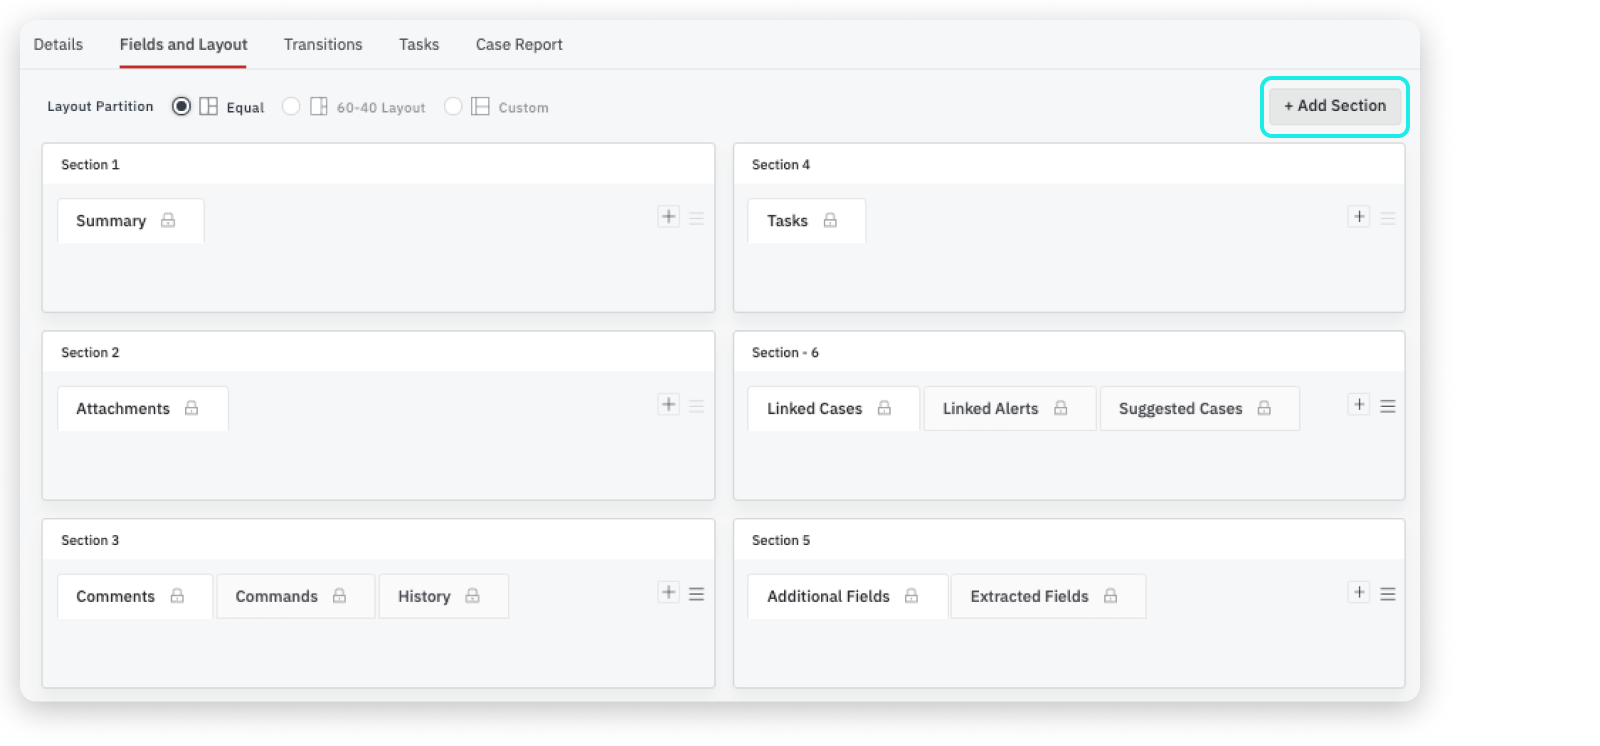
- Click Fields and Layout to manage your case layout.
- In this layout, you can:
- Click + Add Section to add new sections.
- In each section, click the + icon to add multiple tabs by selecting from the defaults list of tabs or create your own custom tabs.
- Drag to reorder the sections.
- Click the trash can icon to delete a section.
- You can delete a section only if data is not available. Some of the default sections that contain predefined tabs cannot be deleted.

Add a New Section or Fields to a Layout
Section
You can add new sections to the layout by clicking on + Add Section. When you create a case type, a set of default sections with tabs will be provided. You can edit the default sections or add a new section and customize it by adding tabs to the sections.
Fields
When you open a case type, the fields available for that case type will be listed on the right pane of the page.
- Click + Add Fields and click to include the fields for this case type that will be added as part of Additional Fields for a case.
- Alternatively, you can click + Create a new field to add a new field.
- Select the fields you want to remove or click on the trash can icon to delete the fields.
- Drag and drop the fields under the section they should appear in.
- The fields in this case type can be associated with a particular tab by dragging and dropping them under the required tab.
Layout Partition
The case type layout allows you to configure the case column width using the following options:

| Layout | Description |
|---|---|
| Equal | The page will be divided equally into a 50:50 ratio. |
| 60-40 Layout | The page will be divided into a 60:40 ratio. |
| Custom | Allows you to add a customized value to the first column and the second column will take the remaining value for a 100% ratio. For example, if the first column is 40, the second column will automatically display 60 to fit 100%. |
Customize Case Report Layout
- Go to Settings > Case Settings.
- Switch to the tab Case Types.
- Open a case type that you want to customize.
To customize case report layout:
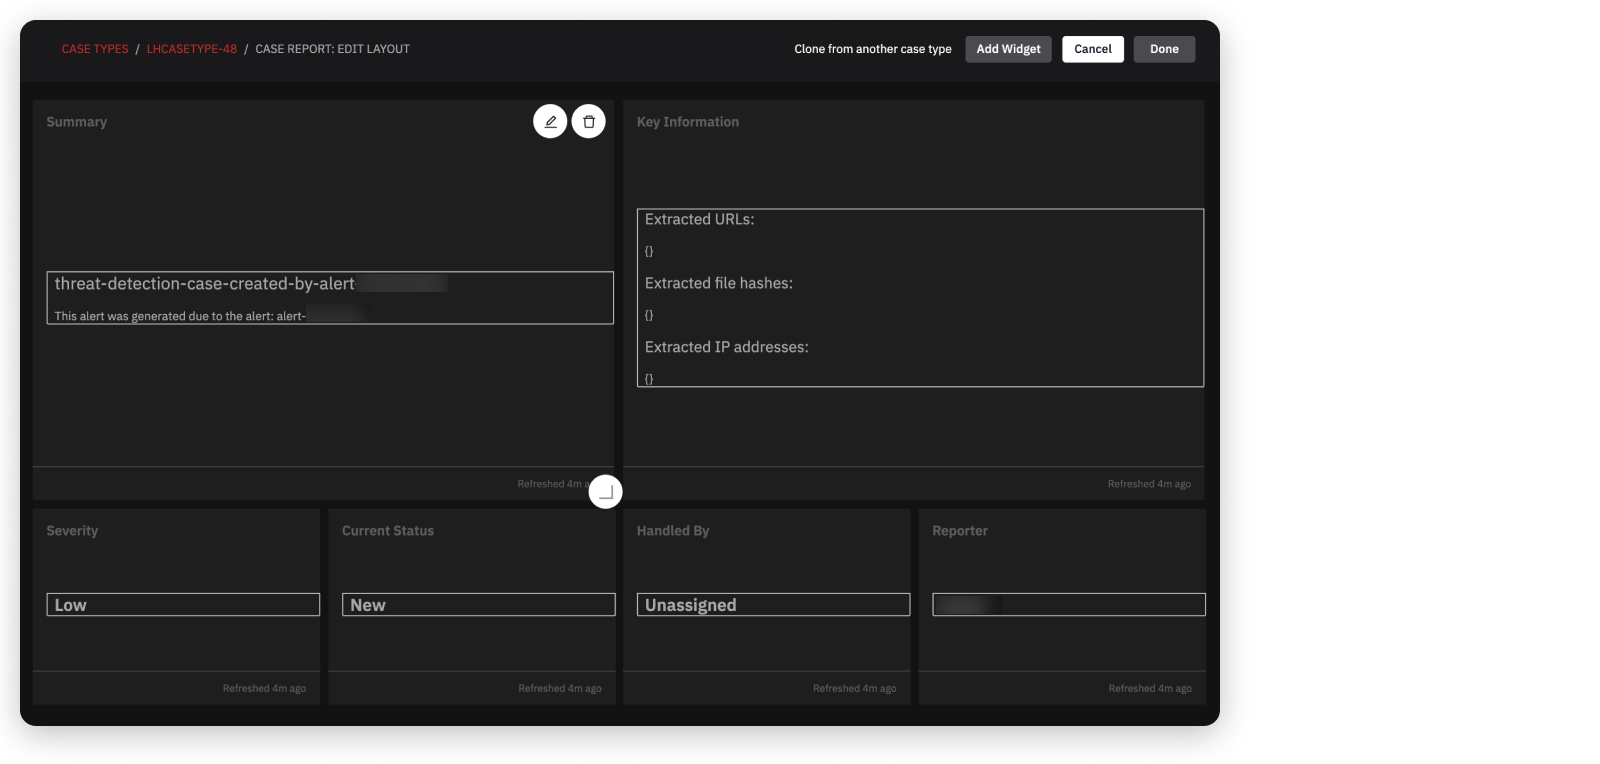
- Click Case Report > Edit layout.
- Click Add Widget to add a new widget in the case report view.
- Click Clone from another case type to clone a widget from other case types.
- Click the Edit icon in each of the widgets to edit the name, summary, assignee, and so on.
- Drag to resize each widget in the layout.
- Click the trash can icon to delete a widget.

How to Add a New Widget
- Click Add Widget on the top-right corner of the page.
- Click Text, Number, or Image to add the type of widget.
- For Text, enter a description.
- For Number, specify the column and type of aggregation.
- For the Image, specify the default image and any conditional options.
- Click Add to save and add the widget to the case type layout.
Clone a Widget from Another Case Type or Dashboard
- Click Clone from another case type on the top-right corner of the page.
- Select the case type and choose the widget.
- Select the dashboard and widget by name, and click Clone & Add.
- After adding or editing widgets, drag and resize them as needed to create your preferred layout.
What's Next
Updated over 2 years ago